KSP Controller Hardware
Building a set of controllers for Kerbal Space Program including attitude, translation, throttle and hotkey inputs
Building a set of controllers for Kerbal Space Program including attitude, translation, throttle and hotkey inputs
To make the experience fit your profile, pick a username and tell us what interests you.
We found and based on your interests.
I'm afraid it's been a while since I've posted any updates to this project. At this point, the project is functionally complete, but I really need to take some time to complete the documentation. This should be happening in the next couple of days, including
In the meantime, I also wanted to share a couple of the other related projects I've been working on. While these all fit into the KSP/space sim theme, I've set them up on hackaday as different projects as the parts list and assembly is completely different.
First, I've been working on a more realistic abort handle that uses a similar spring-loaded cam mechanism which feels really nice. You can follow the project here: https://hackaday.io/project/192126-spacecraft-abort-handle
Second is a set of parts to make a replica spacecraft hatch, starting the the locking latch mechanisms, and eventually the complex hinge mechanism and hatch lever system. You can follow this project here: https://hackaday.io/project/192181-spacecraft-hatch-parts
While I'm (still) waiting on parts to arrive so I can complete the controllers, here are a couple of things I've been working on:
More to come soon...
So, for the past few days I've been stuck waiting for parts to arrive. In the meantime I decided to spend the weekend designing and printing this:
The plan will be to motorise it and connect it through kRPC (yep, more waiting for parts on order), but that will have to wait until everything else is finished
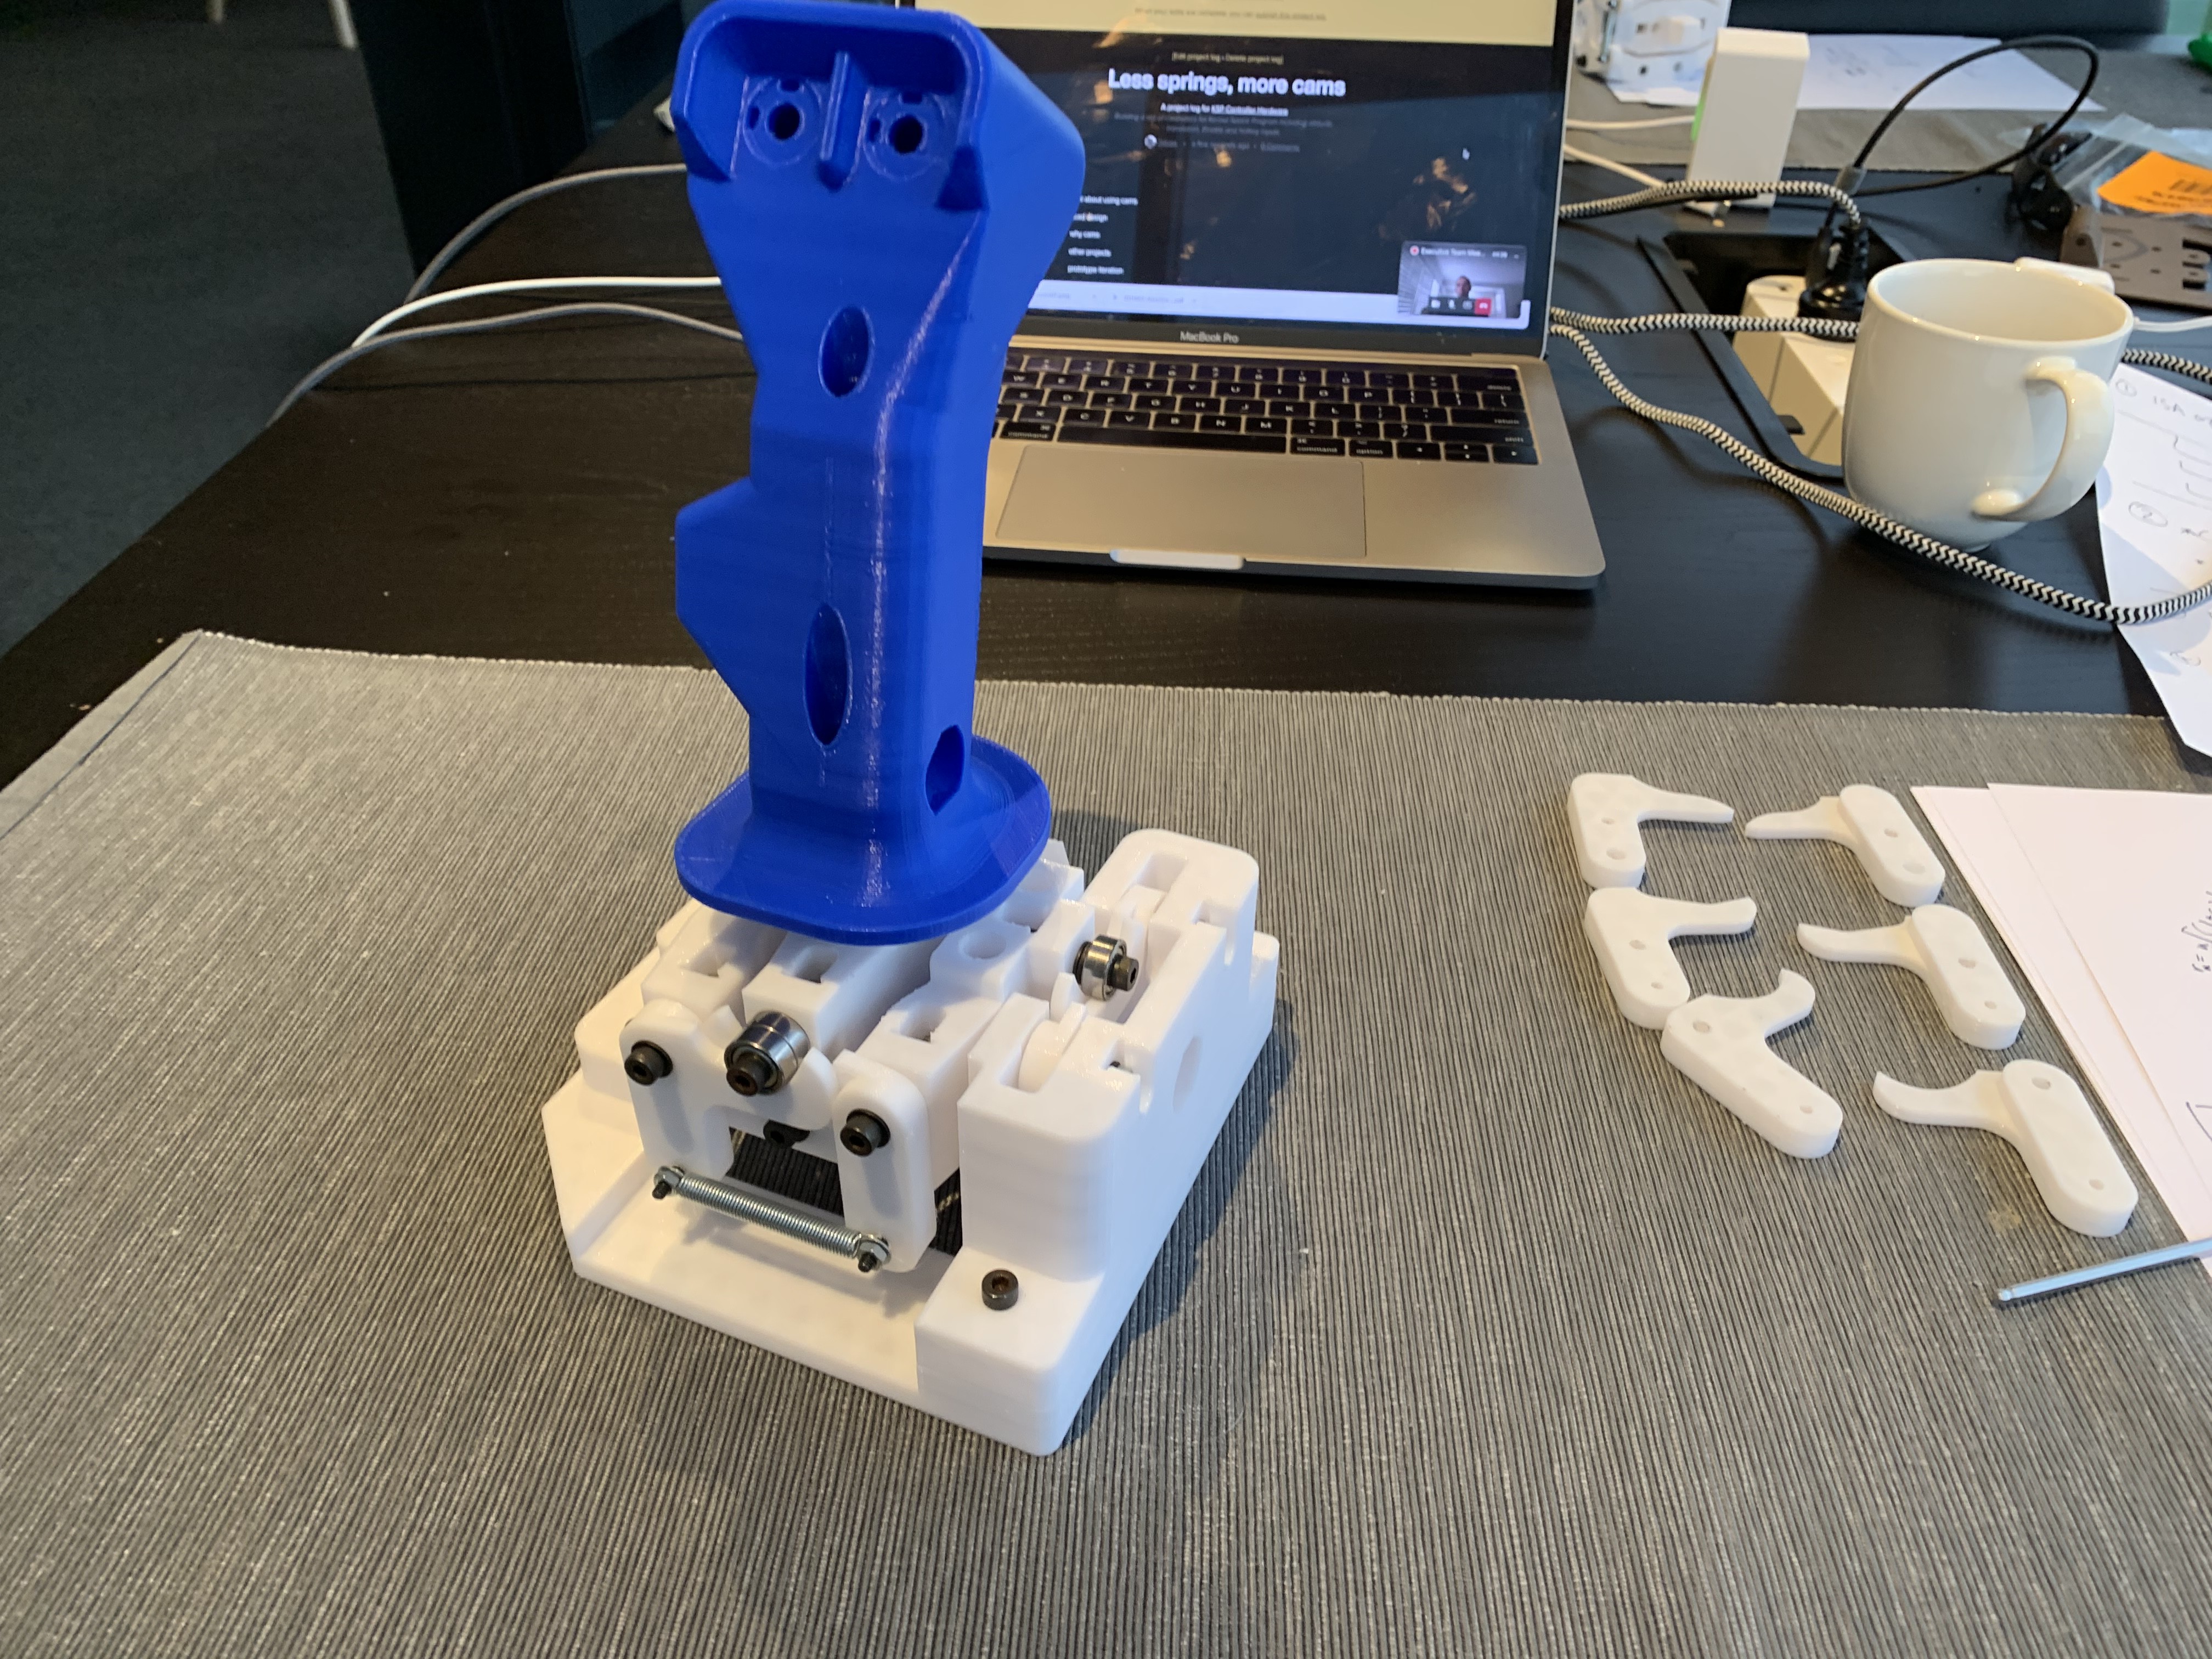
After using the prototype of the attitude joystick the feel of the return springs was really unsatisfactory. Looking at high-end joysticks the common solution appears to be cams actuated by a roller - as the joystick is tilted a bearing is rolled across a cam surface on a lever, and the lever acts on a spring. Here's the resulting design:
By changing the shape of the cam surface you can achieve just about any resistance profile, for example an exponential curve where a small movement away from the center encounters little resistance, but a pushing all the way to the end-stops will result in an exponentially increasing resistance. A linear curve will give the same resistance from the center to the end-stops, and will always snap back to the center. Finally, all of the properties can be combined to produce a completely custom feel.
This isn't a new idea by any means, and you should check out the great work by Olukelo at Thingiverse which provided a great amount of inspiration.
Of course, I went through a lot of design iterations and test prints, here's the first one:
It was pretty clear that the pivots for the cam arms needed to be higher. This version also used a really simple design for the cam surface, and it was clear that some more math would be required to create the right shape (more on this below).
Here's the next prototype with cams for the x-axis:

The shape of the cam surface is pretty complex, and took a few iterations:
From top to bottom:
There's a lot more to the design of the surface, and I plan on going into more detail in a future post.
So, what's next? Unfortunately I'm now waiting on a stack of parts to arrive so that I can make sure that everything works and fits together
After completing the assembly and wiring of the first prototype attitude controller, I put together some arduino code and tried it out in KSP.
The code is fairly simple as it simulates a keyboard with the microswitches of the joystick triggering key presses.
The code still needs a fair bit of work including some form of debouncing and making sure the latency isn't to high
I've been working on adding labels to the switches in the caution and warning panel. This name is a bit misleading, as it won't be acting anything like a real caution and warning panel that you would find in an aircraft. There are a lot of useful buttons that aren't part of the simulation, as they don't exist in the real world - things like pause and save, and time warp in Kerbal Space Program. I was looking for a way to have these buttons, but not have them look out of place. The solution I found was to make them look like a caution and warning panel, but with illuminated buttons instead of indicator lights.
Installing labels: the labels are printed on an overhead transparency and cut to size.
All switches and labels installed:
Illuminate!
There are a few more buttons here than I have inputs on an Arduino pro micro, so I intend to wire these up as a matrix keypad, which will only use 9 inputs (4 columns and 5 rows). As this will involve soldering all of the switches together, this will have to wait until I print the final version of the case (in a more attractive gray plastic).
OpenSCAD files have been added to a new Github repository, and the repo linked from the project page. I have also added some printable STL files, and will be adding more going forward. In the process I learned two awesome things, first that git can handle binary files using git-LFS and that github is able to display STL files. You can access the github repository from the link on the left of this Hackaday project page, or directly here https://github.com/tsnoad/ksp_controller
installing springs. These springs provide return and centering for the joystick.
Installing microswitches:
Installing the pivot mechanism and the translation controller:
Attaching the springs to the center of the pivot mechanism. This is also what actuates the microswitches.
Animation of the exploded assembly of the translation controller. The translation controller is the joystick that moves the ship forwards/backwards, up/down, etc in linear movements, as opposed to pitch, yaw, etc provided by the attitude controller.
First round of OpenSCAD modelling is complete, and files have been uploaded. There's still a lot of work to do, and there will be many clearances and tolerances to update, so I'll be adding the github repo soon
Attitude controller:
Translation controller:
Thrust controller:
Switch panel:
CW (caution and warning) panel. At the moment I'm not going to be pulling data out of KSP, so this will be another input for game functions that aren't simulations (pause, save, etc).
Please note, these instructions are still very much a work in progress - hopefully they'll be finished over the next week or so. But, in the meantime, please bear with me
We'll start with the attitude controller, the joystick that we'll use to control pitch, yaw and roll. The instructions are pretty similar for the other controllers (translation and thrust), but I'll cover those next.
Please note that these instructions are still a work in progress and I've already found a few places that I've made mistakes and made assembly a bit difficult. I'll add notes to address these here, and once I have a better solution I expect to update the instructions and files
Unfortunately this is the step with the most problems - and they're because I made all the wires too short. What you really want to do is make the wires way longer than you think, and then terminate them once they're installed. live and learn.
Parts required:
If you have an arbor press that's fantastic, but you can install them just fine with a g-clamp. It also helps to use a M4 bolt when installing the nuts
Create an account to leave a comment. Already have an account? Log In.
thanks Tom, I’ll keep you posted, and I’ll upload the openscad files shortly (after I make them a bit less messy)
Become a member to follow this project and never miss any updates


 lawnmowerlatte
 Victor Frost
I love OpenSCAD and I love KSP, so very excited to see this one develop.