Close
0%
0%

BrailleRAP diy Braille embosser

An Open source Braille embosser in the spirit of RepRap

Similar projects worth following
A full documented and reproducible open source DIY Braille embosser, with software ecosystem.

Based on a 3D printer board (MKS from Makerbase), BrailleRAP can emboss dots anywhere on a A4 sheet. you can use 160g paper, thin metal or plastic sheet.

The average total cost is about 250 $ if you purchase everything. The cheapest commercial solution is about 2500 $.

To emboss Braille text, you can use several software to translate text in Braille and send it to BrailleRAP, and you can also emboss SVG drawing.

BrailleRAP is open source, licensed under CERN Open Hardware Licence v1.2.
AccessBrailleRAP, our Braille translation software is licensed under GPL V3.

thanks to them we use several open source projects :

- Marlin firmware (GPL V3)
- LibLouis (GPL V2.1)
- Eel (MIT)
- Music21 (BSD)
- React.js (MIT)
- NatBraille (GPL V2)
- pandoc (GPL V2)
- Printrun / Pronterface (GPL V3)
- purecss (Yahoo BSD)


Why a Braille embosser

According to the World Health Organization there is 45 millions peoples living in the world with visual impairment. It's hard to get good statistics but many countries estimate that only 10% of people with visual impairment read and use Braille. But according to the same statistics 90% of blind people who are employed read and write Braille. So Braille is an important subject for education and equality. 

You can get more info about the subject here https://brailleworks.com/braille-literacy-statistics/ and here https://brailleworks.com/braille-literacy-vital-academic-improvement-employment/

In rich country this would not be  an issue as there is commercial solutions, the reality is not as bright as we can think, there is still an issue with general accessibility in most rich countries. Open source can be one aspect of the solution, not just because it is cheap, but because it is build together, this is about sharing and building solutions all together. Sometimes the super market at the corner don't have the right solution.

And what about countries where the average salary is about 2000$ a year. In these countries what about a rural school where there is just one or two students affected by blindness. Who will pay a year of wages for a solution. And again this is not just because open source  is cheap :

-  You have the schematics you can fix it.

-  I you have build one in a workshop, you know how to fix it if something go wrong or you know who can fix it.

- You have the schematics, so you can adapt it to your needs, even upcycling or recycling some parts you got around. And if you adapt it, you can share.

- There is open source communities, so you can find some help.

And now that we have talk about accessibility, what about teaching technologies.  What about teaching that sometimes technologies can really help people, that building a tool is not just a mind exercise. Building a tool is about making choices, what is the best solution if you need it cheap ? what is the best solution if you need it easy to build ? easy to use ? fixable ? accessible ? moveable ? And it can be fun and satisfying.


A brief About BrailleRAP story

I often thought the project started with BRAILLGO (https://hackaday.com/2014/02/24/braigo-a-lego-braille-printer/) in 2014, i was wrong, but it was the first time i was thinking "hey brilliant idea". Open sources and fablab area count many projects to emboss Braille on paper sheets.

In 2016 the My Human Kit non profit organization ( https://myhumankit.org/) organize an hackathon where they started to emboss paper with hacked 3d printer. This was a proof of concept, but complex to build and hard to use.

In 2018 we started BrailleRAP-SP with the idea to build a full reproducible device. A device that emboss one dot at a time but very fast using an electromagnet. A few month later, we started to show different version in makers events and non profit organization. Everybody congrats the team about the physical quality of the Braille Dots. But the lack of time, the covid crisis, some issues with NatBraille usage due to Java license evolution, the project died.

In 2022 the CCLab, a french non profit organization (https://forgecc.org/?PagePrincipale) offer to support some evolution of the design to organize workshop in Cameroon Africa, in partnership with ANIAAC, a local cameroonian non profit organization, and funders, Orange Fondation and My Human Kit. With the CCLab and some enthusiasts we started the BrailleRAP project.

The BrailleRAP contribution

One of the idea was to improve the reliability of the paper feeding. We redesign the paper travel by  lowering the output of the paper, giving us the opportunity to delete a big printed  part (10 hour of print  x 2) that was supposed to rise the paper just after the electromagnet. We also upgrade the 2 carriages to use zip tie to...

Read more »

braillerap-en-building-manual-65.pdf

The complete and detailed building manual

Adobe Portable Document Format - 26.57 MB - 05/19/2023 at 13:44

Preview
Download

BrailleRap.zip

An archive with the complete project. STL files for 3D printed parts, DXF for laser cutting, and firmware

x-zip-compressed - 38.90 MB - 05/19/2023 at 13:38

Download

  • 1 × 500g 3d printer plastic
  • 4 × Linear rod 8mm diameter 330 mm length
  • 1 × Linear rod 8mm diameter 365 mm length
  • 1 × Linear rod 8mm diameter 100mm length
  • 6 × RJ4JP-01-08 polymer linear bushing

View all 23 components

  • Going WIFI - First WIFI enabled BrailleRAP

    Stephanea day ago 0 comments

    Starting the ESP app

    Now that we have enabled a second UART on the MKS controller board of a BrailleRAP, it's time to make a real thing. Wiring an ESP32 on the controller board, can we enable a WIFI access point and diffuse a mobile web application to emboss some Braille with a BrailleRAP ?

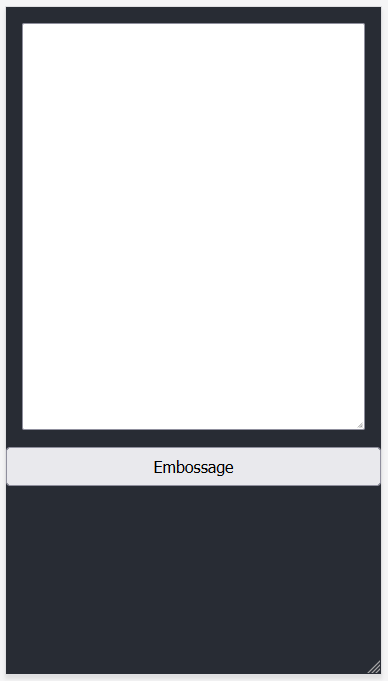
    Enabling a WIFI access point with an ESP32 is not a big deal, there is full of examples around the internet about that. Starting a web server serving a react web application seam faisable. So we start a project with VS Code and Arduino ecosystem and a small react application with an input field and a print button.

    Starting a wifi access point is just a line of code

     WiFi.softAP(ssid, password);

    And starting a web server from files stored in SPIFFS seams easy 

    AsyncWebServer server(80);
    
    
    server.serveStatic("/", SPIFFS, "/").setDefaultFile("index.html");
    server.serveStatic("/static/", SPIFFS, "/");

    But it didn't work, SPIFFS in arduino environment is limited to 32 char for name file, this is not enough for a packaged react app. As we often do with lwip in microcontroller environment, we choose to embed all files in C data structures.  And it fail again, all seem to work well with small files, but with a few kilobytes js file something go wrong and hang. So we choose to fall back to ESP32-idf, the original toolchain for ESP32 from expressif.

    And after a few tests we had a working WIFI access point with a react based web captive portal. 

    For quickly translate the input text in Braille, we just copy paste our previous tbfr2007 translator written in javascript, this is not a "global" solution as there is nearly as many Braille standards as countries in the world, but this is good enough to give a try.

    Wiring

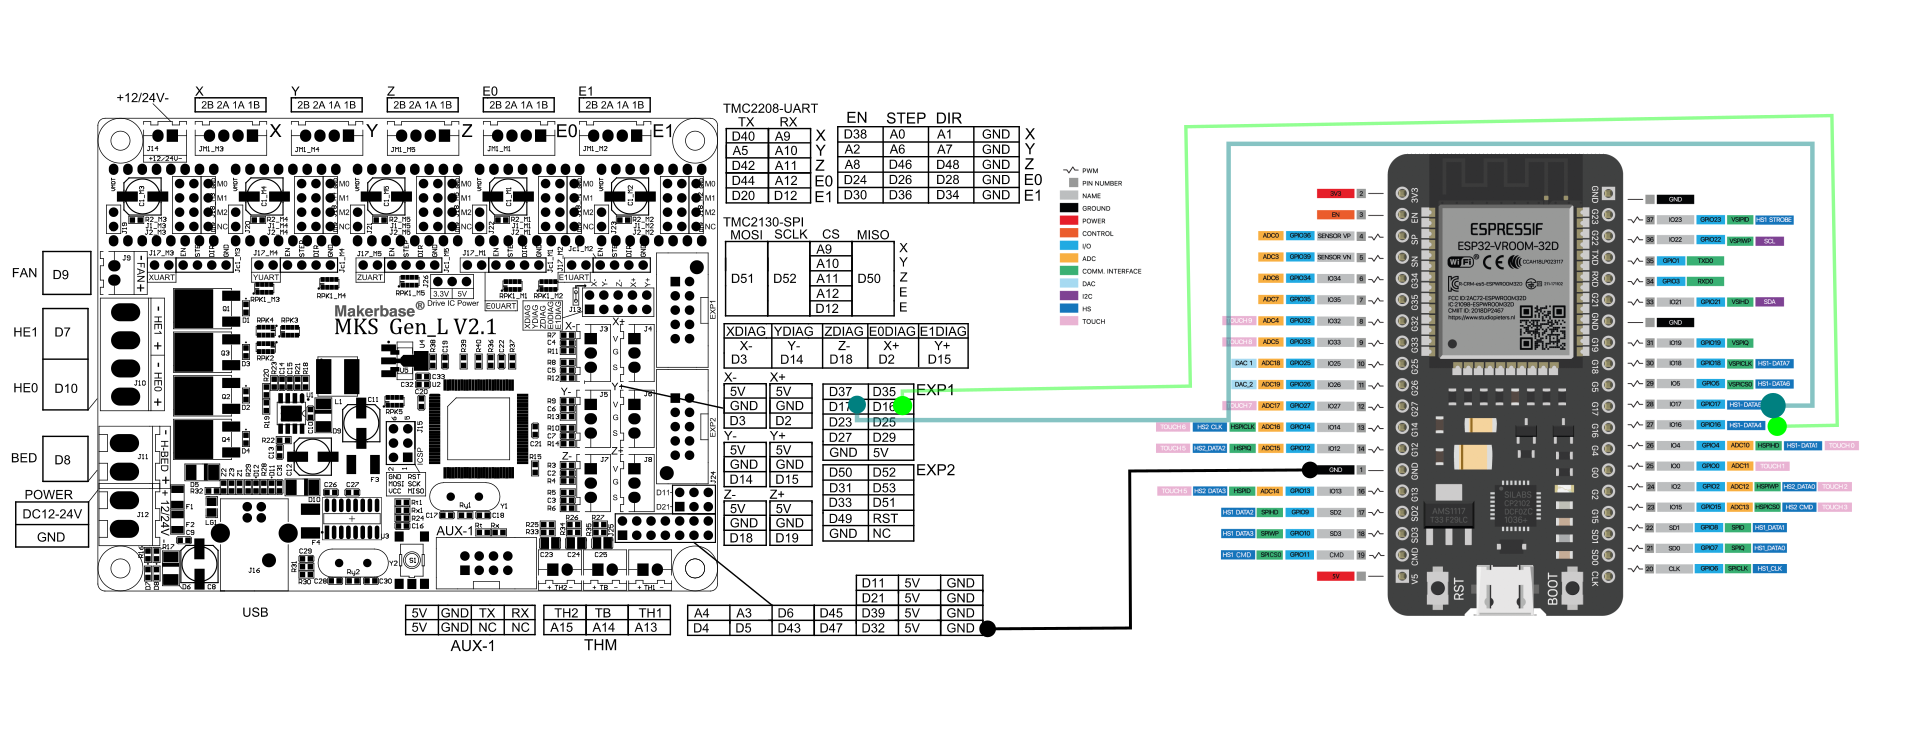
    As we plan to use UART2 of the ESP 32 to talk with the controller board, we select the standard IO16 and IO17 as TX and RX on ESP side. So we just need to wire TX from ESP to RX on MKS and RX from ESP on TX on MKS, and link the GND of the ESP to the GND of the controller board.

    Sending the GCODE

    There is several solution s to send the GCODE to a board with Marlin firmware, one of the simplest is just sending GCODE commands without comment and waiting for a "ok" or "error" answer from the board. The more important problem is that it seem not a good idea to send the complete GCODE command file from the react app (which run on the mobile phone) to the ESP, the ESP32 is a comfortable MCU with thousands of kilobyte available, but GCODE files can often take a few megabytes, even for Braille single page. 

    As we try to go fast, we first try sending GCODE command one at a time embedded in JSON POST requests to the ESP, it partially work but with poor performances.

    So we decide to go websocket, when you click on print button, the react application open a websocket with the web server on ESP, then we send GCODE commands one a time to the ESP, the ESP then send the GCODE to the UART, wait for the controller answer and send the commande back to the react app via the websocket. We were able to print complete Braille page but with fair performances regarding what we achieve with AccessBrailleRAP connected to the controller with USB.

    Final solution for the test

    To improve performance, we implement a simple protocole with a fifo queue on the ESP32 side. The react app send GCODE commands one at a time, and the ESP answer immediately if there is space for more commands in the fifo. So the react app send all the GCODE as quick as it can, when the buffer is full, the react app wait for some space to send the next command. On the ESP side we start a FreeRTOS task waiting for GCODE commands available in the fifo, then sending it to the UART, wait for the controller answer, and send back a status to the react app. At the end of the print, we simple close the websocket. And it work just fine !

  • Going WIFI - Marlin V2 and first tests

    Stephane3 days ago 0 comments

    In the path to enable WIFI connectivity with BrailleRAP, we need an upgrade of the BrailleRAP firmware to Marlin 2 as standard BrailleRAP firmware is still based on Marlin V1. 

    We call the firmware we are using in BrailleRAP MarlinBraille. Basically it's a Marlin firmware with the good configuration for Homing, Step / mm and using the bed power connector to control the electromagnet. We modified the G28 command to set the 0 on Y axes at the top of the paper sheet, this is just a slightly logic modification of the homing function. 

    - If the endstop Y is activated there is already a sheet of paper in the device so we are doing a standard Homing procedure

    - If the endstop Y is not activated, we try to move the paper sheet forward until the endstop is activated. Then we are doing a standard homing procedure.

    Porting the MarlinBrailleRAP features in Marlin V2 was not a great deal, just about reporting the  motor driver configuration and specialize the homing logic. Building Marlin 2 is another story if you want to build it for several MCU base board. And this is what we have in mind, building a firmware for MKS gen 1.4 and MKS Gen L V2.1 which are based on ATMEGA 2560 MCU, and build a firmware for MKS TinyBEE, an ESP32 base control board.

    Marlin V2 build system is based on buildroot, a developpement tools, genuinely developed to compile linux kernel on different embedded hardware. You can still try Arduino ide or VS code, if you just need one configuration. But i you want to build for several MCU, you need an automated build tool, based on make or cmake, and the toolchain for every mcu you need. These kind of build environment can be easily done in docker. Docker is a software used to build virtual machine, you can use it to build software configuration like web or database server available on internet. You can also use docker to build temporary "machine" just to install complex software toolchain, compile what you need, and destroy the virtual machine. With this kind of procedure, you avoid "polluting" your own system with complex software installation.

    For those who are interested you will find all source code on github:

    Docker configuration for building marlin : https://github.com/crocsg/marlin-build

    MarlinBraille2 source code : https://github.com/braillerap/MarlinBraille2

    Marlin2 configurations : https://github.com/braillerap/MarlinBraille2Configuration

    Now that we have a firmware based on Marlin V2, we can activate the 2nd UART in configuration.h

    /**
     * Select a secondary serial port on the board to use for communication with the host.
     * Currently Ethernet (-2) is only supported on Teensy 4.1 boards.
     * :[-2, -1, 0, 1, 2, 3, 4, 5, 6, 7]
     */
    #define SERIAL_PORT_2 2
    #define BAUDRATE_2 250000   // :[2400, 9600, 19200, 38400, 57600, 115200, 250000, 500000, 1000000] Enable to override BAUDRATE
    

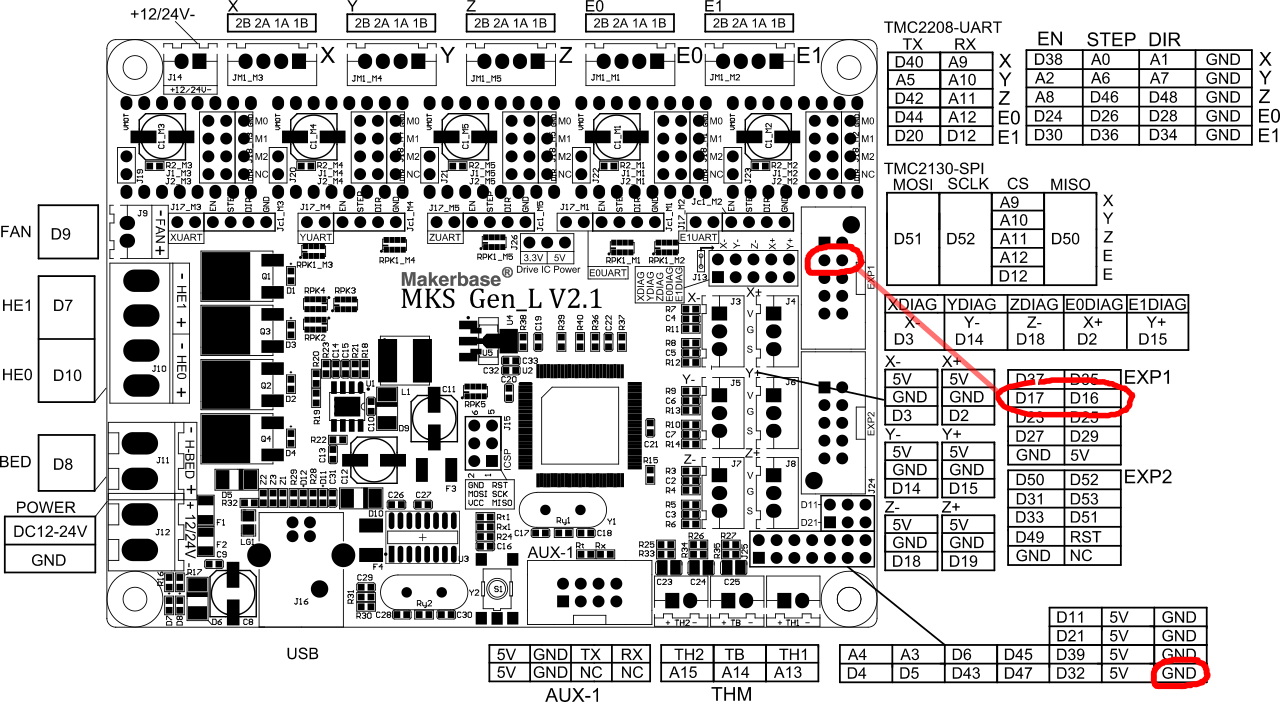
    According to the documentation, the UART RX and TX pin are D16 and D17 on EXP1 connector on the MKS Gen L V.1 board. GND pins are also available on J25.

    So now we can test with a USB to serial converter. Wiring TX on D17, RX on D16 and GND on GND.

    And it work perfectly !  we are now able to connect to the board with Pronterface with either the USB or USB to serial board

  • Going WIFI

    Stephane4 days ago 0 comments

    Since we started building Embosser, some users where asking a particular feature : The ability to emboss Braille from a smartphone, especially Android since it is the most widespread terminal in Africa. This summer, we worked on the WIFI feature, with some fail and some promising success.

    Desirable specifications

    - The system will provide a way to connect an Android phone with a BrailleRAP with WIFI or Bluetooth.

    - The Android application will provide the ability to input some text, translate the text in a Braille standard and send it to BrailleRAP.

    - Obviously, as unsighted peoples use Android smartphone. The application will use accessibility Android features to enable use by unsighted people, like AccessBrailleRAP software.

    - The Android application must  be able to work without internet connection.

    - The Braille translation must be up to date and adapted to different Braille standard, like AccessBrailleRAP do with LibLouis library.

    - The android application must be multi languages.

    - Depending on the technical solution, it would be nice to provide an "upgrade kit" for existing BrailleRAP as there is several BrailleRAP in the fields.

    - A WIFI BrailleRAP may be still usable with USB connection to provide use with a laptop. Mobile phone is a nice feature, but laptop may provide most advanced usage.

    - The solution may be cheap, a complete BrailleRAP is about 250 $ it wouldn't be reasonable to offer a 100 $ WIFI solution.

    - And the last but not the least, all the system must be open source licensed like everything in BrailleRAP ecosystem.

    Available technical solutions

    The first idea that come in mind is using a Raspberry PI. In the BrailleRAP team we are using our 3D printers with octoprint a nice Raspberry Pi distribution, allowing you to use your 3D printer with WIFI and a user friendly web interface. Octoprint is specialized for 3d printing, and you can use it with BrailleRAP, but this is not the user experience we want. With some software development we can build a solution with the Raspberry Pi as Access Point, an option to join an existing wifi network and providing a web application like AccessBrailleRAP. A  Raspberry Pi Zero W cost around 20$ and can fit in BrailleRAP frame. It would be an elegant solution, but we have the feeling that using a Raspberry Pi would be a little overkill and may be hard to maintain as our current users are not comfortable with linux systems.

    The second idea is to use use an ESP32 base board. Currently we use MKS Base or MKS Gen L, but MKS offer the MKS TinyBee which is a 3D printer board base on a ESP32 MCU with Wifi connectivity. But what about upgrading existing device ? You still can exchange the board with a MKS TinyBee, but you will gain some unused boards in the hand. It would be an elegant solution to add an ESP32 in BrailleRAP frame giving access to WIFI connectivity and providing a web mobile application. For communication with the MKS Gen L board, Malin 2 firmware provide a solution to enable a second UART for serial communication. You can still use the board with USB and you have a second channel to send GCODE command to the board. 

    As there is still a global shortage on Raspberry Pi Zero W, and i have some ESP32 DevKit and an MKS TinyBee on my desk. I choose to give a try at the second solution

  • Back to word document

    Stephane06/22/2023 at 15:29 0 comments

    About a week ago, we made some tests integrating pandoc in our Braille translation software AccessBrailleRAP

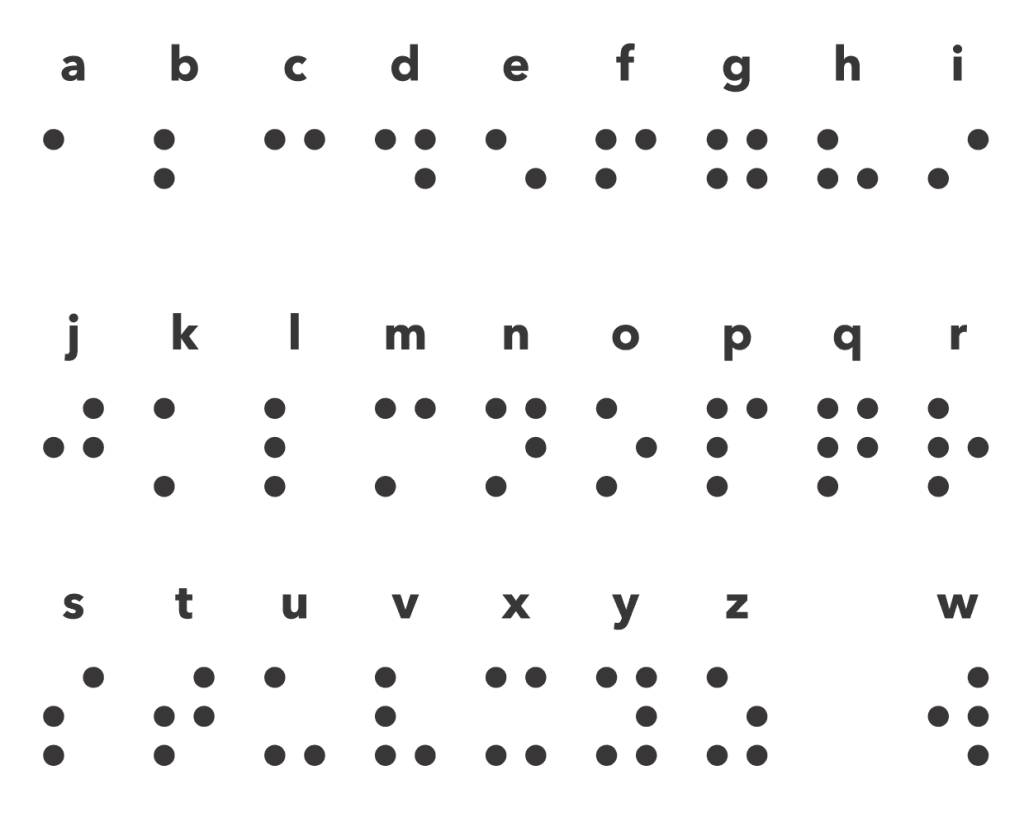
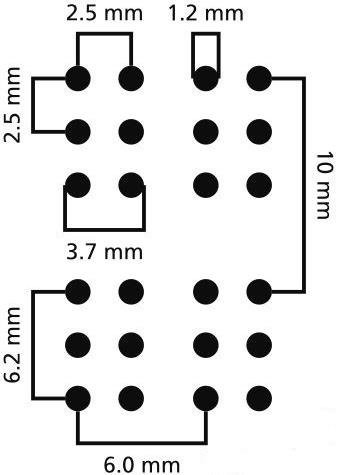
    Once you get a good translation algorithm, the major issue about translating document in Braille, is that Braille characters are fixed size characters. Basically, Braille is a tactile alphabet where letter are composed of a 6 dots matrix (or 8 dots matrix), each combination in the matrix corresponding to a letter. 

    When you read Braille letter, all the 6 dots of the matrix must be under the same finger, this is why Braille is fixed size and normalized.

    Therefore, you can't represent big Braille character nor little. As you can represent capital letters and number, there is an 'emphasis' encoding available but no way to print Italic, underline, bold or all our favorite typographic effect. So, to translate a word or openoffice even a markdown or an html document in Braille, you need a tool to extract plain text, trying to preserve the text presentation with space characters. This is where pandoc is useful, pandoc is an open source tools to convert document in different format, you can convert an open office .odt to pdf or a Markdown document to .odt, and you can convert all this beautiful file format to plain text.

    As we have a python backend in AccesBrailleRAP, integrating pandoc is not an issue. Just adding an import button on the GUI write the 10 lines of code to get a filename, give it to pandoc and get plain text back. But you need to install pandoc and have it available in the path for AccessBrailleRAP software. As the operation is a little tricky for most of our BrailleRAP users, we decide to go a step further and build an installation script to install everything you need to use a BrailleRAP.

    At this time, if you want to use AccessBrailleRAP, you need to install :

    - The virtual com port drivers to communicate with the BrailleRAP MKS Board

    - pandoc

    - Chrome

    As and installation tools, we choose NSIS, an open source tools to build installation software. NSIS allow you to build an installation script just by providing a little script defining which file you want to include and where you want to put it on the PC.

     ; Set output path to the installation directory.
        SetOutPath $INSTDIR
        
        ; AccessBrailleRAP
        File "AccessBrailleRAP.exe"
        File "parameters.json"
        ; pandoc
        File "pandoc.exe"
        ; drivers
        File "CDM212364_Setup.exe"
        File "CH341SER.EXE"
      

    run the drivers installation.

      ExecWait '"$INSTDIR\CDM212364_Setup.exe"'
      ExecWait '"$INSTDIR\CH341SER.exe"'

    defining some registry keys to make the "uninstall" option available

    ; Write the installation path into the registry
      WriteRegStr HKLM SOFTWARE\AccessBrailleRAP "Install_Dir" "$INSTDIR"
      
      ; Write the uninstall keys for Windows
      WriteRegStr HKLM "Software\Microsoft\Windows\CurrentVersion\Uninstall\AccessBrailleRAP" "DisplayName" "AccessBrailleRAP"
      WriteRegStr HKLM "Software\Microsoft\Windows\CurrentVersion\Uninstall\AccessBrailleRAP" "UninstallString" '"$INSTDIR\uninstall.exe"'
      WriteRegDWORD HKLM "Software\Microsoft\Windows\CurrentVersion\Uninstall\AccessBrailleRAP" "NoModify" 1
      WriteRegDWORD HKLM "Software\Microsoft\Windows\CurrentVersion\Uninstall\AccessBrailleRAP" "NoRepair" 1
      WriteUninstaller "$INSTDIR\uninstall.exe"

    and defining the uninstall procedure, deleting all installed files, and created registry key.

      ; Remove registry keys
      DeleteRegKey HKLM "Software\Microsoft\Windows\CurrentVersion\Uninstall\AccessBrailleRAP"
      DeleteRegKey HKLM SOFTWARE\AccessBrailleRAP
    
      ; Remove files and uninstaller
      Delete $INSTDIR\AccessBrailleRAP.exe
      Delete $INSTDIR\parameters.json
      Delete $INSTDIR\uninstall.exe
      Delete $INSTDIR\CDM212364_Setup.exe
      Delete $INSTDIR\CH341SER.EXE
    
      ; Remove shortcuts, if any
      Delete "$SMPROGRAMS\AccessBrailleRAP\*.lnk"
    
      ; Remove directories
      RMDir "$SMPROGRAMS\AccessBrailleRAP"
      RMDir "$INSTDIR"

    Once your installation script defined (we intensively use the tutorials...

    Read more »

  • BrailleRAP meets GOSH community

    Stephane06/15/2023 at 13:37 2 comments

    We are happy to share about the BrailleRAP project with the GOSH community on Thuesday June 29.

    Interested ? you can register here https://us06web.zoom.us/meeting/register/tZYpdeCtqzkoHNeLBhf30OFysUtFIJQzbt-X#/registration

  • Translating Word files to Braille

    Stephane06/08/2023 at 22:45 0 comments

    Since we have tried MusicXML files a few days ago, i was wondering if there is a pandoc module available in python.

    Pandoc is a well known open source command line software to convert file format, you can use it to convert html to pdf or Markdown to html ...

    The main issue with word processor formats is that they can contain many features that are not really available in Braille. Different font and font size are not available in Braille, just because Braille characters is a normalized fixed size matrix of 6 or 8 dots depending of the Braille standard. 

    So to convert an Open Office .odt file or a word .doc you need a tool to extract  plain text from these files. This is were pandoc can be useful,  pandoc as a feature to extract plain text from many file format.

    After some internet search i found pypandoc, a python module to bridge pandoc with python software.

    So i start a little test with AccesBrailleRAP.  Just like we already done it with MusicXML, i add a bacend python function which ask a file to the user, convert the file to plain text with pandoc, and return the result to the javascript frontend.

    @eel.expose 
    def import_pandoc():
        js =""
        root = tk.Tk()
        
        fname = tkinter.filedialog.askopenfilename(title = "Select file",filetypes = (("all files","*.*"),))
        #print ("fname", fname)
        root.destroy()
        if fname != "":
             
            linel = int (app_options['nbcol'])-1
            
            data = pypandoc.convert_file(fname, "plain+simple_tables", extra_args=(), encoding='utf-8', outputfile=None)
            #print (data)
            js = json.dumps(data)
        
        return js

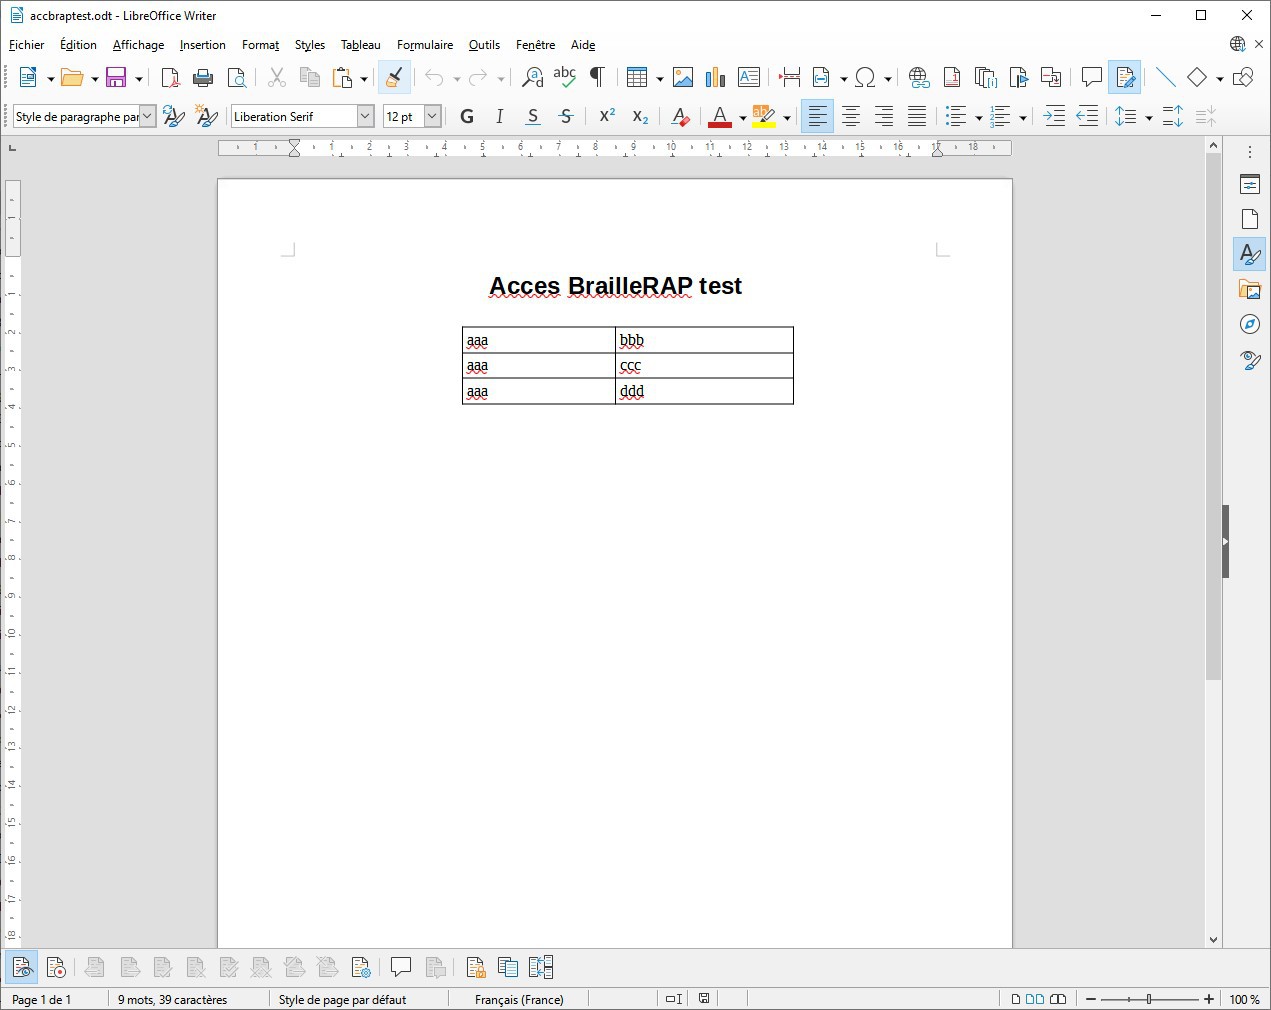
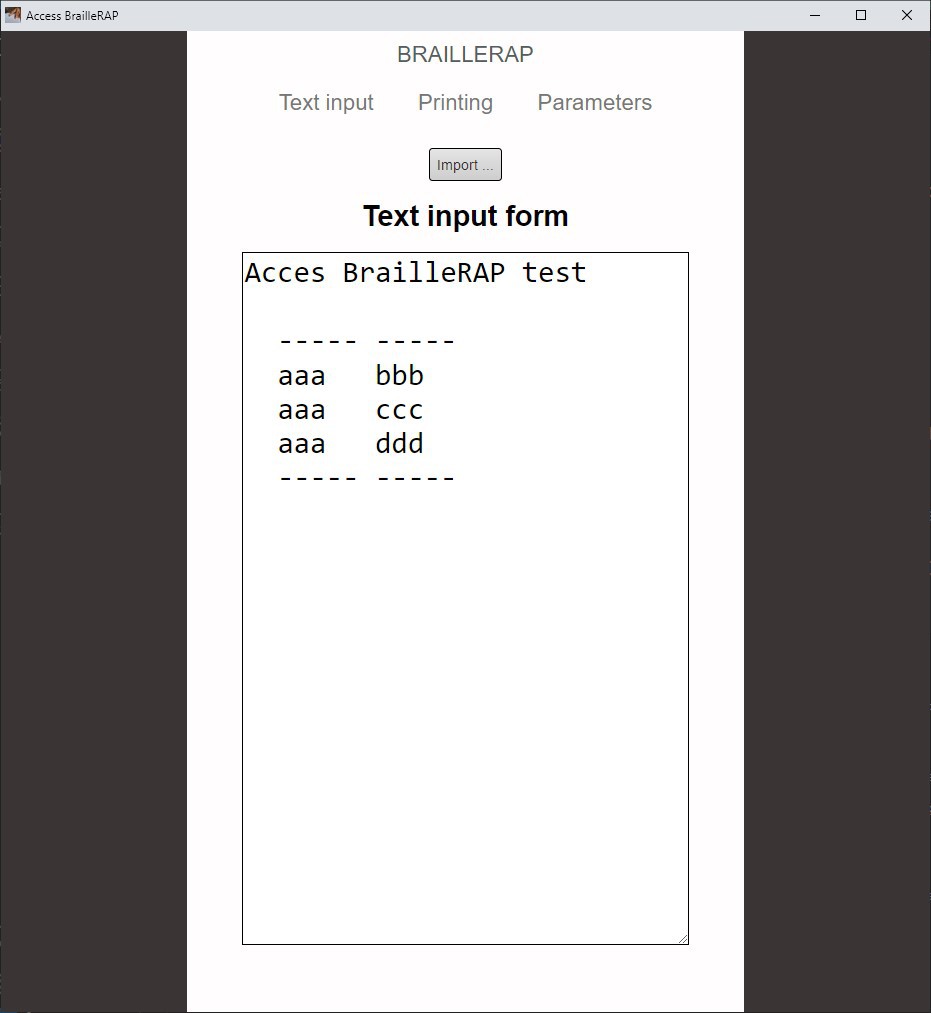
    and i just give it a try with a little openoffice test, just a text line with some format and a little table.

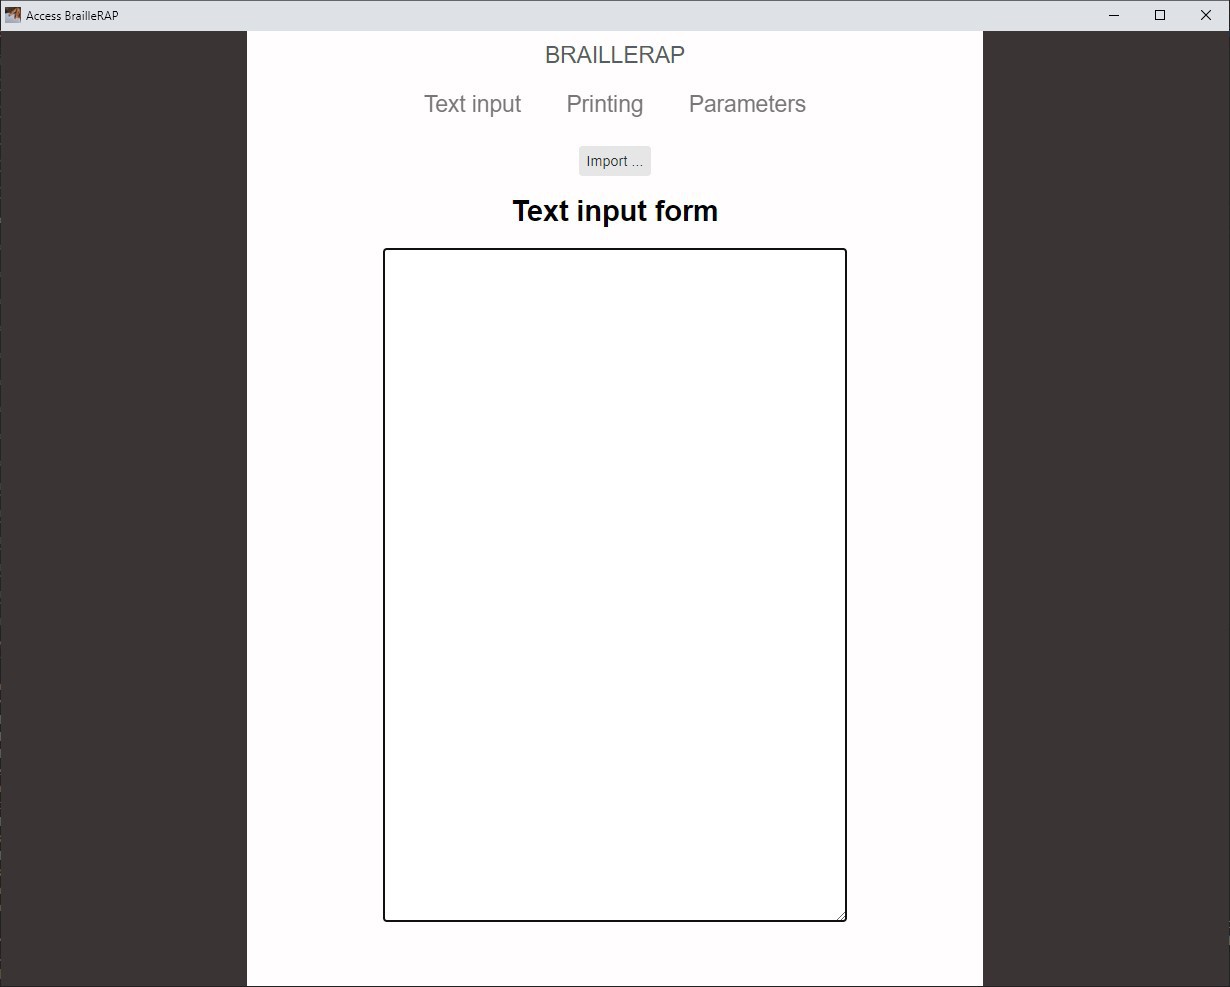
    Starting AccesBrailleRAP i test the new import button

    and select our open office .odt test file

    Not bad, we get all the text, and the table is conserved

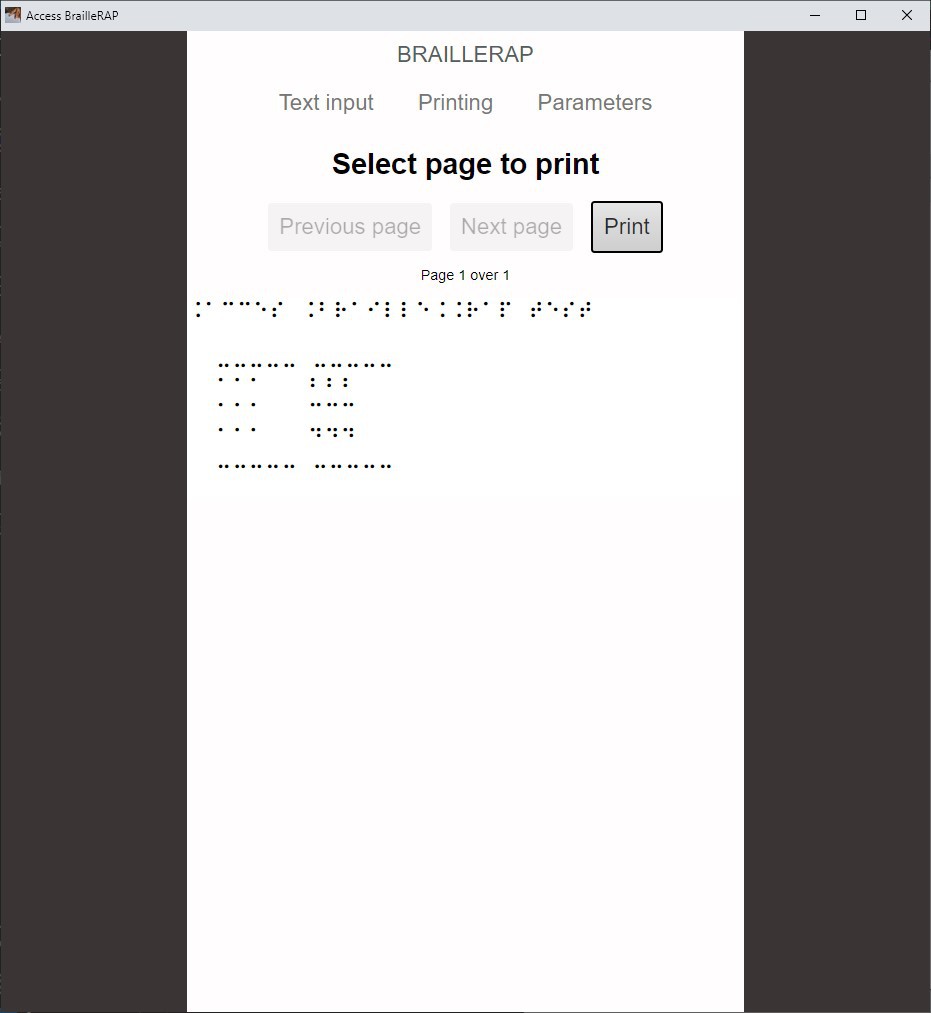
    Converting that to Braille

    Gotcha, we have a proof of concept. we definitely need to build an installer to include all the needed software to work with AccessBrailleRAP (drivers, pandoc, ...) but this a promising feature allowing anybody to open a word processor file, convert it into Braille, and emboss it. You don't even need to know anything about Braille !

  • Hacking AccessBrailleRAP with MuseScore

    Stephane05/28/2023 at 15:12 0 comments

    Since we started the BrailleRAP project a few years ago, we eared some peoples asking about Braille music score. 

    As we were focused on literacy transcription, we just put aside this feature, just noticing that Braille music score is just another standard in the Braille word.

    I'm not a musician, but sometime i love to make some music hack with bio sensor, midi and software synth on Raspberry PI. As hacking around with musical open source software, i've discovered MuseScore (https://musescore.org/). MuseScore is a wonderful and impressive open source tool to edit and display music score, as well as handling many music file format.

    Last night, looking for some python module for a customer, i just found music21 "a toolkit for computer-aided musicology" (http://web.mit.edu/music21/#) and this article by Young Choi about Braille and music21 (https://www.linkedin.com/pulse/convert-music-xml-braille-music21-young-choi/) with just a few lines of python to translate a musicxml file into Braille. Starting from Young Choi example, i just create a python venv and write a little script :

    import music21
    import sys
    
    print (sys.argv)
    c = music21.converter.parse (sys.argv[1])
    
    c.show ('braille')
    #c.show ('png')
    bu = music21.braille.translate.objectToBraille (c, maxLineLength=28, showHeading=True)
    
    data = bu.splitlines()
    for l in data:
        print ("{0} |{1}|".format(len(l), l))

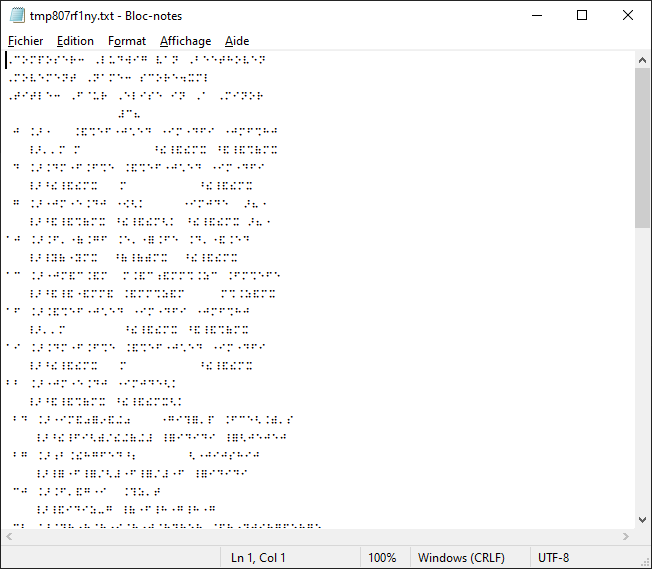
    getting some musicxml around, i tried the script and get this

    and this in the console :

    33 |⠠⠉⠕⠍⠏⠕⠎⠑⠗⠒⠀⠠⠇⠥⠙⠺⠊⠛⠀⠧⠁⠝⠀⠠⠃⠑⠑⠞⠓⠕⠧⠑⠝|
    26 |⠠⠍⠕⠧⠑⠍⠑⠝⠞⠀⠠⠝⠁⠍⠑⠒⠀⠎⠉⠕⠗⠑⠲⠭⠍⠇|
    33 |⠠⠞⠊⠞⠇⠑⠒⠀⠠⠋⠈⠥⠗⠀⠠⠑⠇⠊⠎⠑⠀⠊⠝⠀⠠⠁⠀⠠⠍⠊⠝⠕⠗|
    27 |⠀⠀⠀⠀⠀⠀⠀⠀⠀⠀⠀⠀⠼⠉⠦⠀⠀⠀⠀⠀⠀⠀⠀⠀⠀⠀⠀|
    27 |⠀⠚⠀⠨⠜⠐⠀⠀⠀⠨⠯⠩⠑⠋⠐⠚⠡⠑⠙⠀⠐⠊⠍⠐⠙⠋⠊|
    27 |⠀⠀⠀⠸⠜⠄⠄⠍⠀⠍⠀⠀⠀⠀⠀⠀⠀⠀⠀⠀⠘⠮⠸⠯⠮⠍⠭|
    23 |⠀⠉⠀⠨⠜⠐⠚⠍⠋⠩⠓⠚⠀⠀⠨⠙⠍⠐⠋⠨⠋⠩⠑|
    23 |⠀⠀⠀⠸⠜⠘⠯⠸⠯⠩⠷⠍⠭⠀⠘⠮⠸⠯⠮⠍⠭⠀⠀|
    23 |⠀⠑⠀⠨⠜⠨⠯⠩⠑⠋⠐⠚⠡⠑⠙⠀⠐⠊⠍⠐⠙⠋⠊|
    23 |⠀⠀⠀⠸⠜⠄⠄⠍⠀⠀⠀⠀⠀⠀⠀⠀⠘⠮⠸⠯⠮⠍⠭|
    22 |⠀⠛⠀⠨⠜⠐⠚⠍⠐⠑⠨⠙⠚⠀⠐⠪⠣⠅⠀⠀⠀⠀|
    ....

    a pretty well formatted unicode string with Braille music score ! wow !

    if you read about BrailleRAP, you know that AccesBrailleRAP, our Braille translation, software is based on eel python module. Eel allow you to embed html/javascript frontend and python backend on a packaged application for window.

    So i just started a new app for AccesBrailleRAB, calling it MusicBrailleRAP, add a page and button on the react.js frontend, and drop some python lines in the backend. With a little python function, we can open a file selection dialog, convert the file to Braille characters strings with music21 and return a result as JSON for the react frontend.

    @eel.expose 
    def get_file_dialog():
        root = Tk()
        fname = filedialog.askopenfilename(initialdir = "./",title = "Select file",filetypes = (("musicXML","*.mxl"),("all files","*.*")))
        print (fname)
        root.destroy()
        
        linel = int (app_options['nbcol'])-1
        
        c = None
    
        if zipfile.is_zipfile (fname):
            with zipfile.ZipFile(fname, mode='r') as archive:
                with archive.open ('score.xml') as score:
                    print ("trying to open a msz")
                    data = score.read()
                    c = music21.converter.parseData(data)
        else:        
            print ("trying to open a xml")
            c = music21.converter.parse (fname)
        
        bu = music21.braille.translate.objectToBraille (c, maxLineLength=linel, showHeading=True)
        
        data =str(bu)
        js = json.dumps(data)
        
        return js

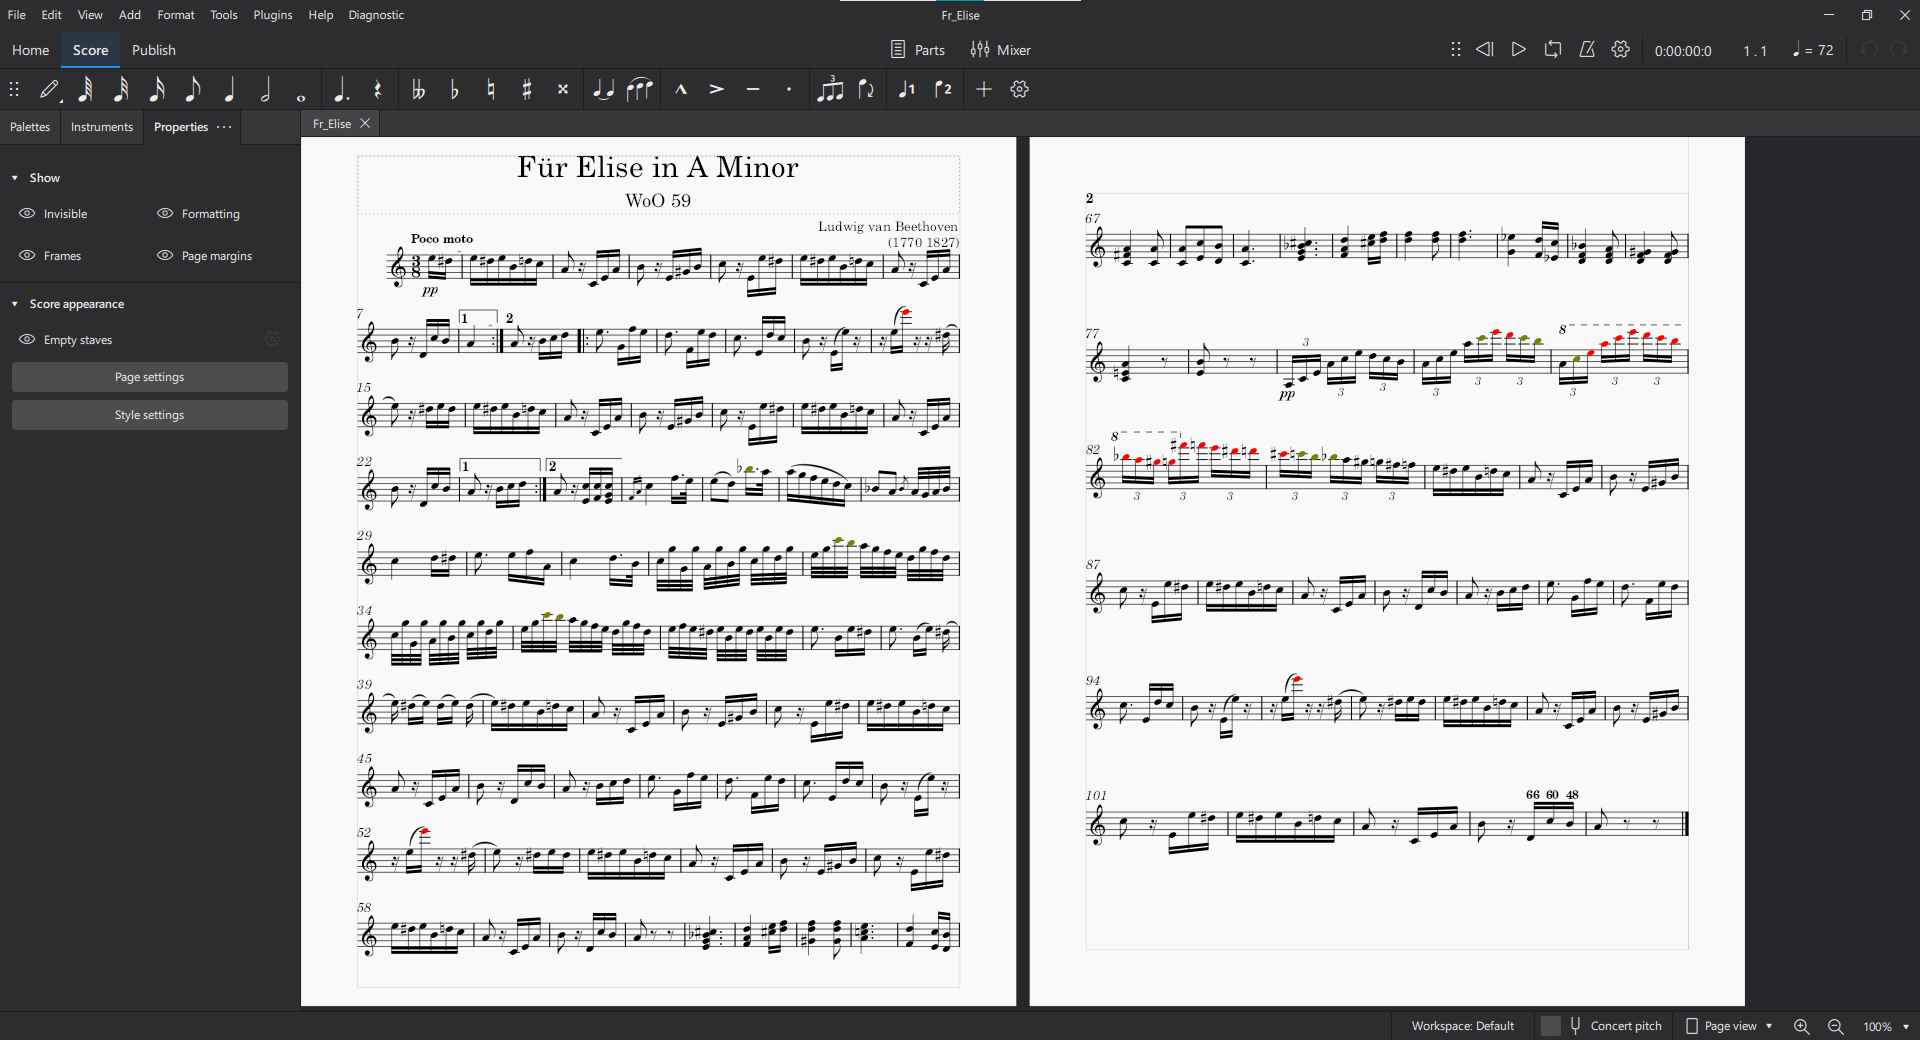
    After a few hours of tests and updates on the frontend and Braille paginator, i can now use MuseScore to open a music score.

    i use the export feature to export the score in MusicXml...

    Read more »

  • Designing stronger motor support

    Stephane05/20/2023 at 13:13 0 comments

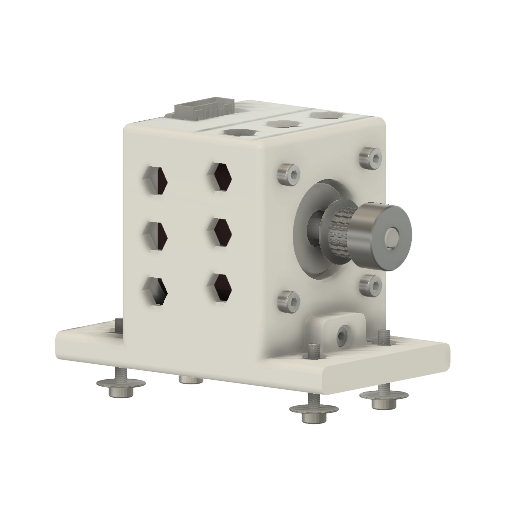
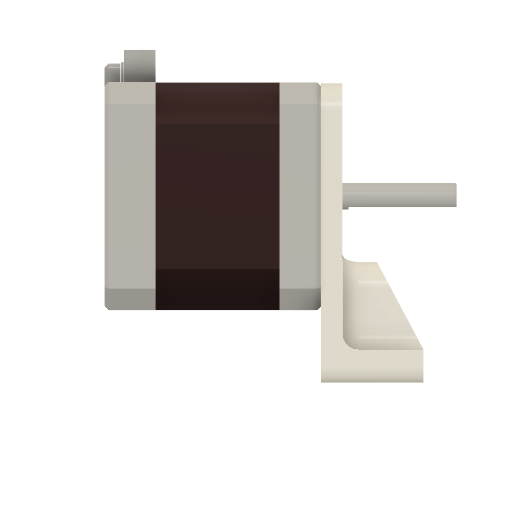
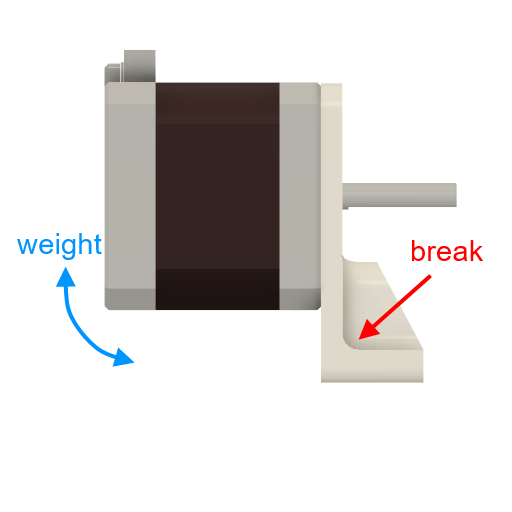
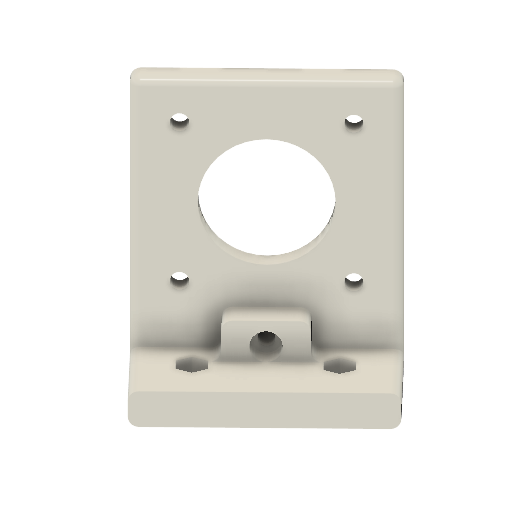
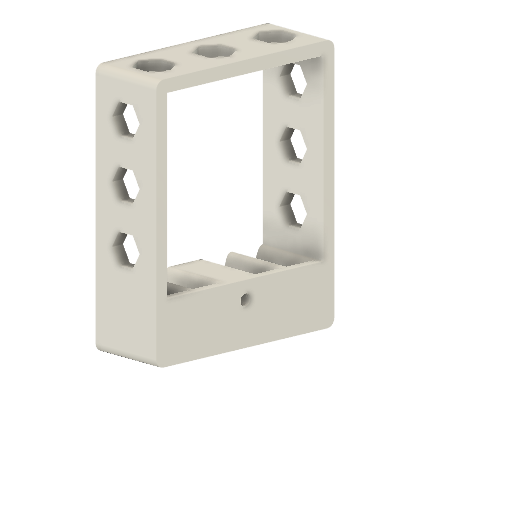
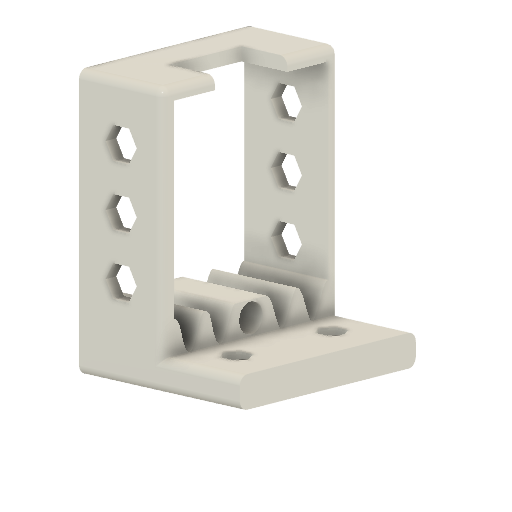
    In previous version of BrailleRAP the Y motor support whas this one :

    As the support work well, the 3d plastic deigned part sometime break at the layer jonction. Even if  the BrailleRAP was packed in foam, plane travel in cargo hold was hazardous for the support. We analyses the problem and thought that the weight of the motor with the big cantilever created by the design, could bend the support between the horizontal and vertical part.

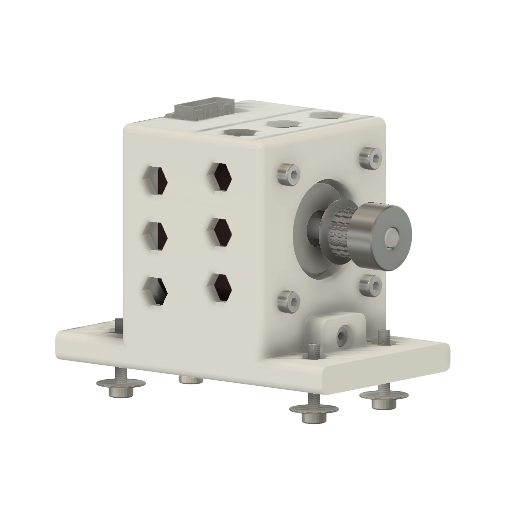
    The goal was to kill the cantilever, adding some support on the motor back that we can secure with some screw on the frame. So we design a support like a cage, securing the motor in the cage with standard screw fixation of nema17 but now the motor do not have the ability to bend the support.

    As the support is not easy to print one a standard 3d printer, we cut it in 3 parts, allowing the user to build the support himself by securing the 3 parts with 2 screws.

    That's it the Y motor is now firmly attached to the frame with 4 screw and you still can adjust the motor position to tension the belt.

  • Embossing Braille Dots

    Stephane05/18/2023 at 20:22 0 comments

    Basically BrailleRAP is a 2D device that move a tools (the Braille stylus and the corresponding anvil) over a sheet of material. BrailleRAP use a 3d printer control board, we use MKS boards as these boards are compatible with the marlin firmware (https://marlinfw.org/). 

    Marlin firmware enable the board to act as 3d printer, but more precisely, it can control several stepper motor in position / speed  / acceleration, read some sensors (endswitch, thermal resistor ...), and drive some tools like 3d printhead, heat bed but also CNC spindle motor etc.

    Another feature of Marlin, is the GCODE interpreter. GCODE is a specialized language to control CNC devices. So if you send a correct GCODE command to a board with marlin onboard, marlin will execute the command. For example if you send the GCODE command :

    G1 X10 Y10

    Marlin will control the motor to move the tool at position X=10mm and Y=10mm

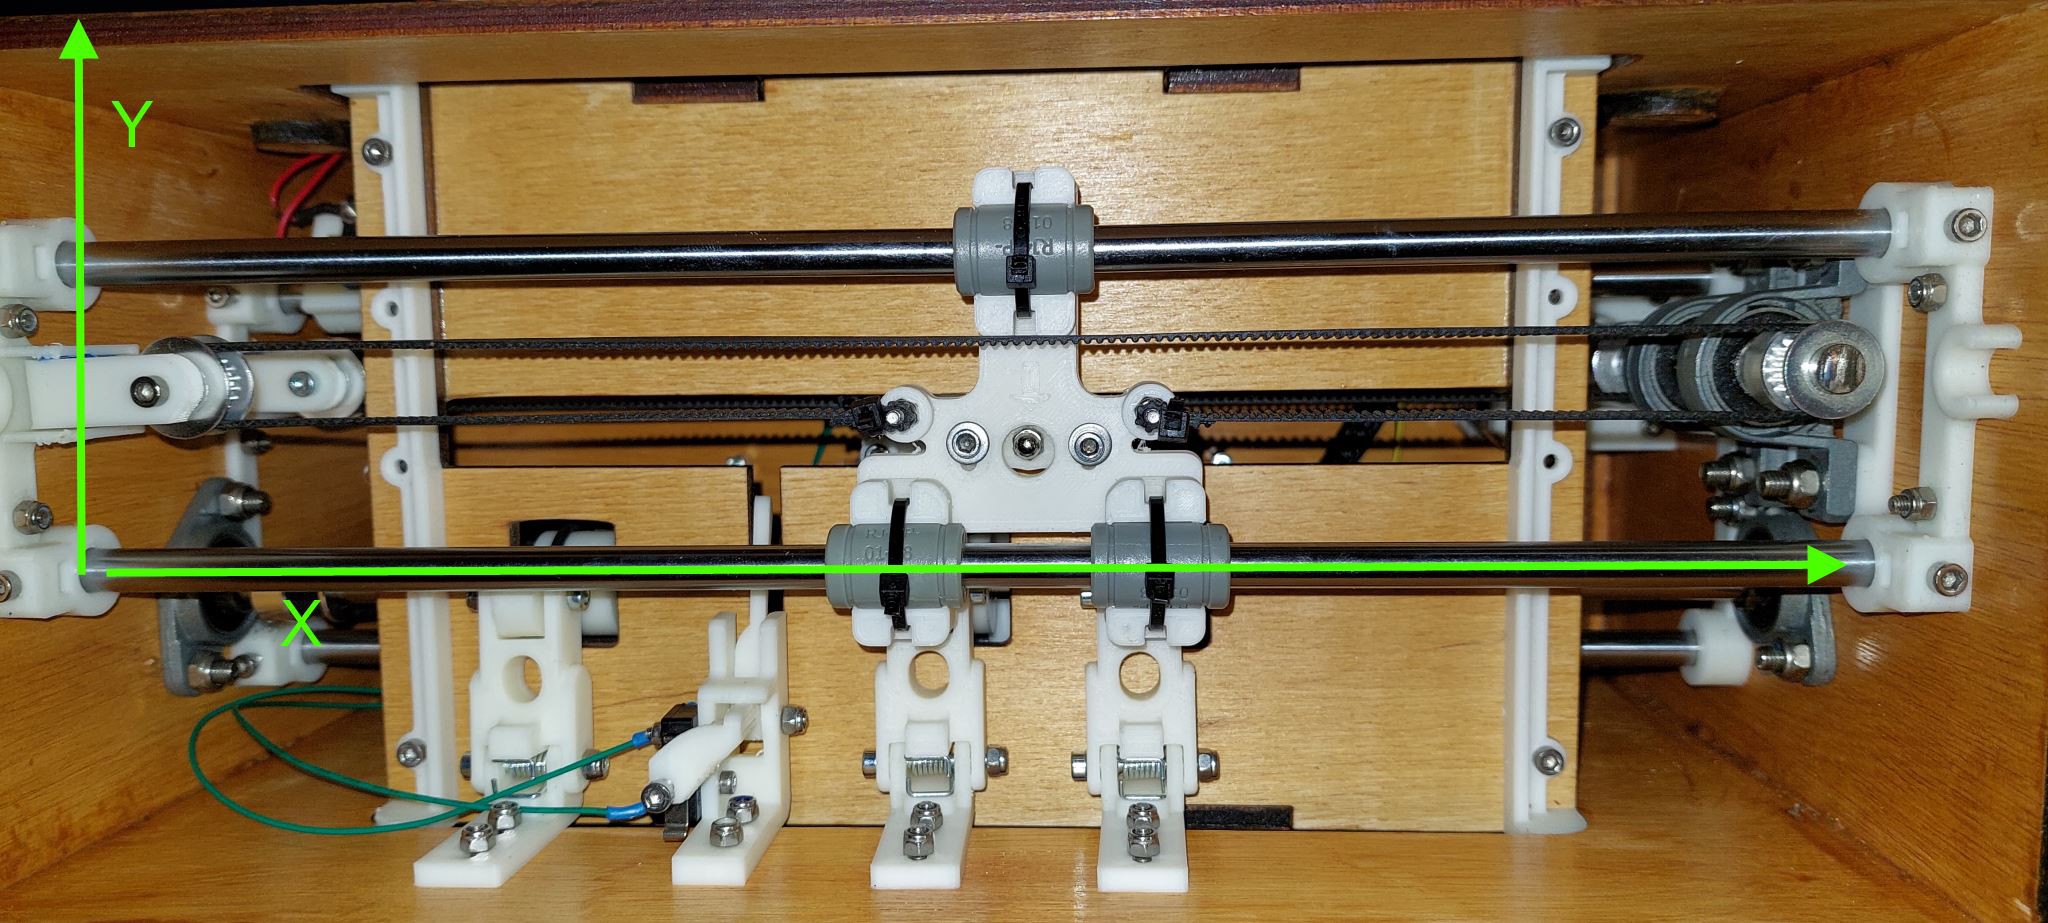
    So, we have some commands to move a tool on X and Y axis. On BrailleRAP the X axis is the motor on the left. This X motor move the two trolleys in the direction of the width of the sheet of paper. The Y axis is on the right motor. The right motor move the sheet of paper in and out. If you send the G1 X10 Y10 command to a BrailleRAP, marlin will move the Braille stylus 10 mm from the left side and 10 mm from the top side of the sheet.

    Now we need to have some sensor to tell marlin where is the left side and the top side. This is where we use end switches. On BrailleRAP we have 2 end switches, one is activated when the trolleys are on the left side, the another is activated when the paper sheet is engaged in paper rolls.

    With the two end switches, we have 2 sensors to detect the trolleys position and paper sheet position. So we can use the GCODE G28 command which is the homing command. G28 X tell marlin to move the X axis until it detect some change on the X endswitch. G28 Y tell marlin to move the Y axis until it detect some change in the Y endswitch. As usual in software it's a bit more complex, but with these 2 commands G28 X and G28 Y we can detect the top left corner of the sheet and define this corner to be X=0 and Y=0.

    So has we have A4 sheets of paper wich are 210mm x 297 mm 

    X=210 and Y=0 is the top right corner of the paper sheet.

    X=0 Y=297 is the bottom left corner of the paper sheet.

    X=210 Y=297 is the bottom right corner of the paper sheet.

    At this time with Marlin firmware we have some commands to find the left top corner of the paper sheet, and  to move the Braille stylus on the trolley at any given position on the paper sheet.

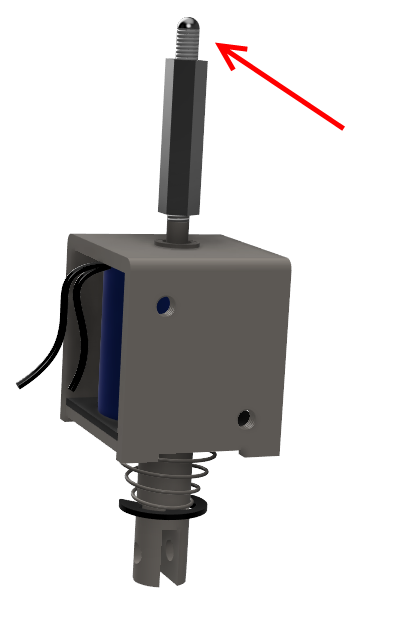
    The next thing is to make a dot. The Braille stylus is on the top of an electromagnet

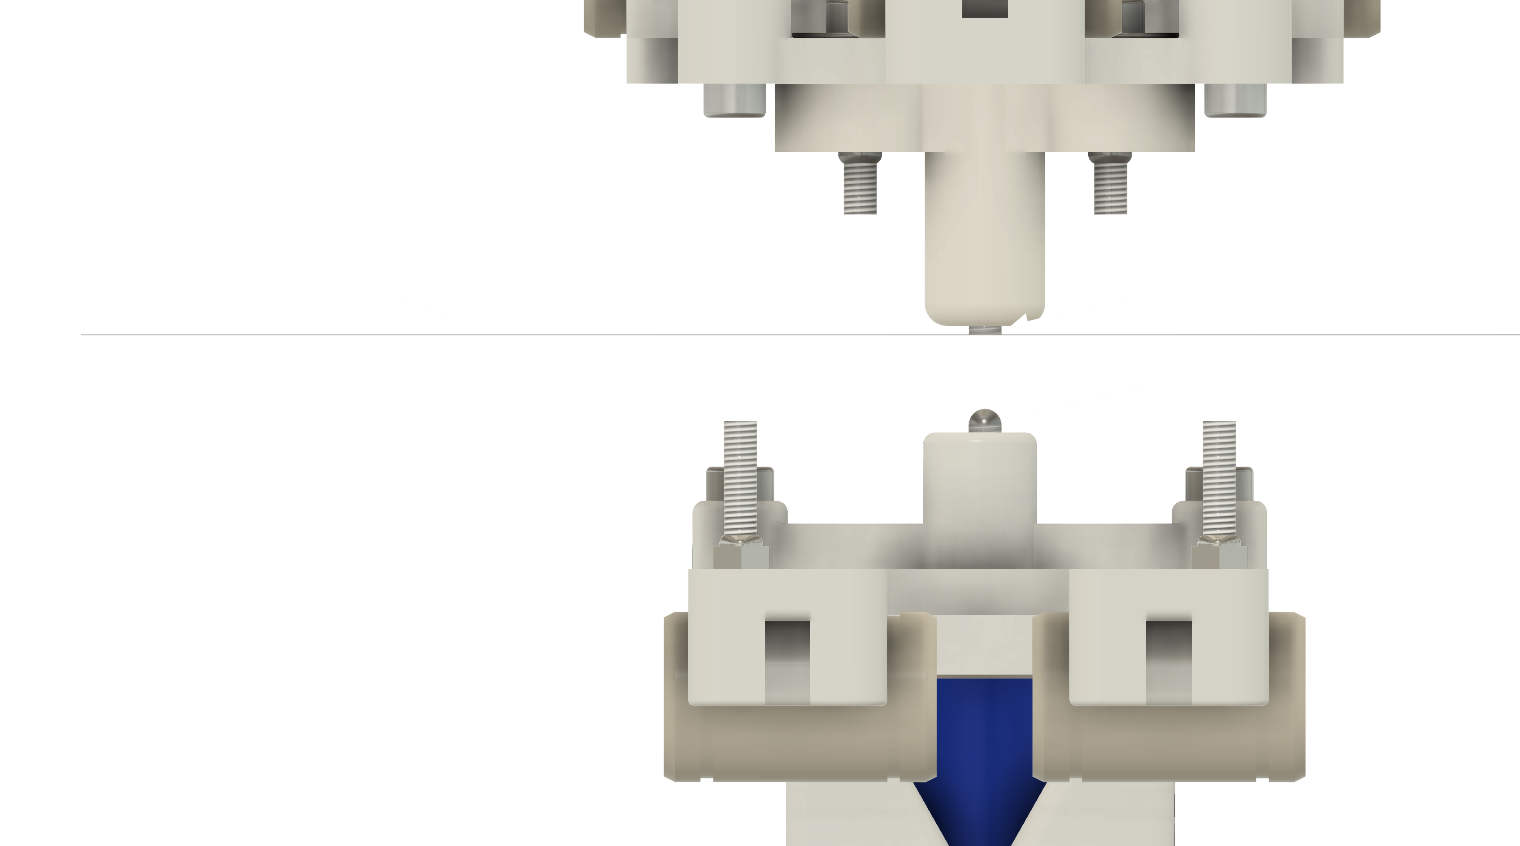
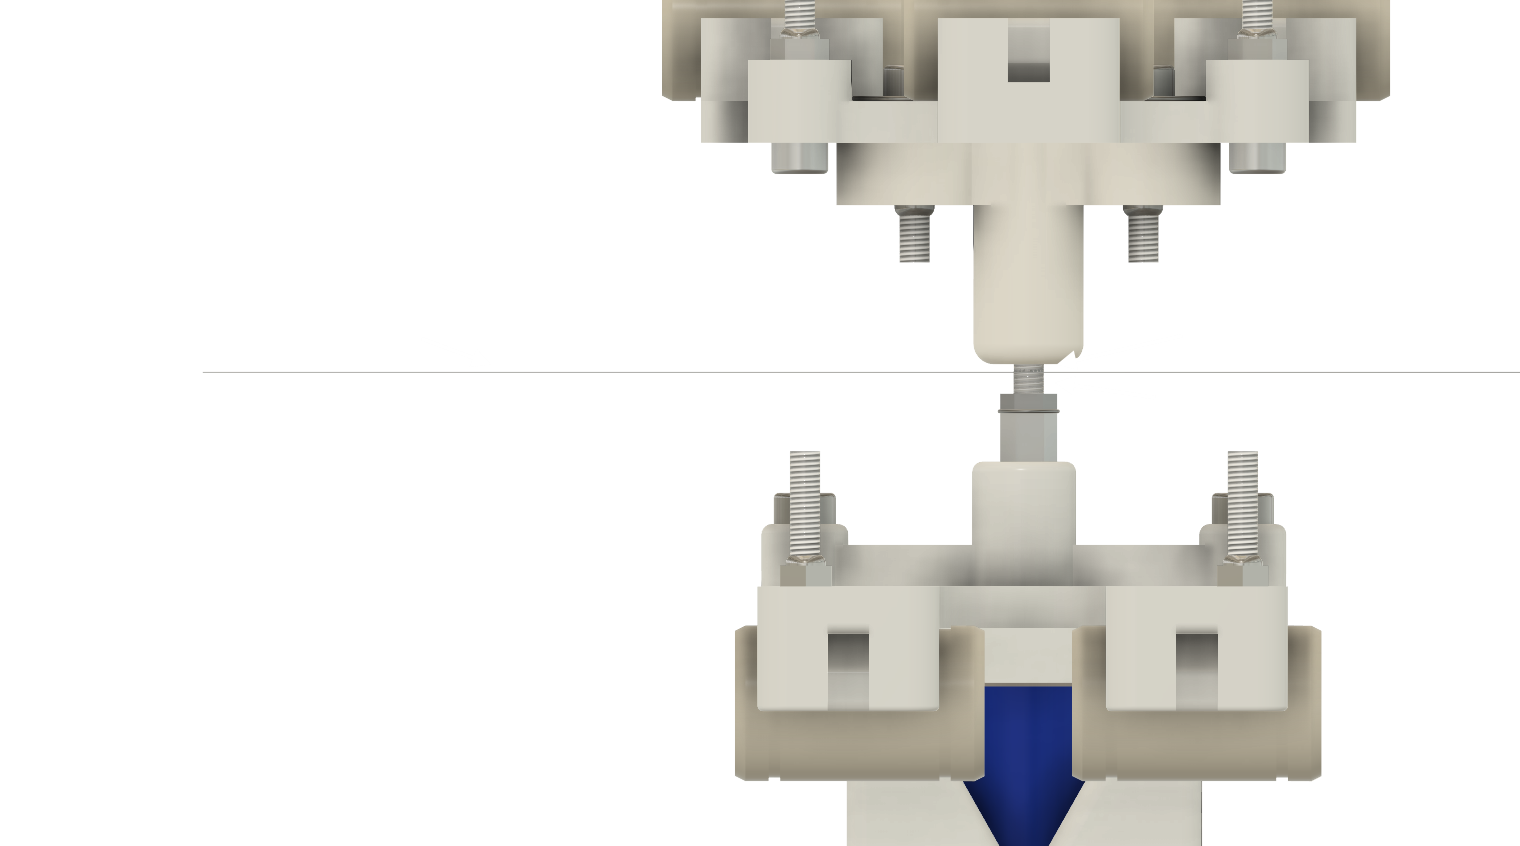
    The electromagnet is wired on the board on the heatbed connector.  This connector is also used to control spindle motor of CNC in marlin. We have configured marlin to use this connector as an on/off connector for the 12V. So if you send the GCODE command M3 S1, marlin will give 12V current to the electro magnet for a short period of time (50ms). As the electro magnet receive 12V current, it move quickly upward and pinch the sheet of paper between the Braille stylus and the anvil. That's it we just made a Braille dot on the paper.

    The electromagnet is off, the Braille stylus is down.  We can move the trolleys over the paper

    The electromagnet is on. The Braille stylus move upward and pinch the paper in the anvil.

    Let sum up where we are at this point, if we send the following GCODE program to a BrailleRAP :

    G28 X

    G28 Y

    G1 X10 Y20

    M3 S1

    will obtain a Braille dot a 10mm from the left, 20 mm from the top. let's eject the paper sheet from the BrailleRAP

    G1 X10 Y297

    you can now get the paper sheet.

    What we start to understand, BrailleRAP is not a Braille embosser it is just a Braille dot machine, if you want to emboss some Braille text you need to send the GCODE commands to emboss all the dots one after one and at the correct position....

    Read more »

View all 9 project logs

  • 1
    Prepare material

    Put your hand on all the needed stuff and gear.

    The frame parts:

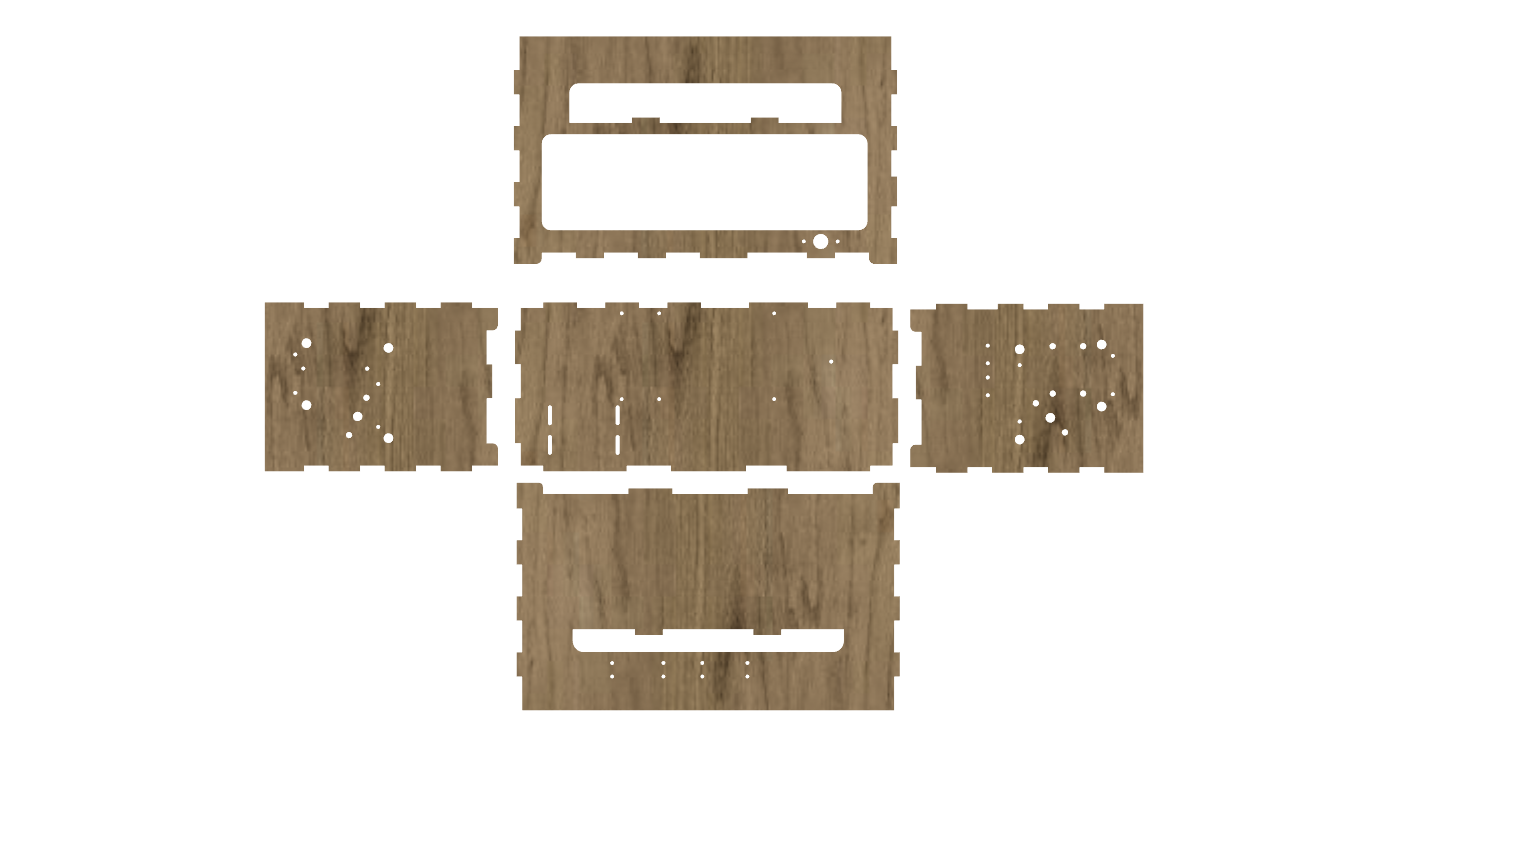
    Usually, we use 5mm plywood. But you can use any 5mm thick material that you can cut in a laser cutter, as acrylic PMMA for example. 

    3d printed parts :

    Print all 3d parts, it take some times, more than 20 hours depending on your 3d printer. Usually, we use ABS, but PLA is an alternative, you can test PETG. As there is 40 parts to print, you will find a detail listing in printed_part directory.

  • 2
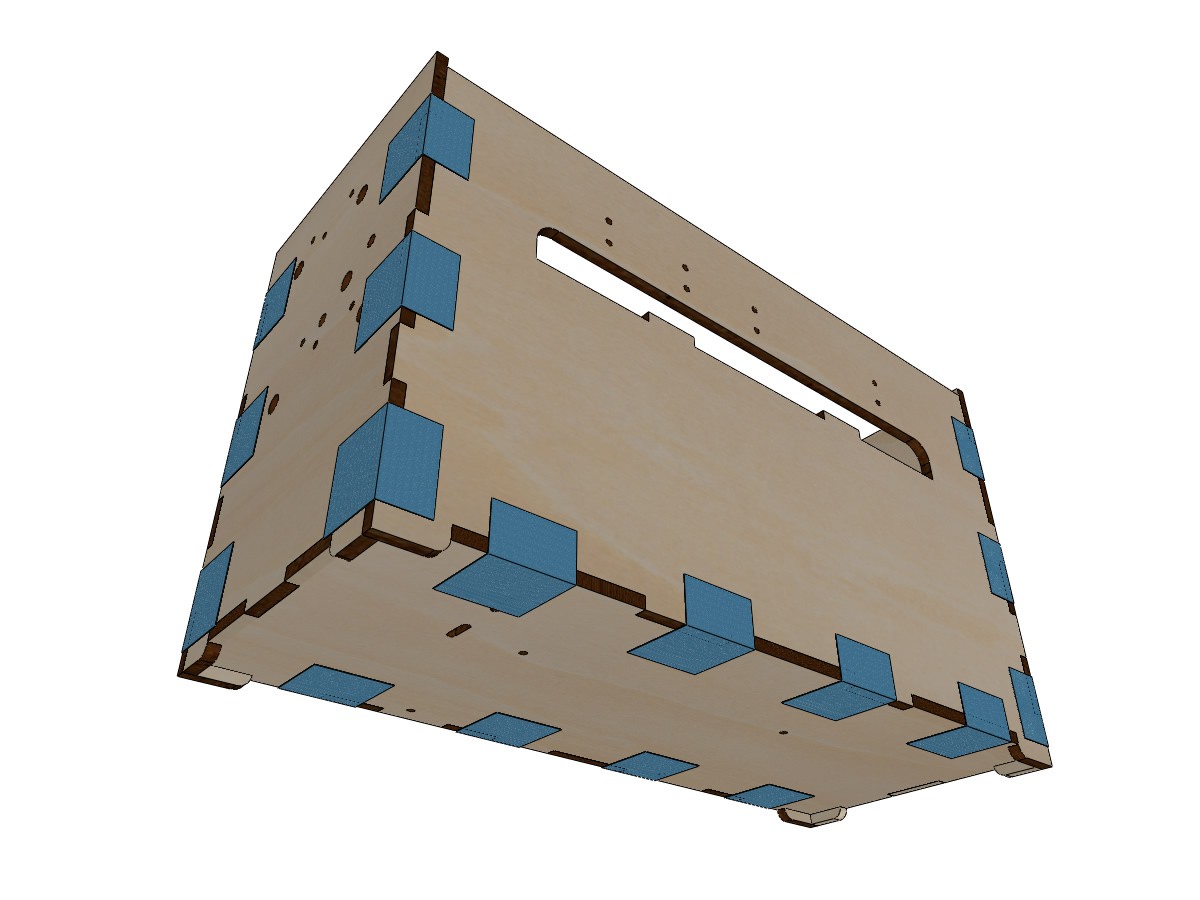
    Bonding the frame

    Put all the laser cut parts as bellow on a table . Pay attention  to clearly identify each part orientation (use holes in the parts to find the correct orientation)

    Glue all the notches and build the chassis, secure your build with some tape (blue tape for example)

  • 3
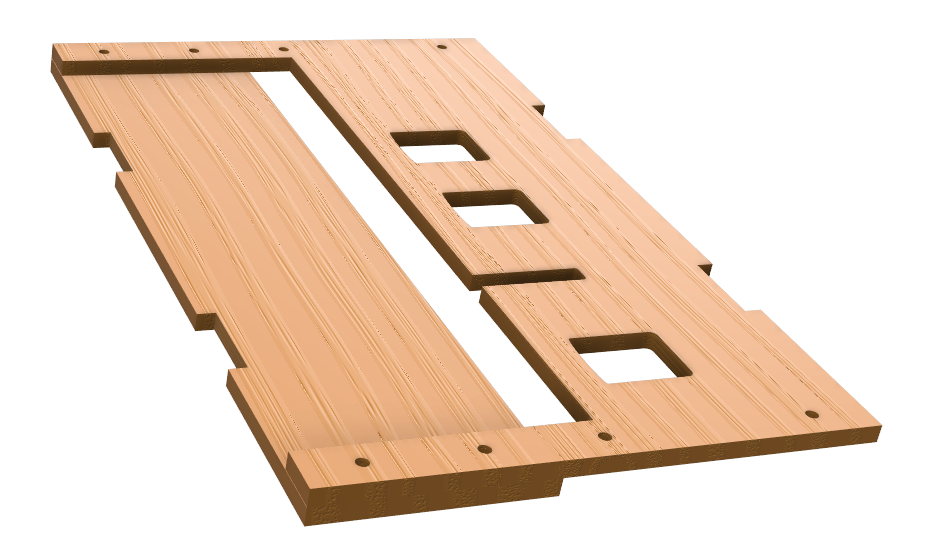
    Bonding paper support

    Glue the lower support under the upper support. Place screws in drillings to properly align the parts. Use clamps to maintain the two parts together

View all 20 instructions

Enjoy this project?

Share

Discussions

Julia John wrote 4 days ago point

looking good and interesting, well detailed explanation about the project.

regards

Julia

owner of

https://apkscent.com/worms-zone/

  Are you sure? yes | no

Stephane wrote 3 days ago point

Hello Jullia.

Thanks, we are working hard to make the design available for most makers, and it seem to work. Sometime we have news about a BrailleRAP built somewhere in world, and it's always a great pleasure. The last one we heard of, was built in Egypt.

regards

  Are you sure? yes | no

John Opsahl wrote 07/07/2023 at 02:59 point

Have you released the 3D design files of the entire assembly? What mechanical CAD software are you using? 

  Are you sure? yes | no

Stephane wrote 07/09/2023 at 09:28 point

Hello John. Not at this time, we are using Fusion360, with a lot of parts linked together for rendering view in the documentation. The bad is that it is a little messy to export all the design for public usage. We are working on it, since upgrading the design from stl files is not the very easy for beginners.

  Are you sure? yes | no

John Opsahl wrote 07/10/2023 at 18:59 point

Thanks Stephane. I am interested in a step file of the entire assembly when you get to that point. I have a background in low-cost laser cut CNC machine designs. Thinking I might be able to make some suggestions to help reduce cost of your existing design.

  Are you sure? yes | no

Stephane wrote 07/11/2023 at 08:21 point

Hello John, let keep in touch. I don't know how long we need  for a complete .step design but any help or suggestion are welcome.

  Are you sure? yes | no

Similar Projects

Does this project spark your interest?

Become a member to follow this project and never miss any updates