Close
0%
0%

TechNIK's Cyberdeck

A 3D printed compact and customizable linux terminal

Similar projects worth following
Unfortunately, I didn't find out about the Cyberdeck Contest until July 10th, but I started drawing the case right away. Since I've been thinking about this thing for months, I've fortunately already got almost all the hardware together.

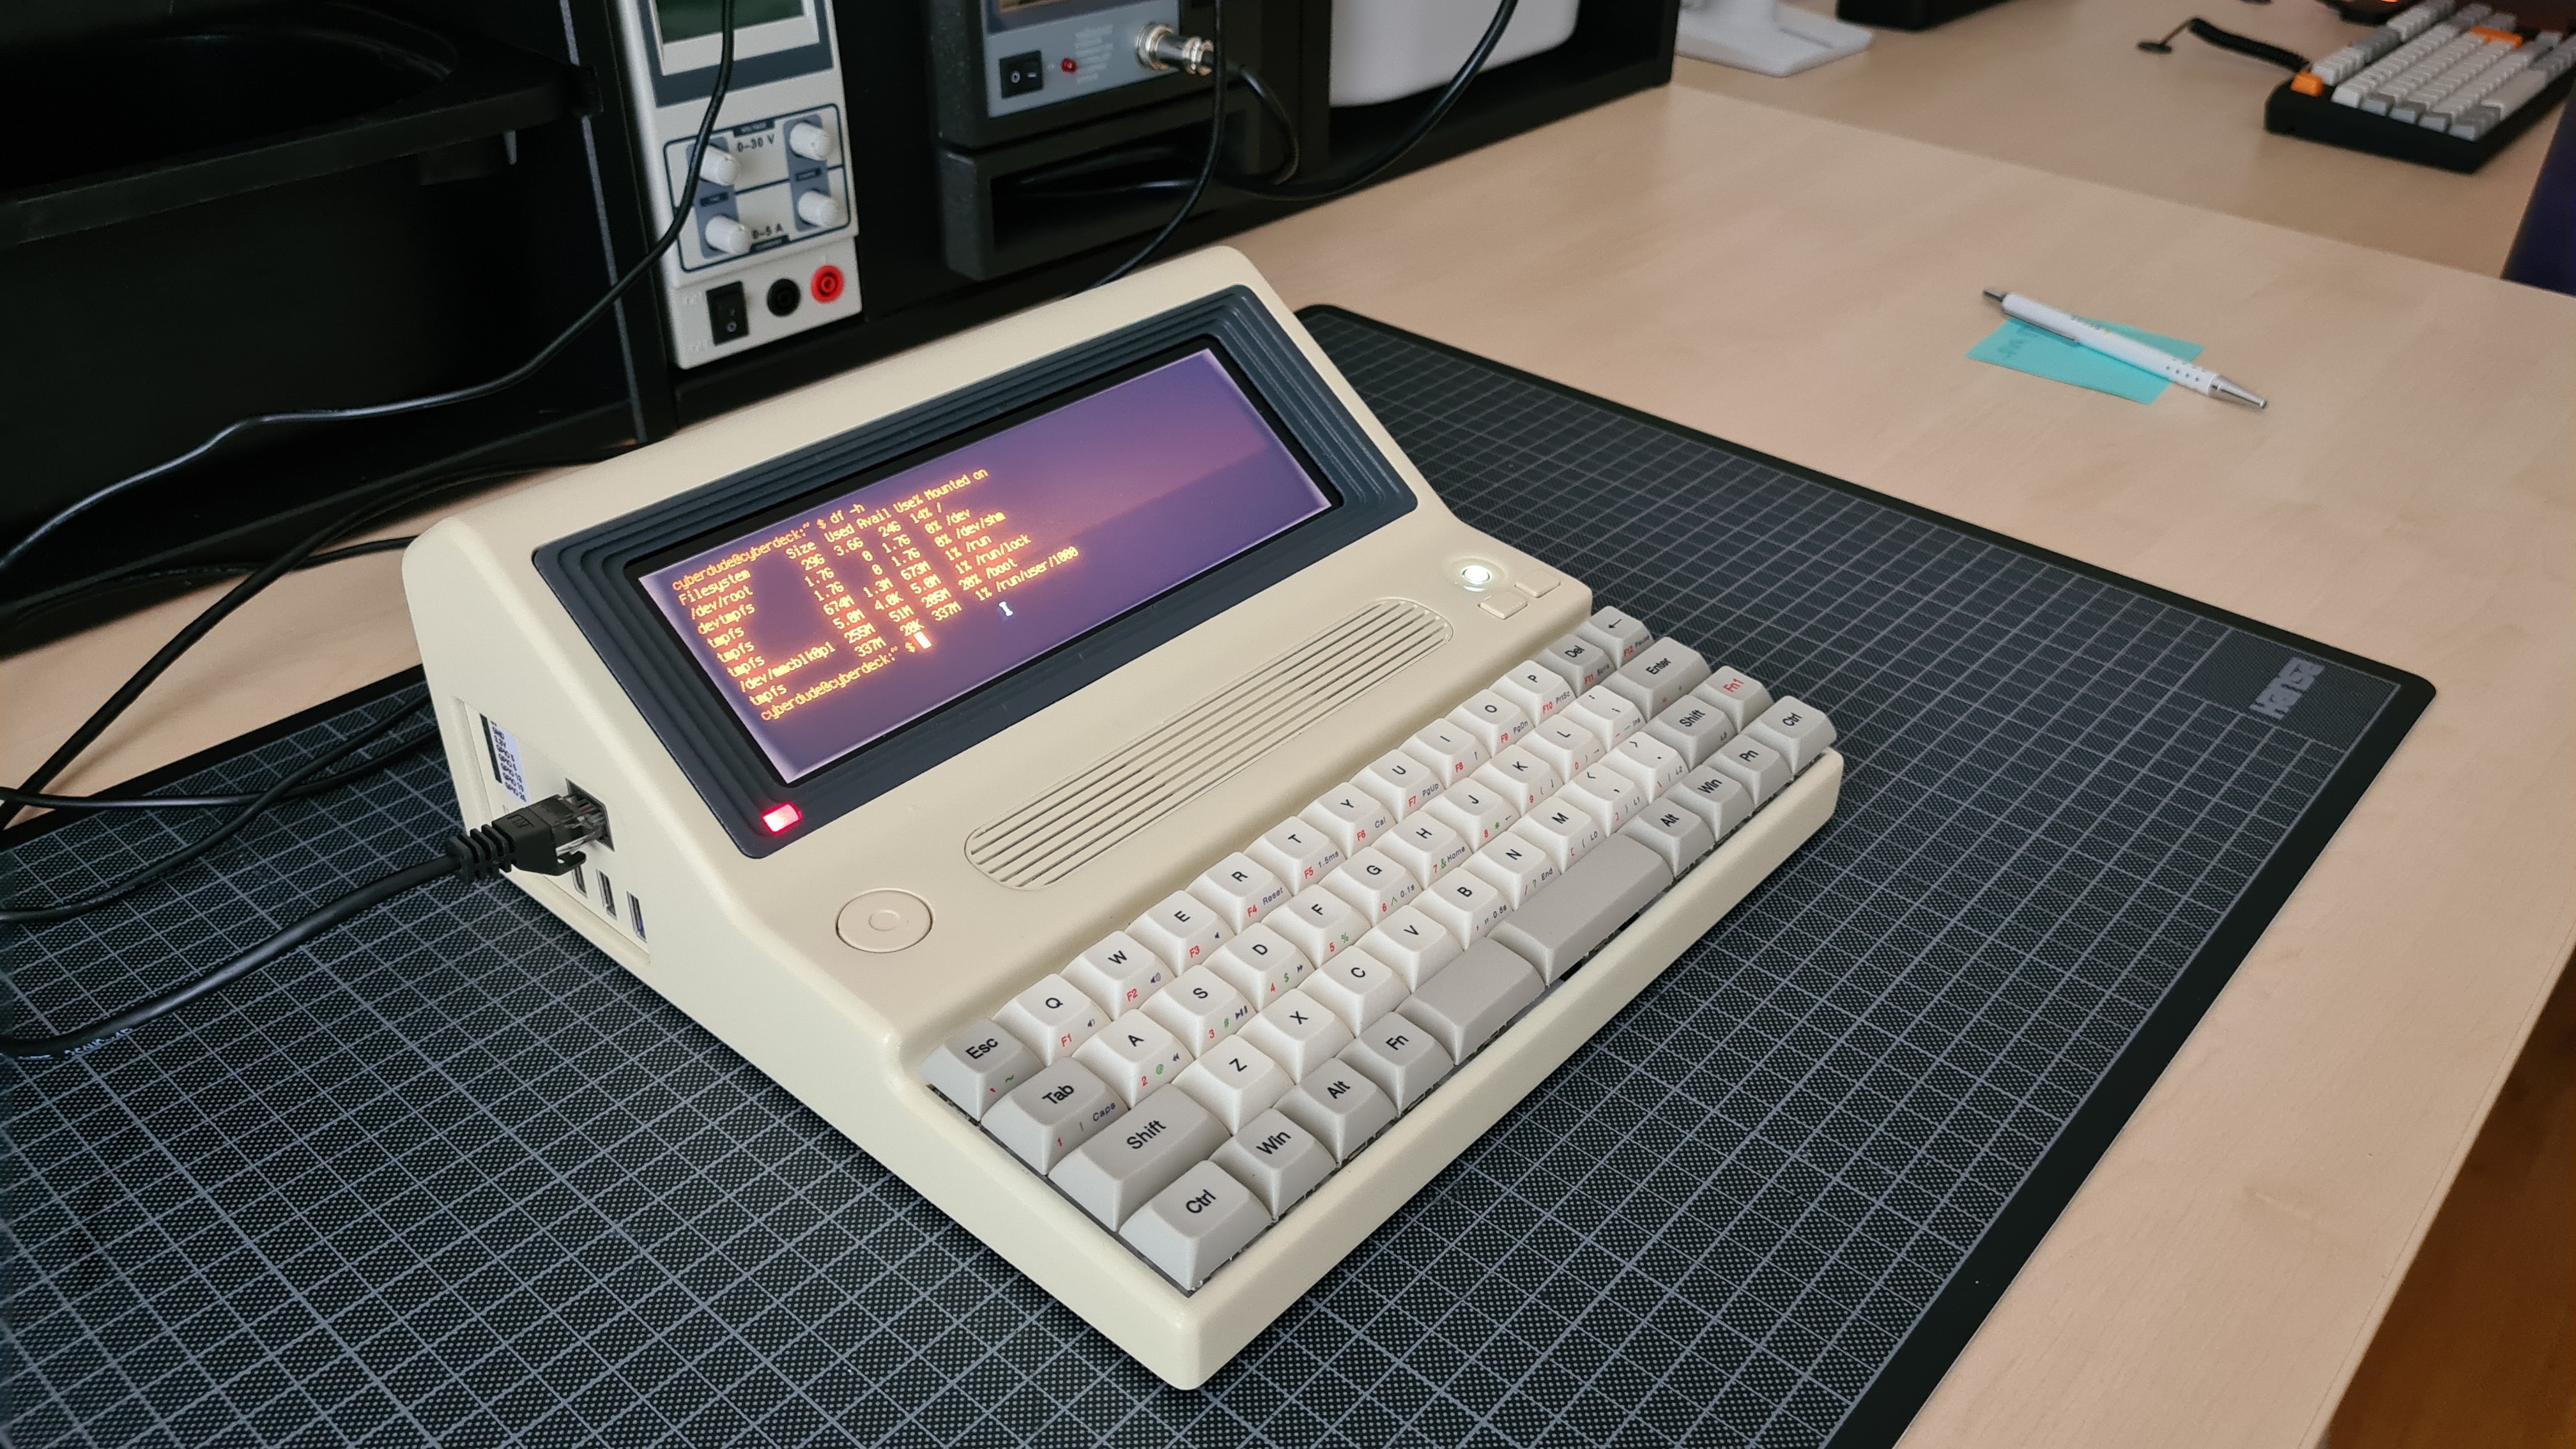
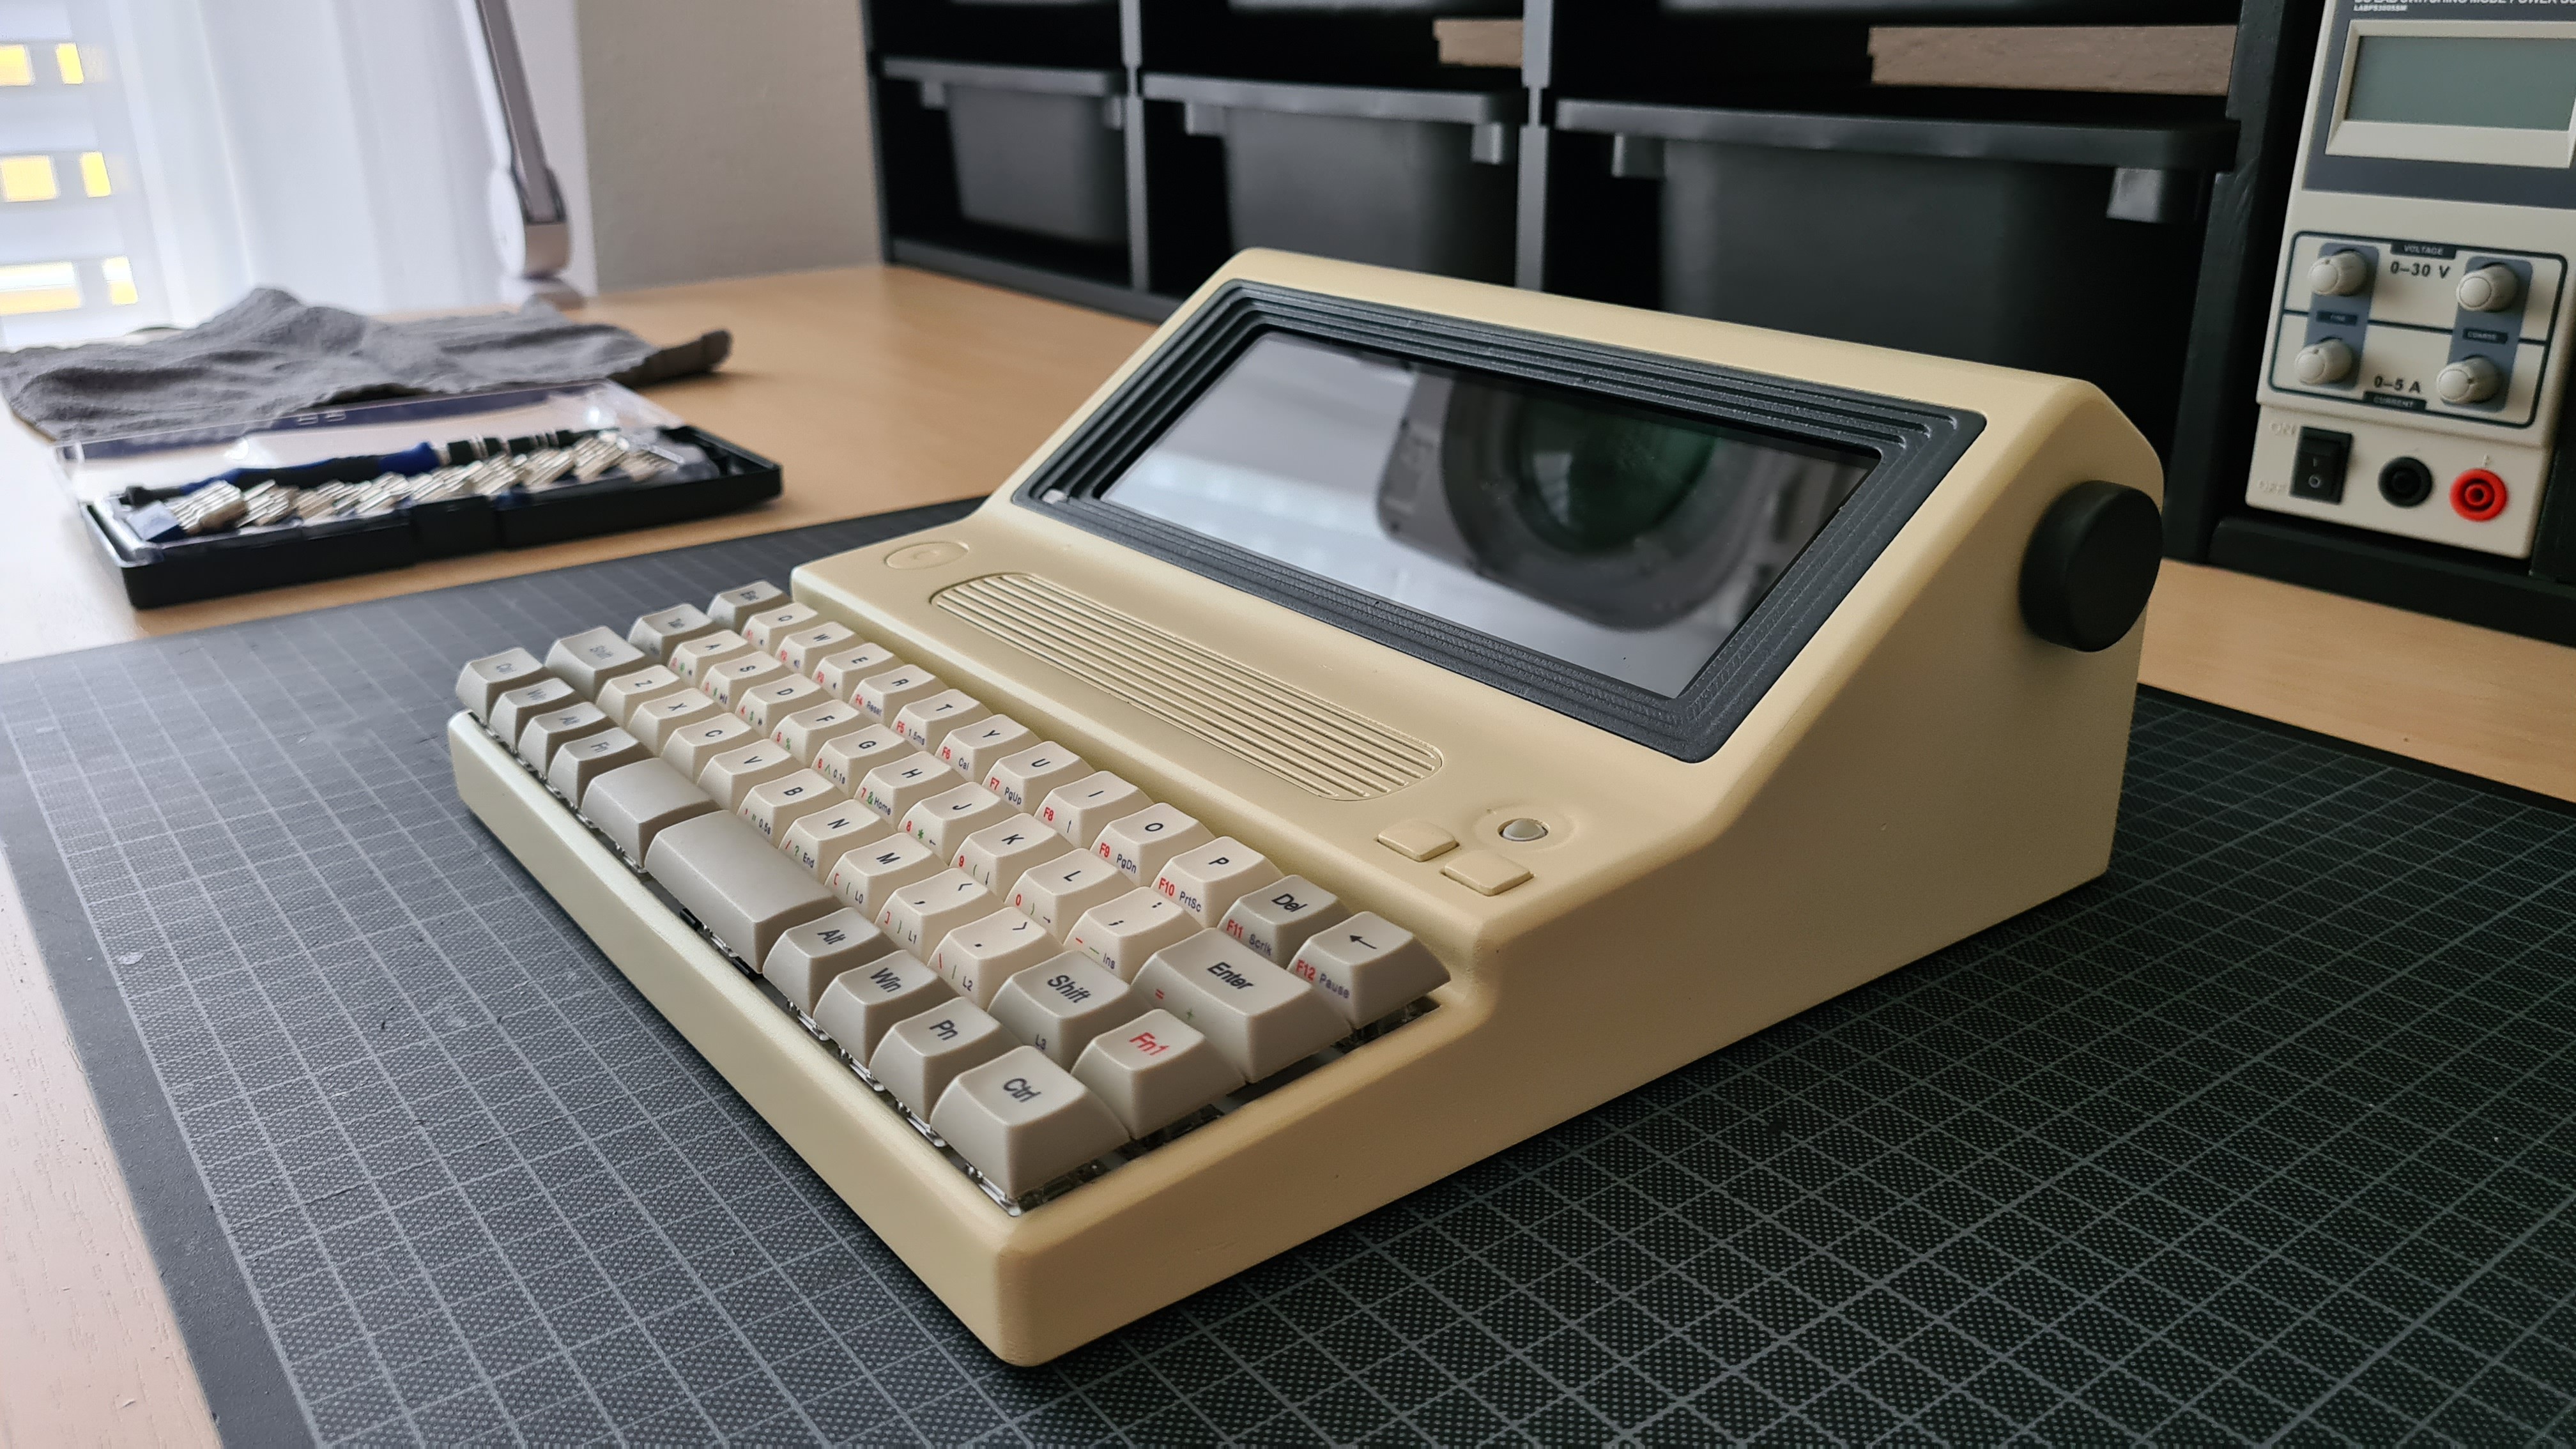
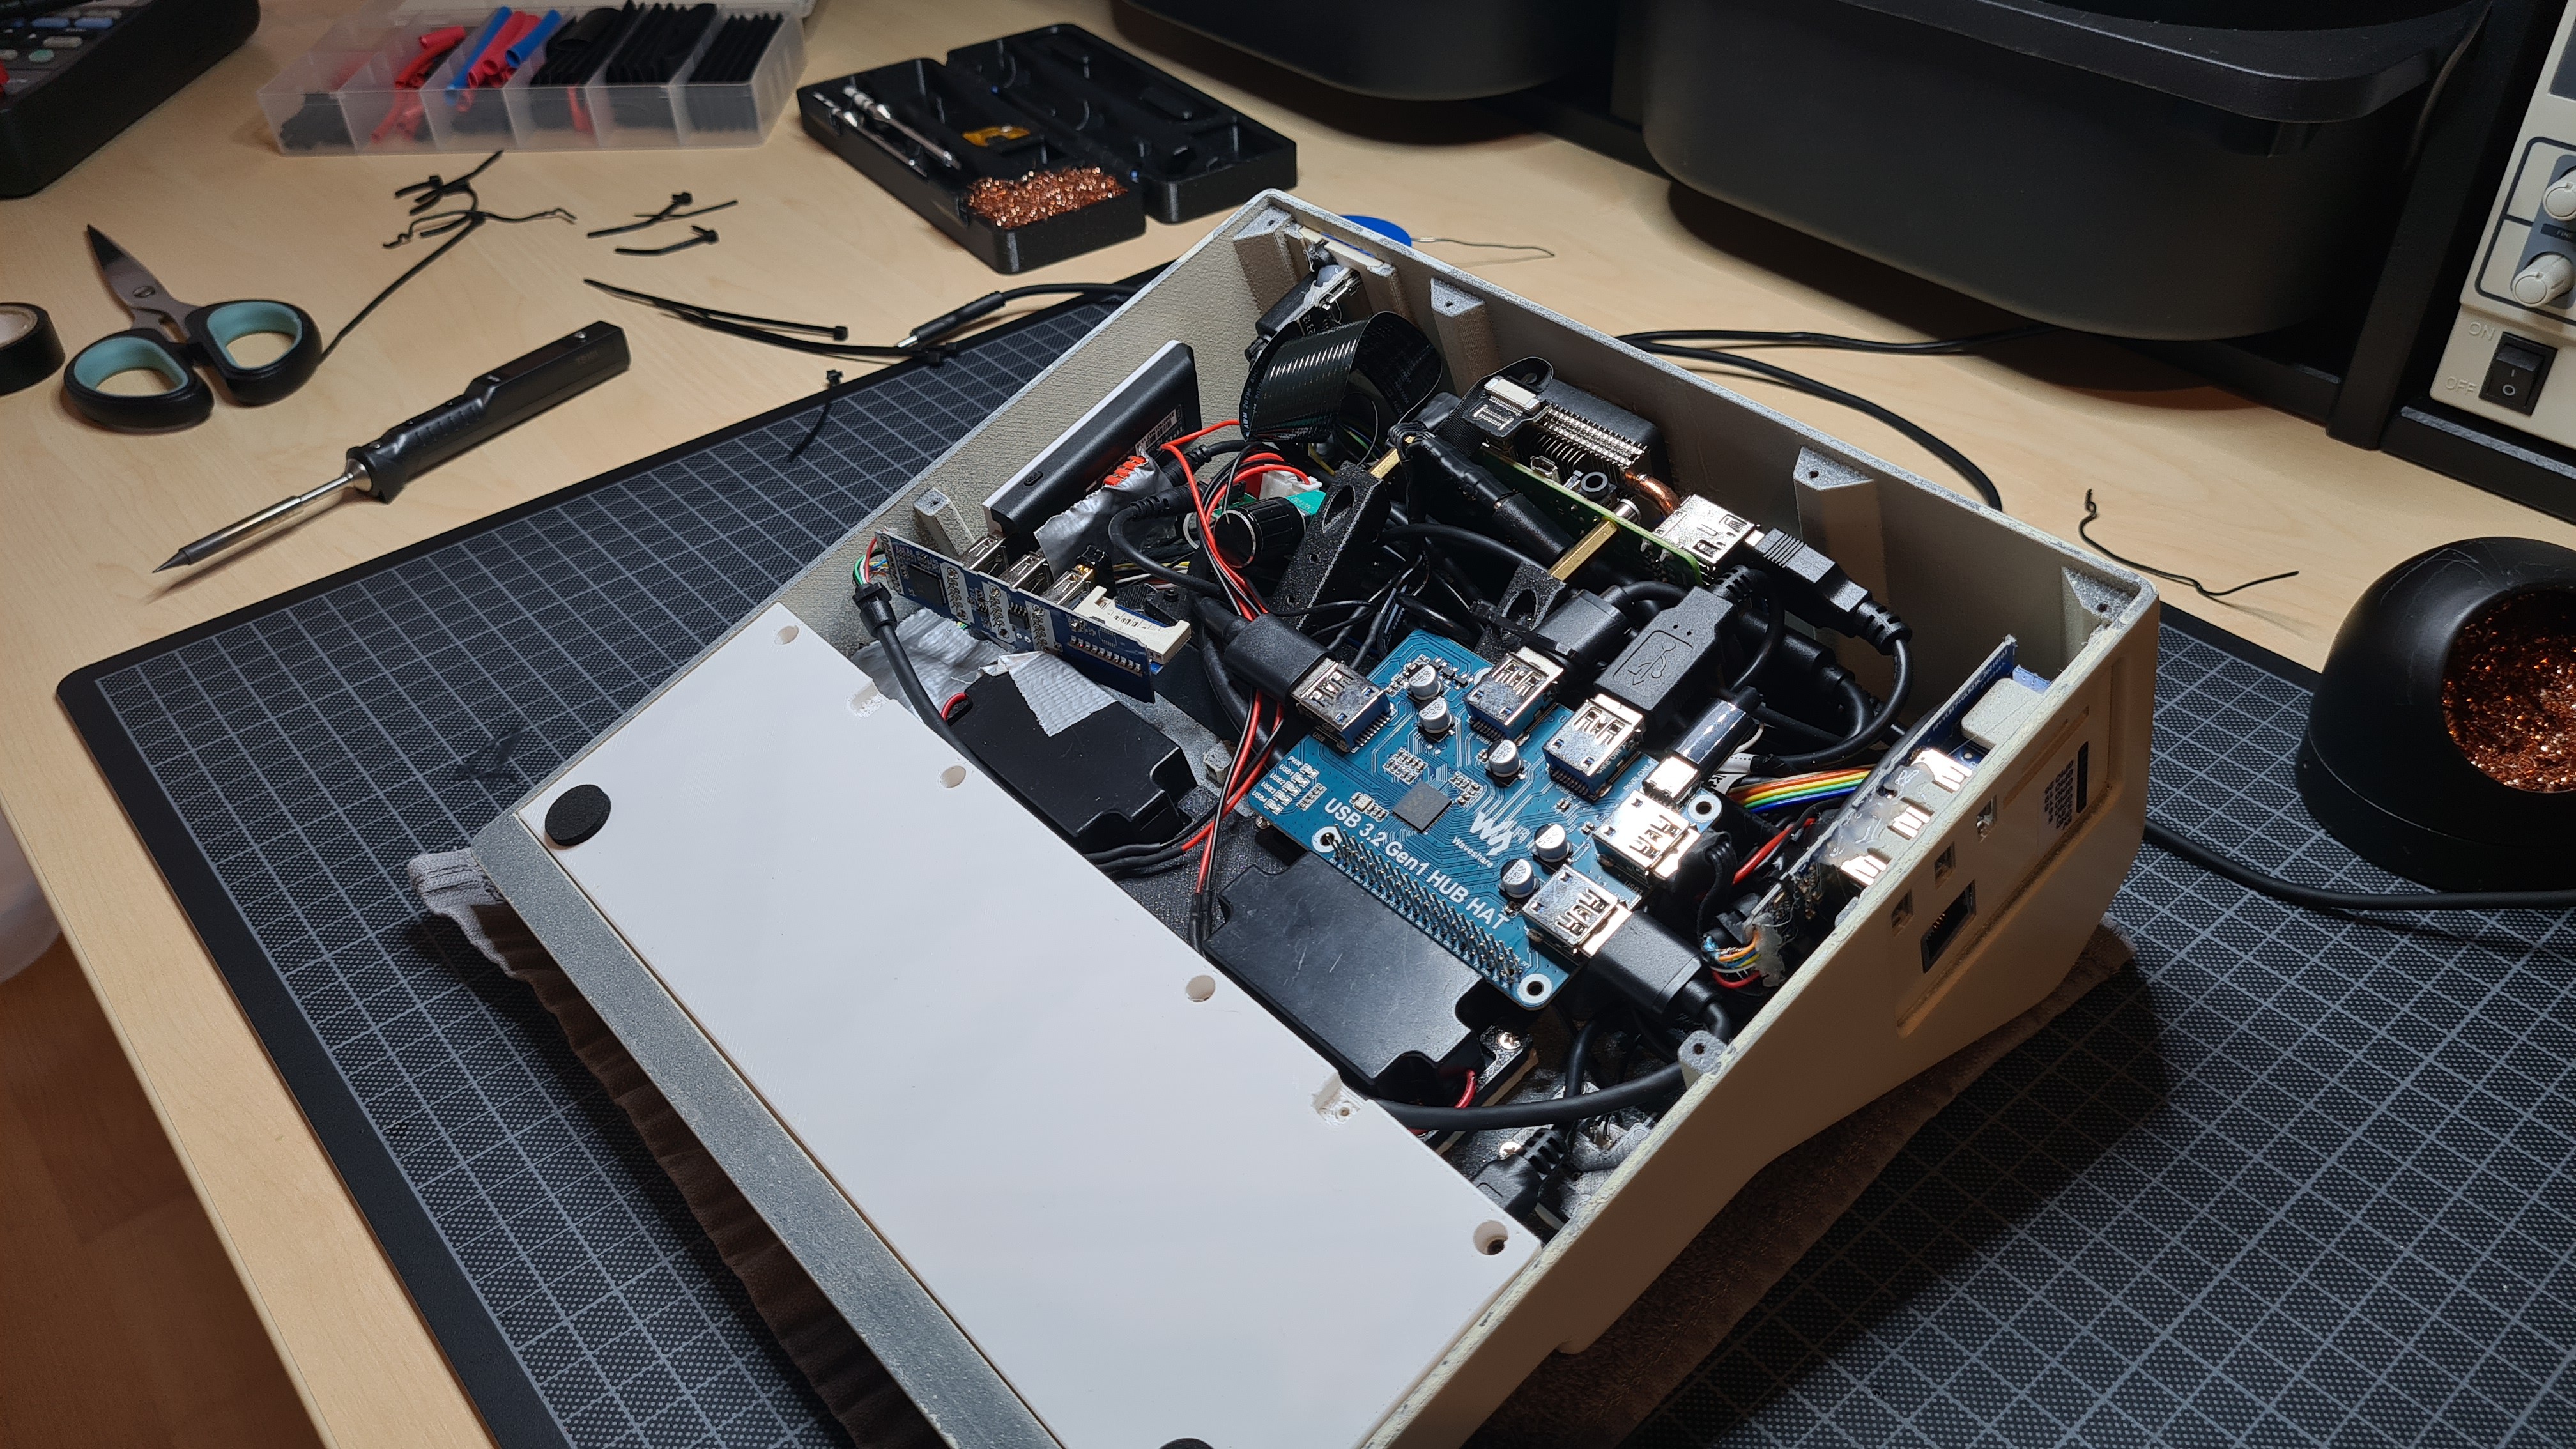
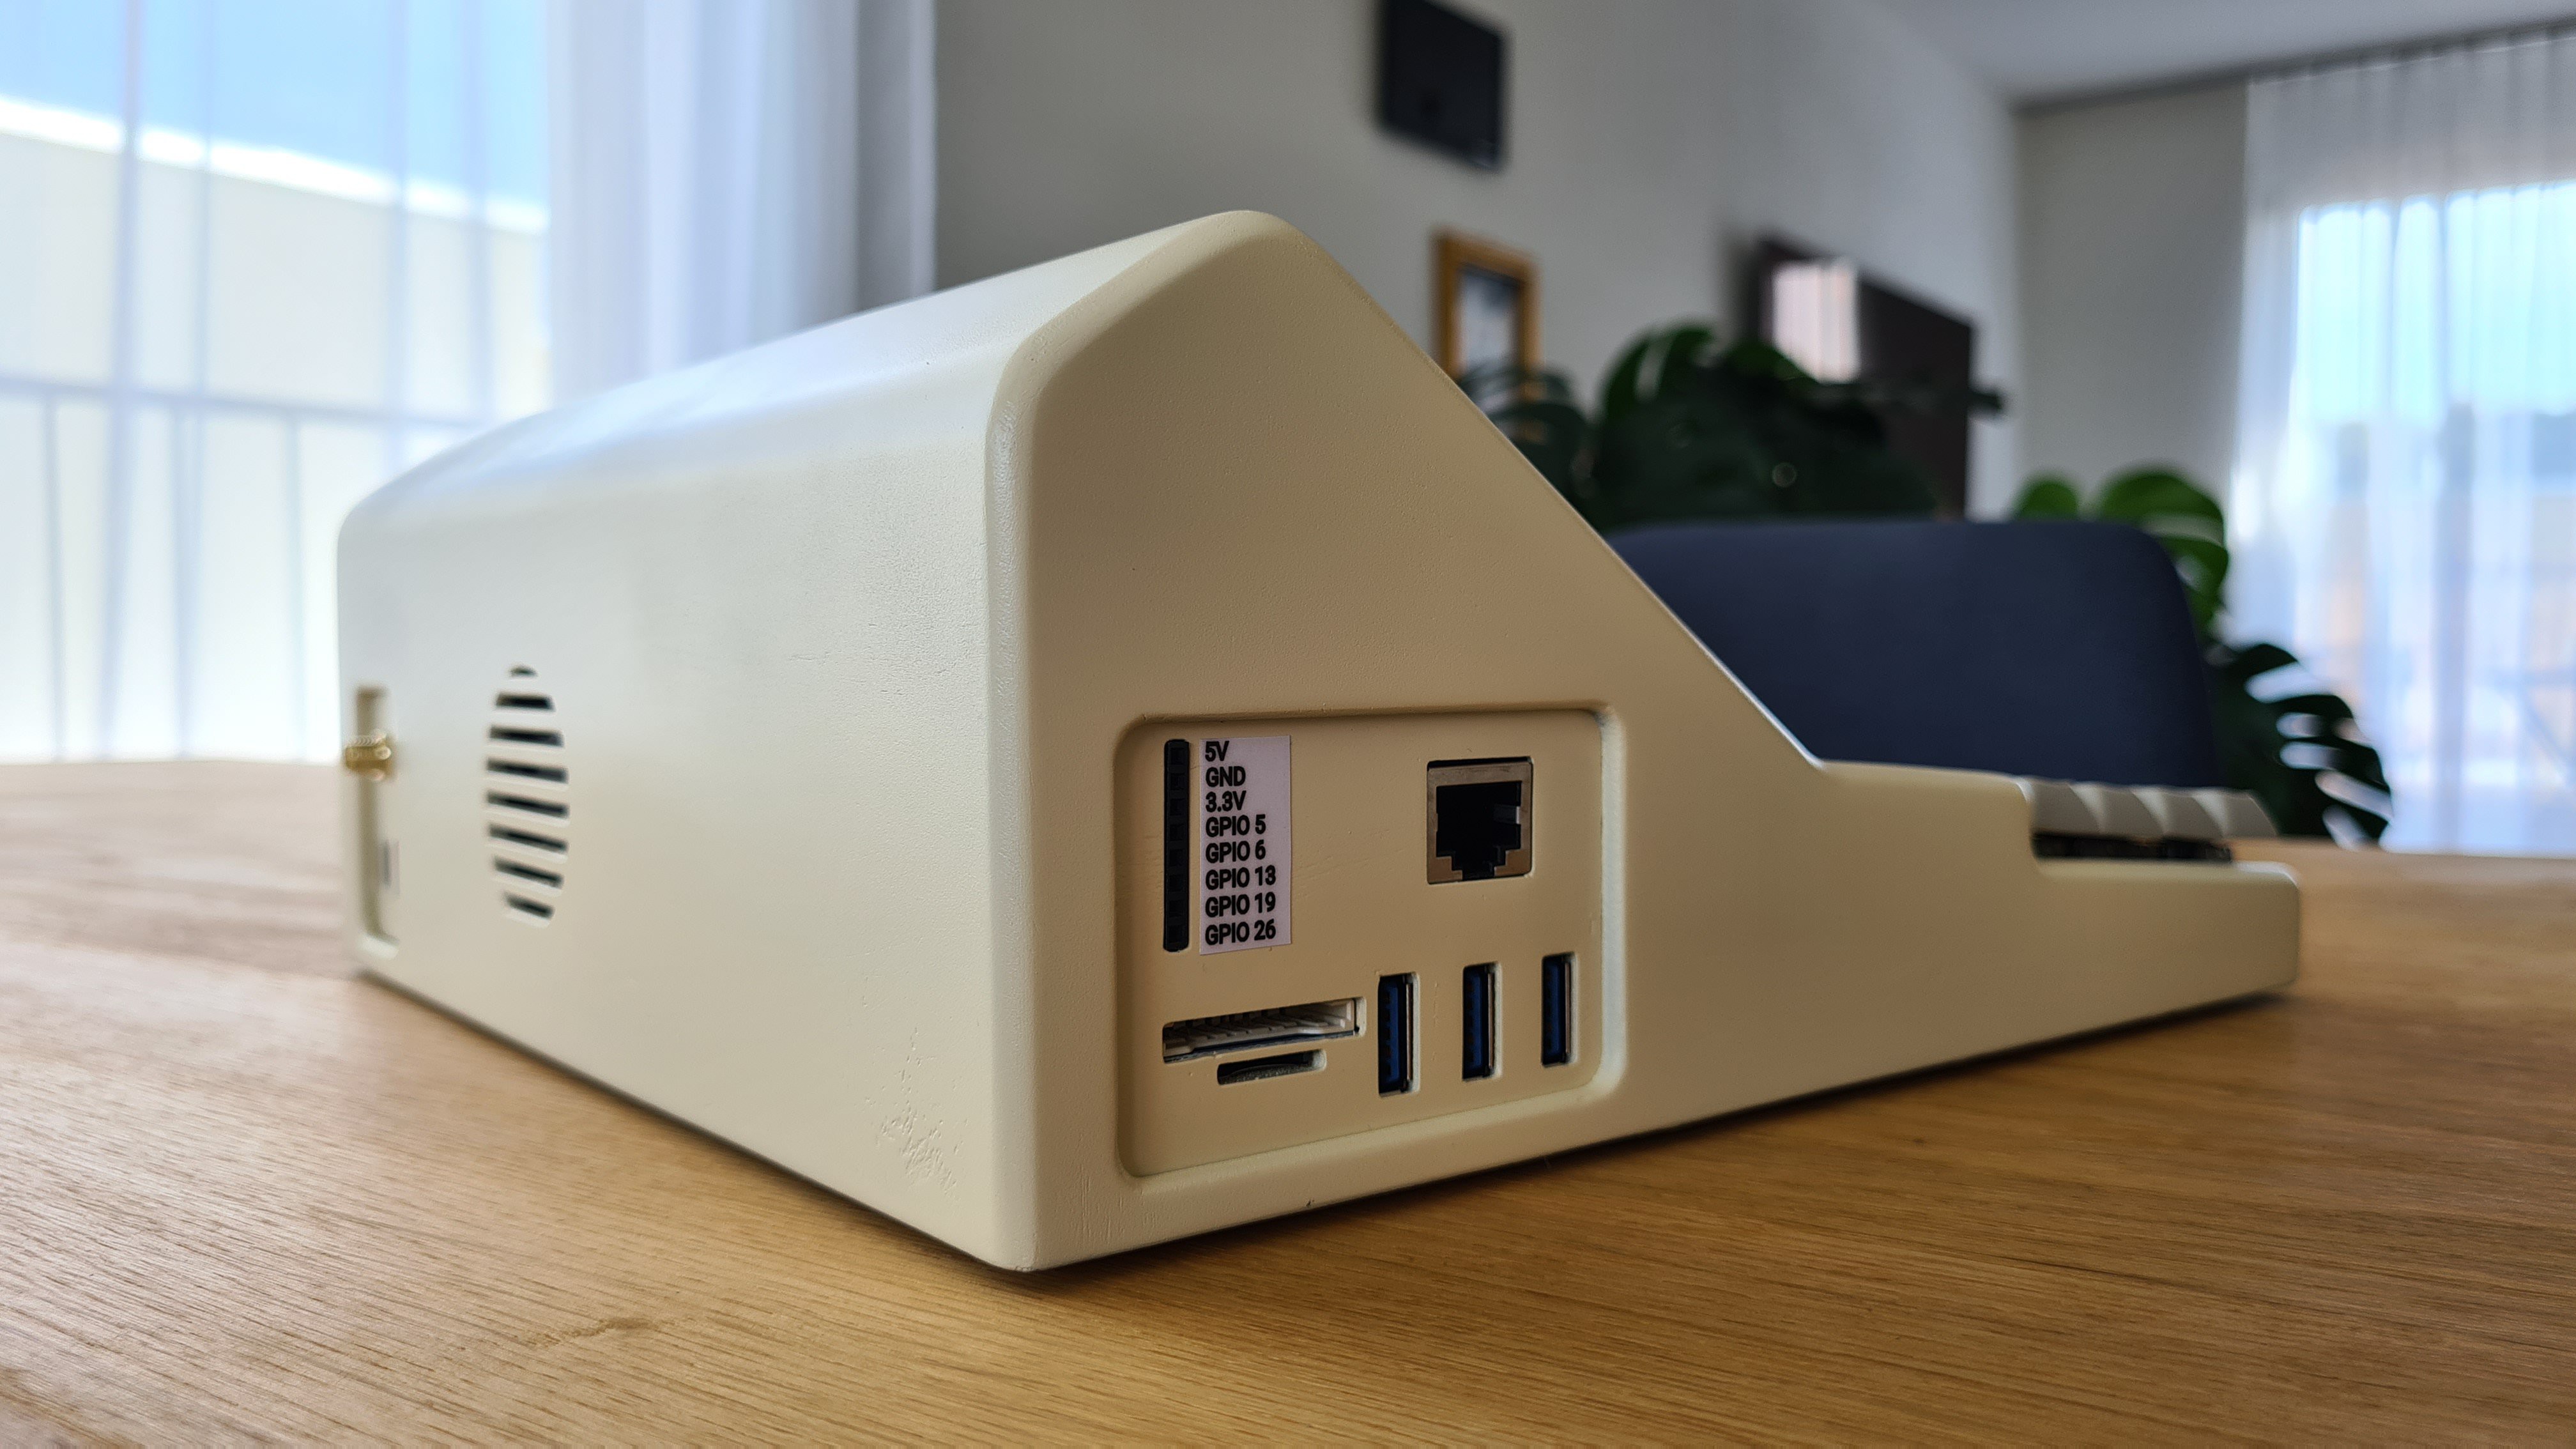
The Cyberdeck housing is designed in such a way that all components are screwed to the housing from the inside with sufficient space reserves. This means that holders for components can be changed later, and also the IO panels are both very easy to adapt and replace.

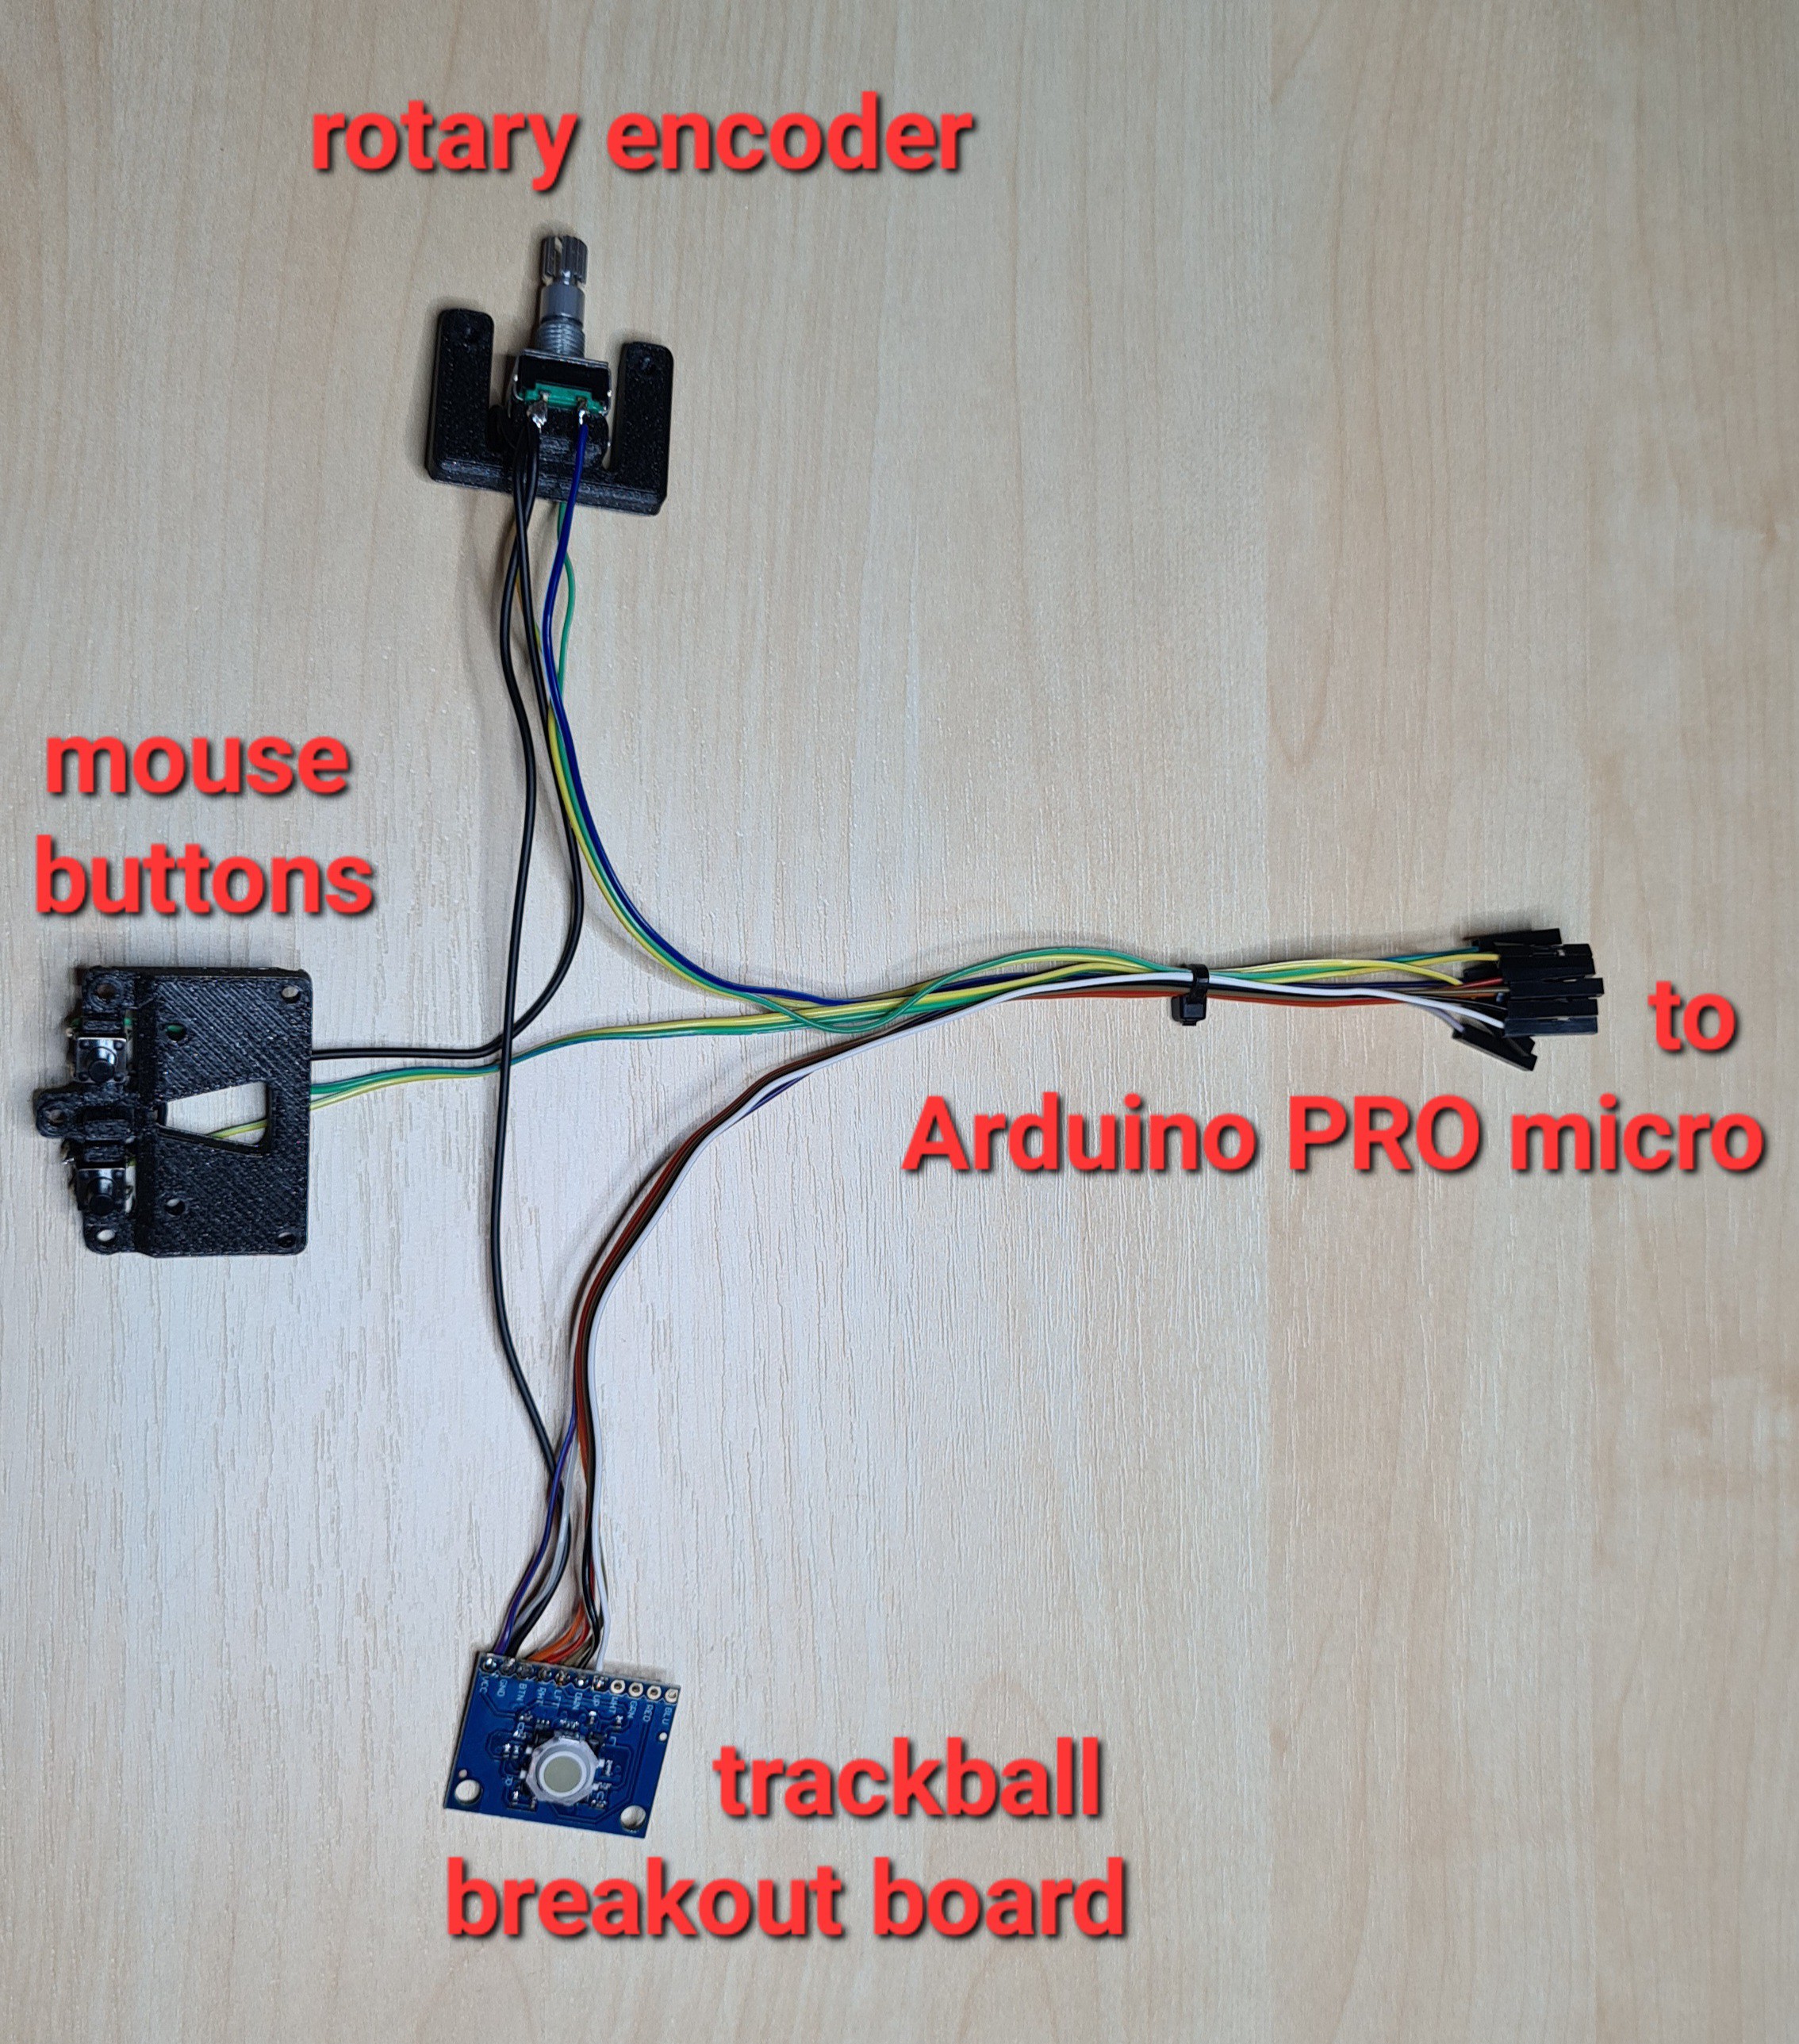
Due to the compact design, I decided to use a trackball instead of a mini trackpad, since I also want to remain flexible with the SBC, the trackpad is connected to the SBC via USB. This required a Arduino PRO micro which also takes the controller function for the side wheel.

It's my first project with fusion 360.

Special features

  • side wheel with button for cursor keys and enter (useful in the terminal) 
  • very easily customizable IO and back panel (because I'm someone whose projects are never really finished) 
  • two wifi adapters (USB and Raspberry builtin)
  • two bluetooth adapters (USB and Raspberry builtin)
  • zigbee adapter (to debug zigbee networks)
  • internal SD or microSD memory 
  • three external usb ports 
  • external SD and microSDcard reader 
  • external 5 gpio connectors, 5V, 3.3V, ground (so that raspberry tinkering can be tested quickly with a breadboard)
  • can be used as a full desktop

Design in general

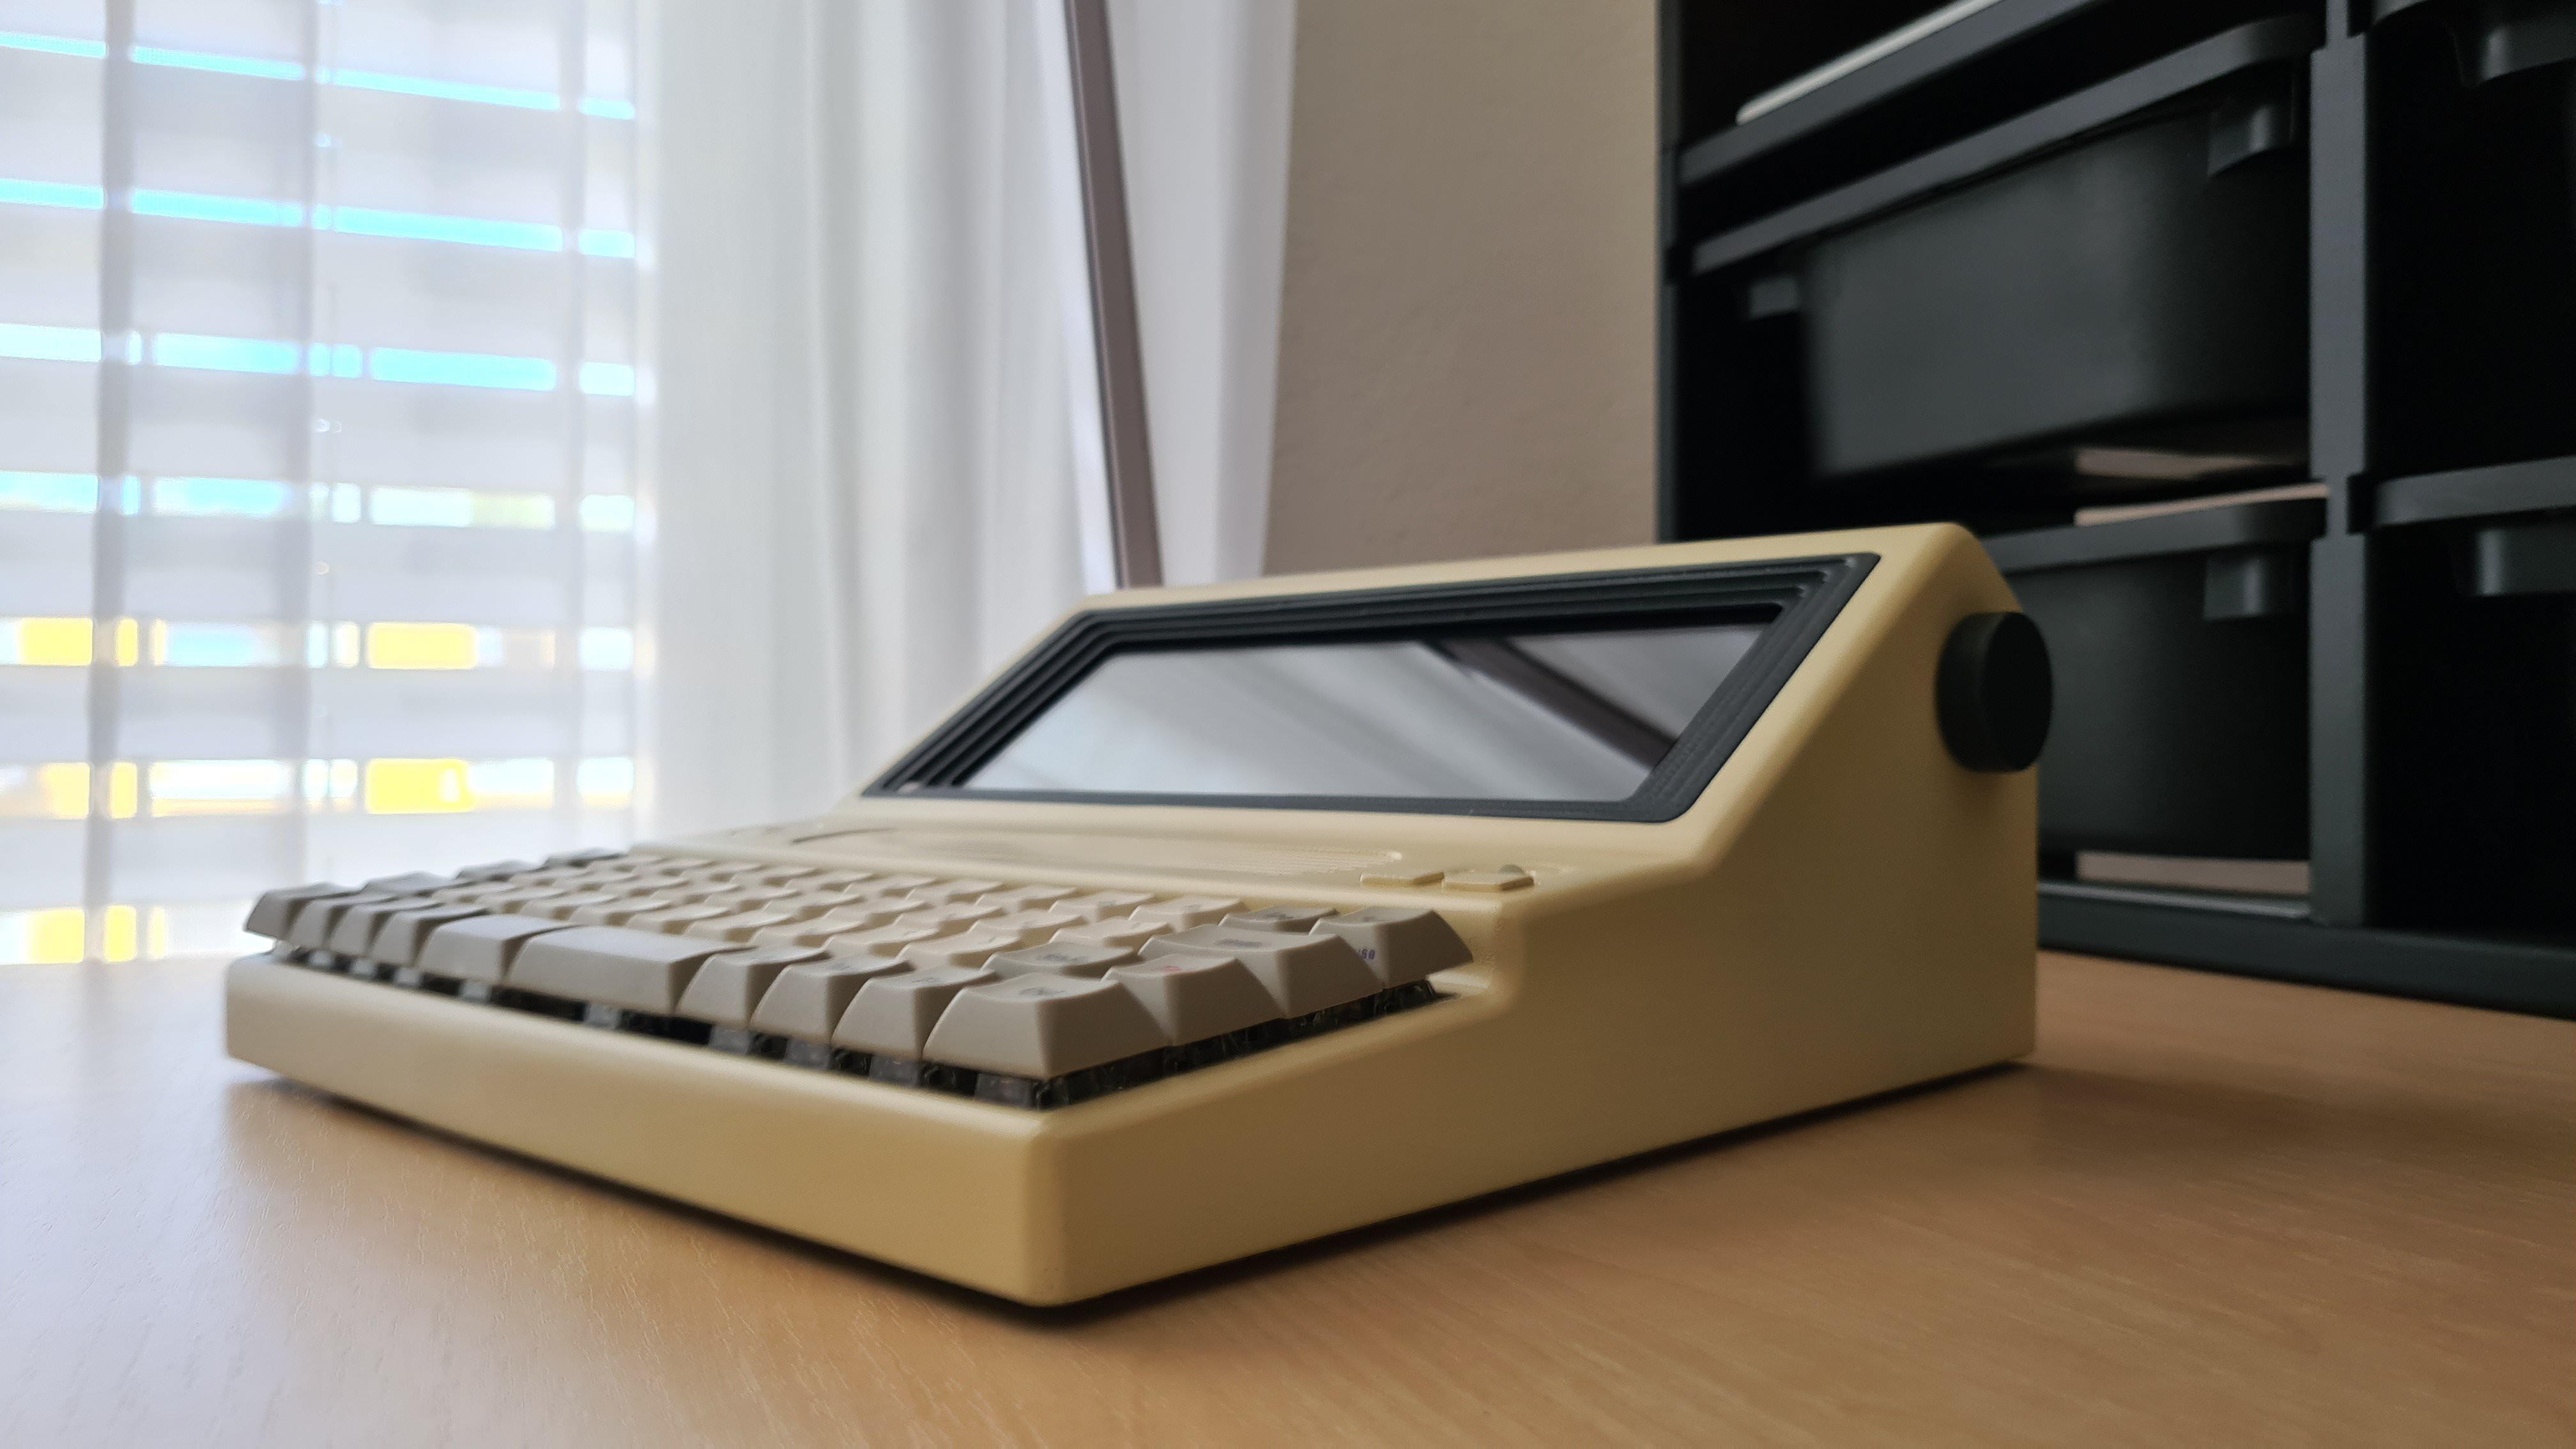
  • retro look
  • sturdy
  • compact
  • easy assembly (without glue)
  • easy access to the internal components
  • customizable without having to reprint the case
  • no screws visible from the outside
  • dimensions 253x253x104mm

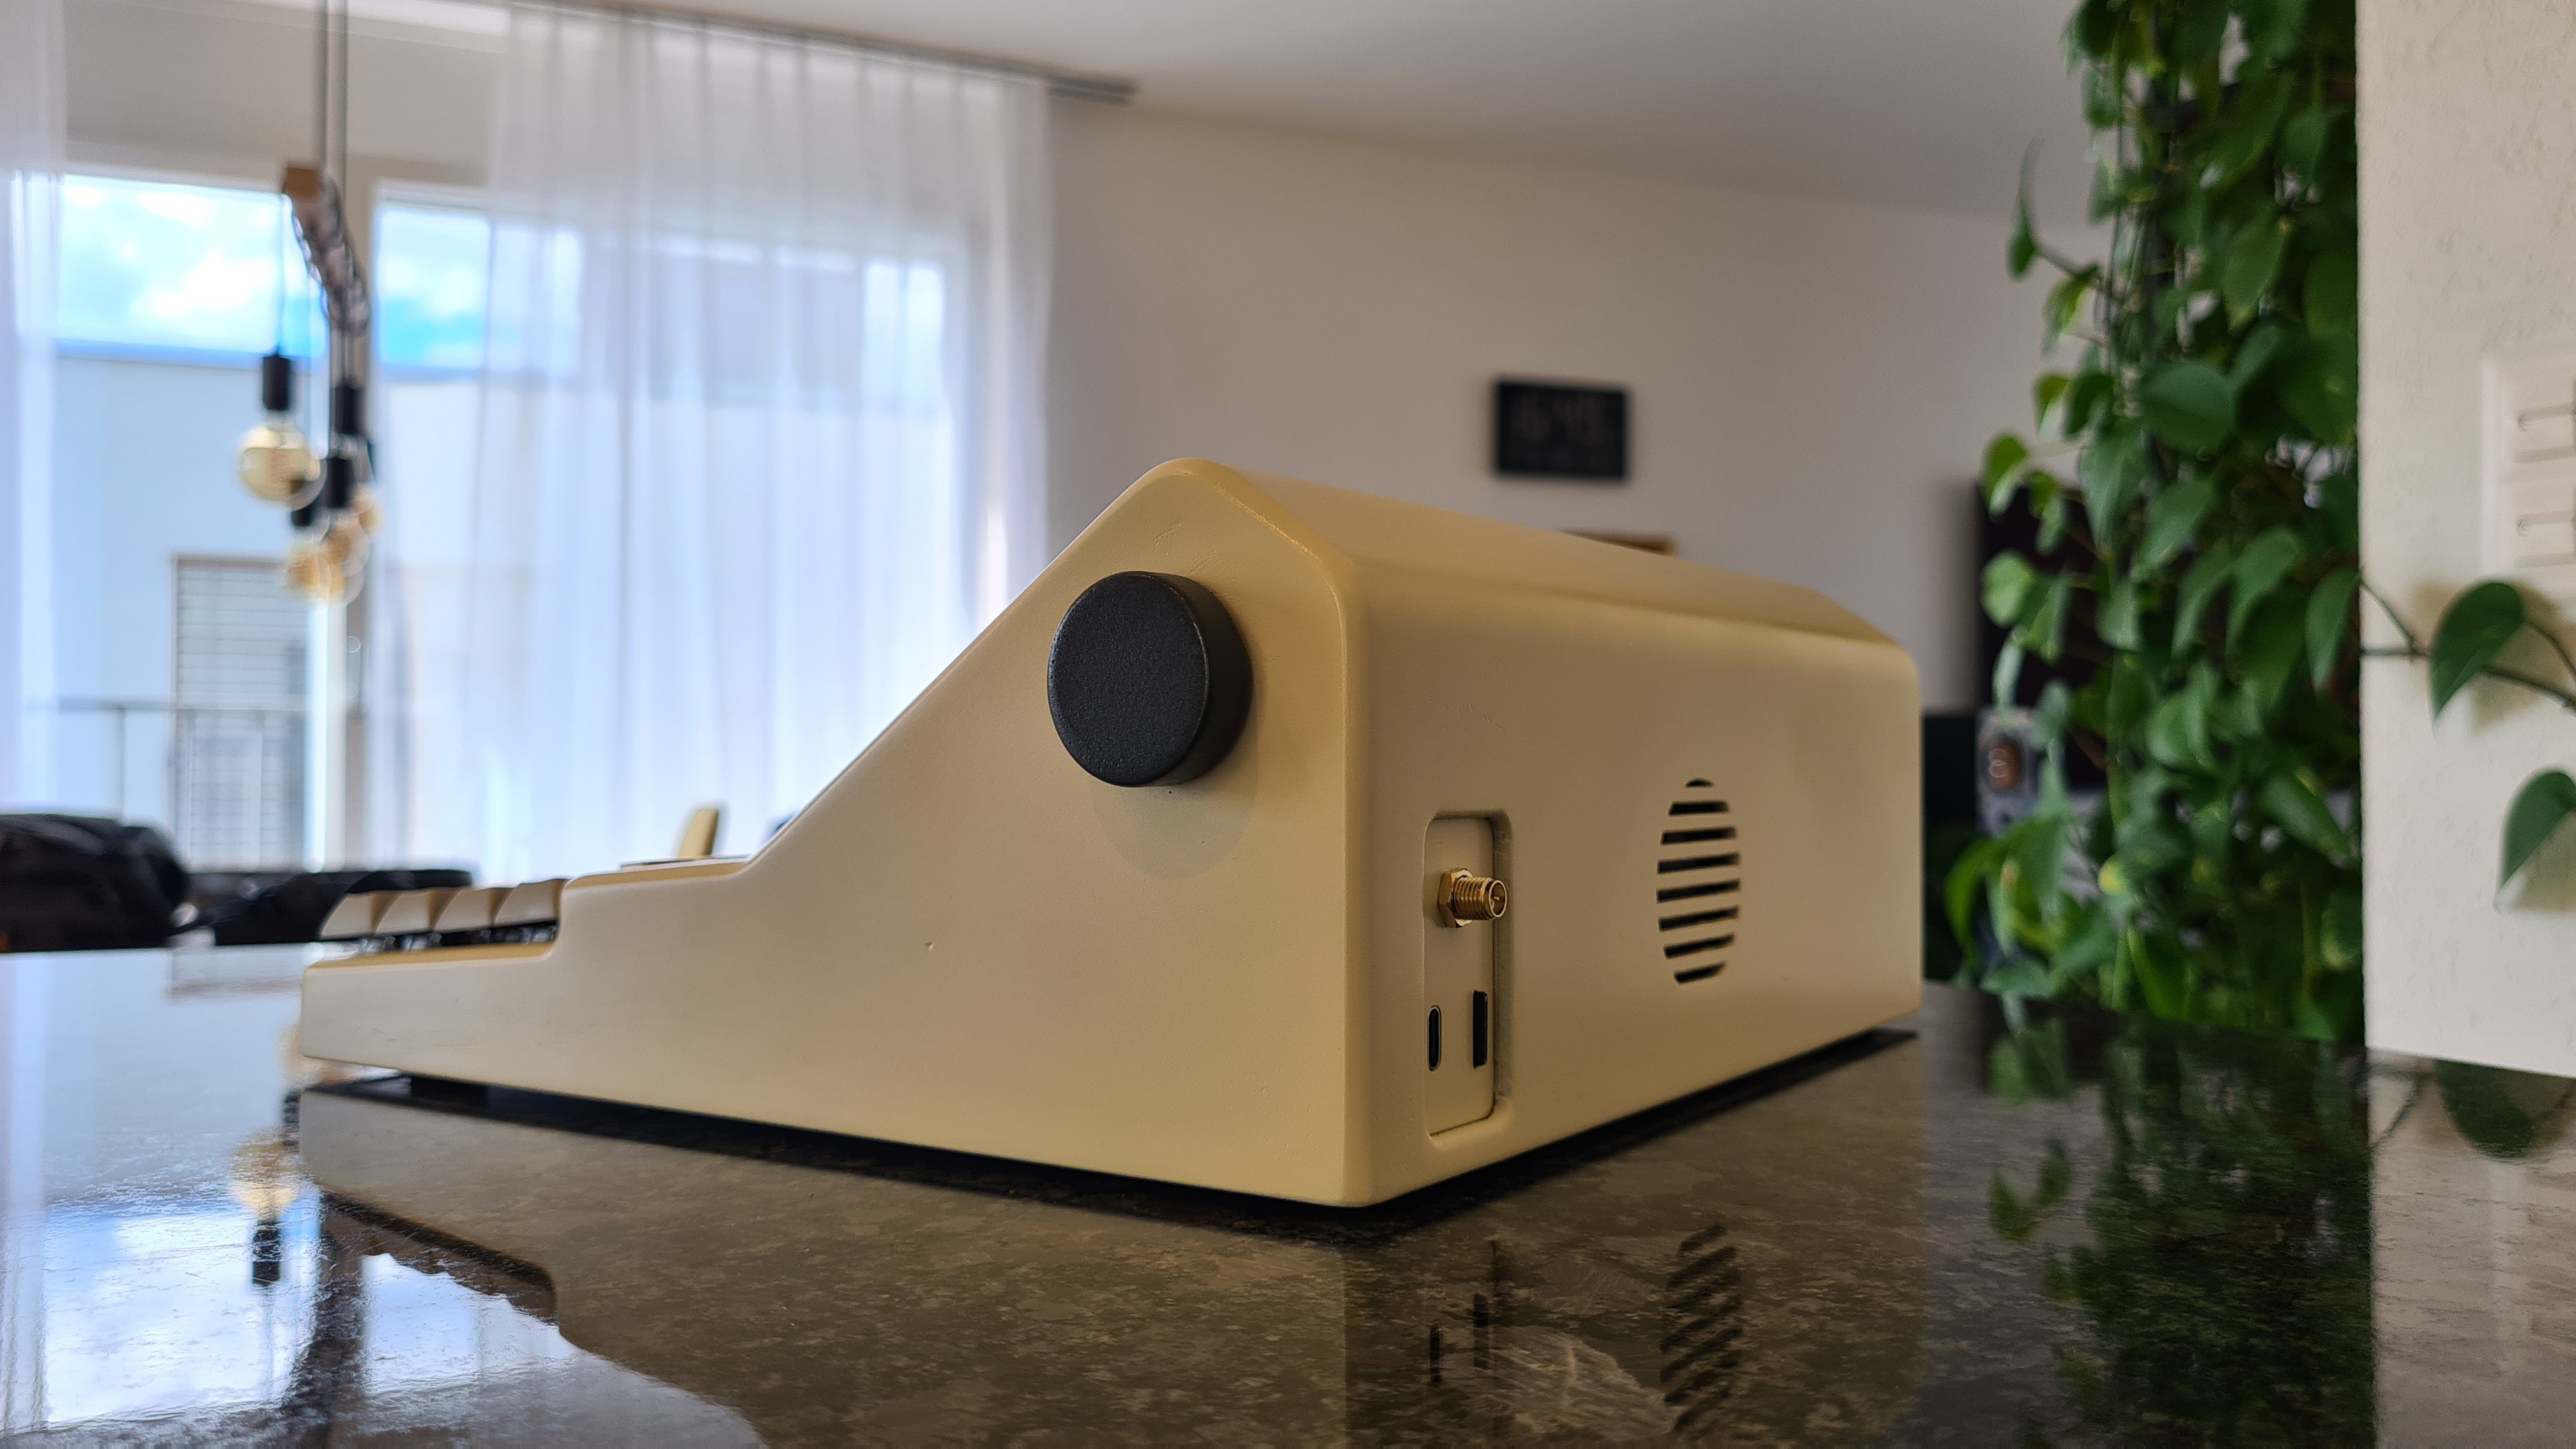
Rear panel 

(can be slided into the case and is held in position by the bottom cover)

  • raspberry microSD access
  • "usb c" charging port
  • external WiFi antenna

IO panel 

(can be slided into the case and is held in position by the bottom cover)

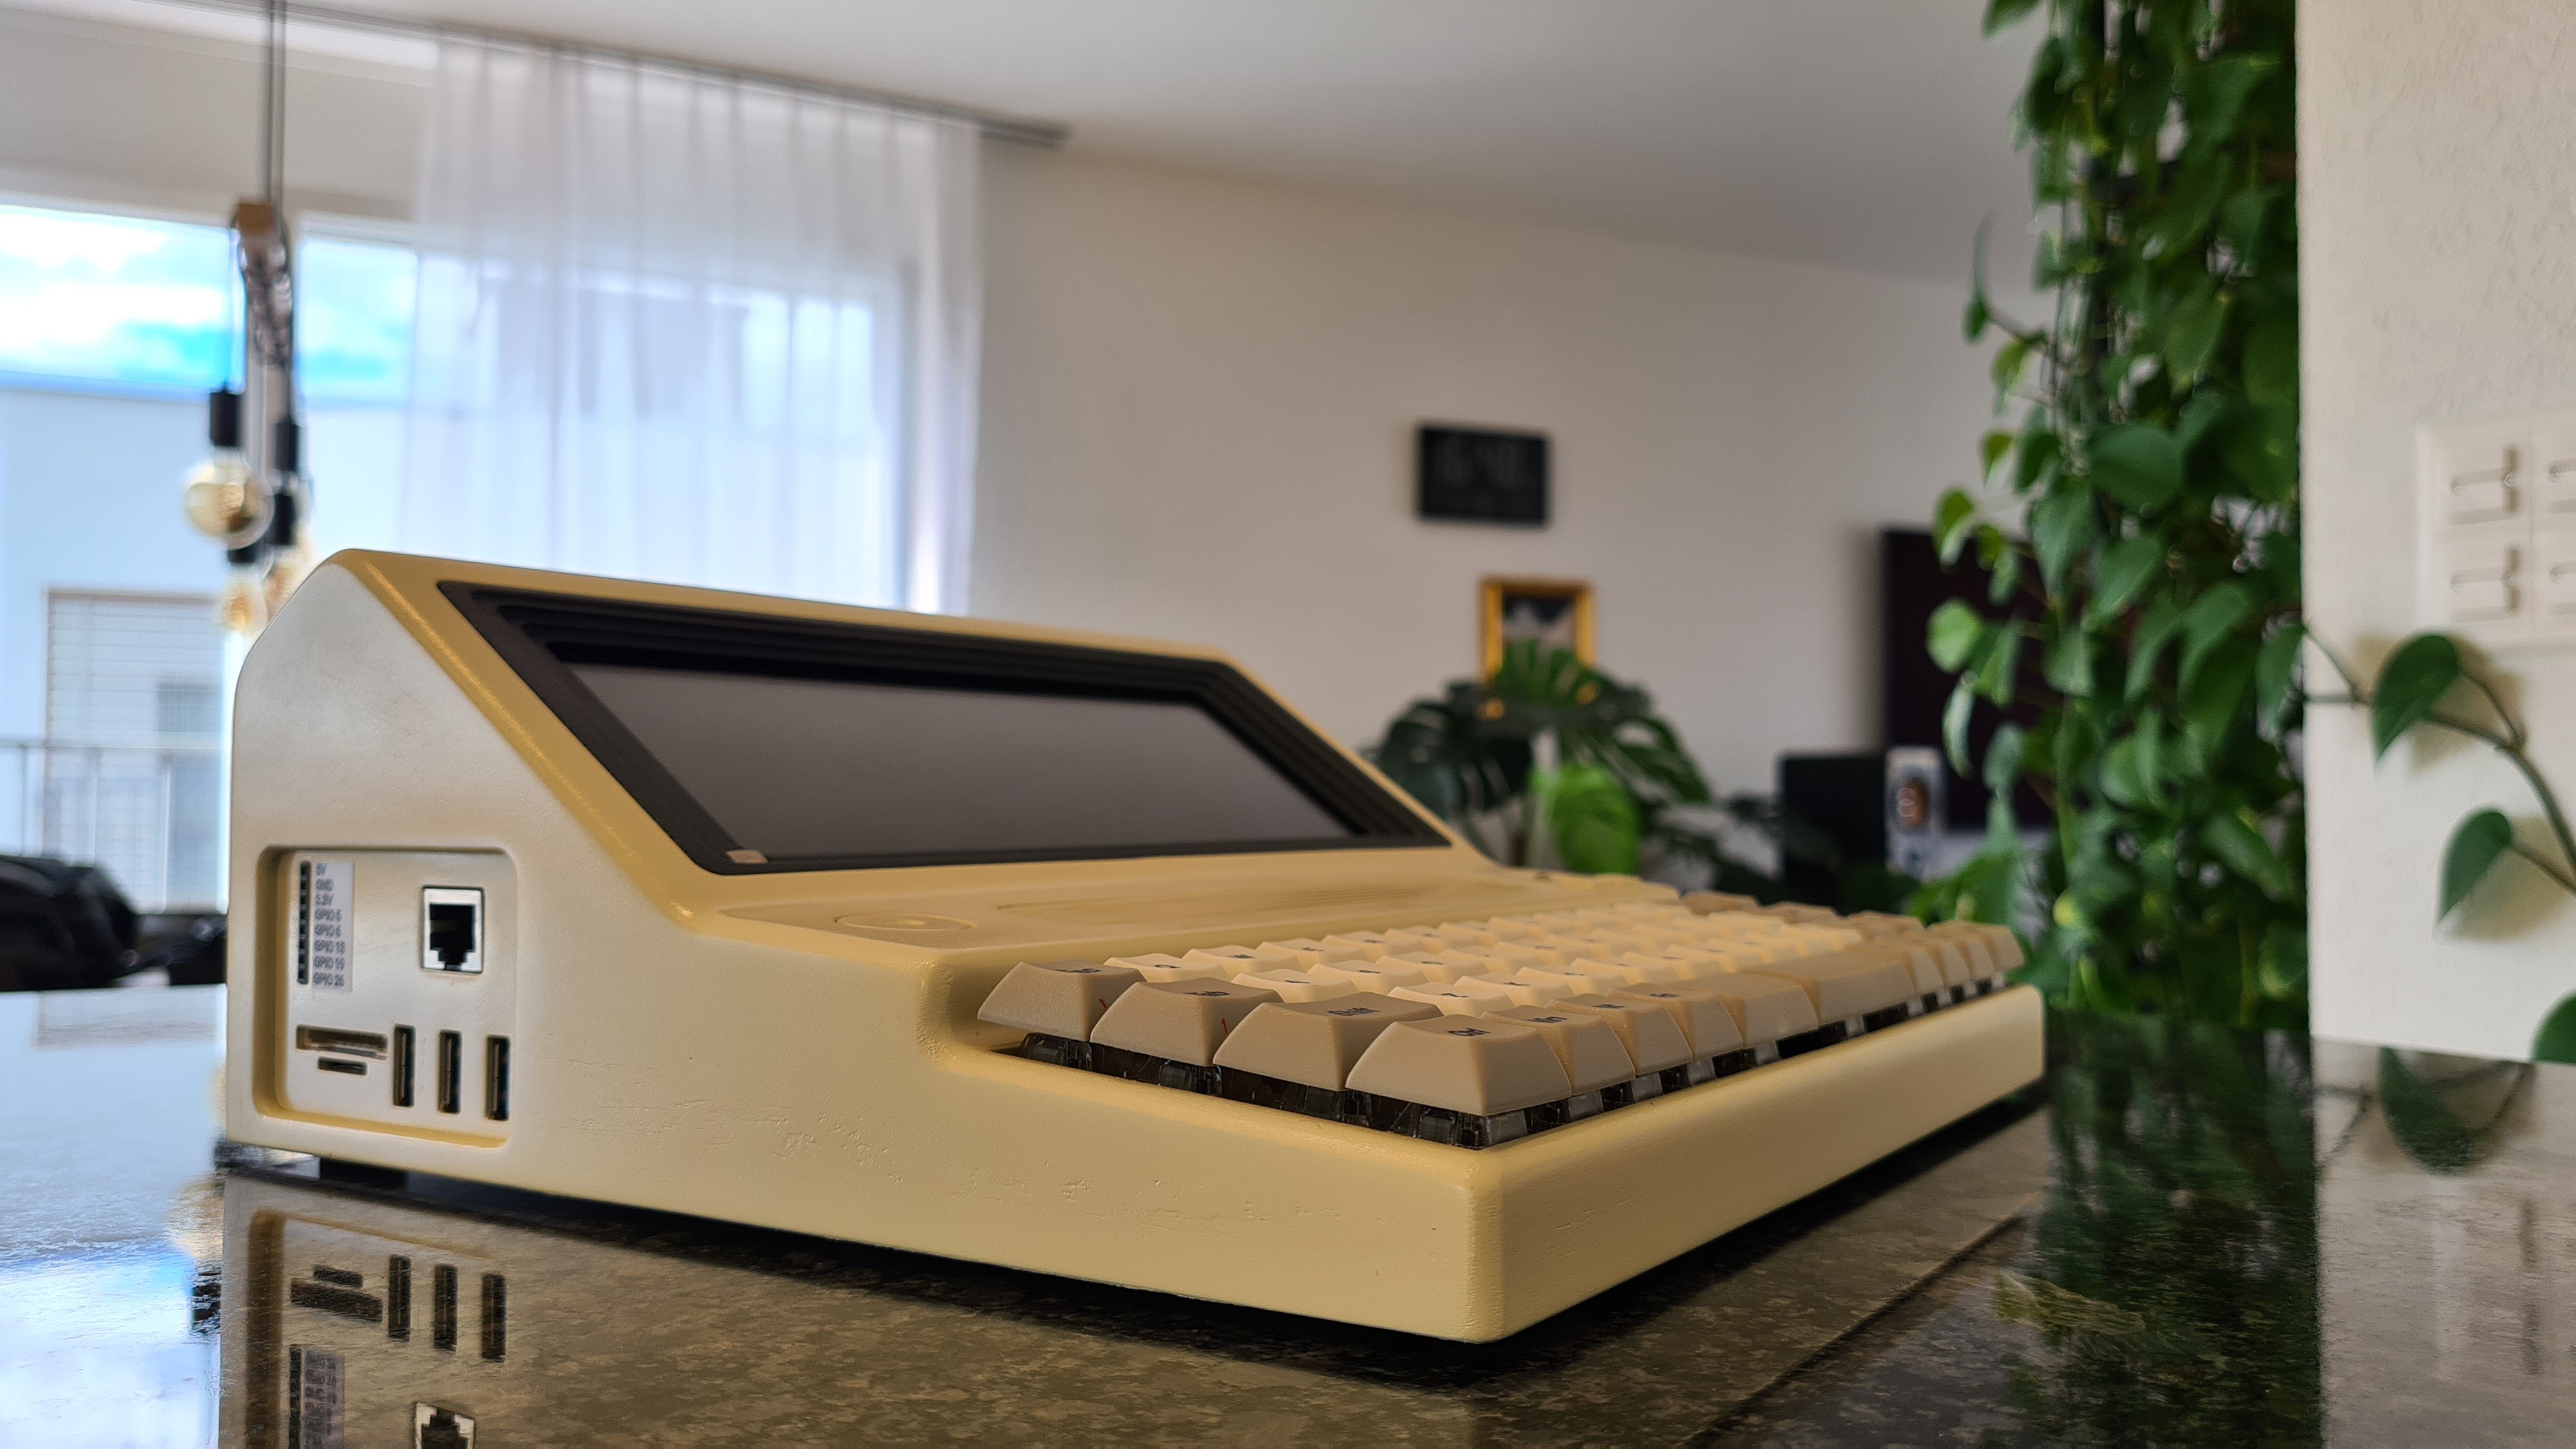
  • three USB Ports
  • 8pin gpio (5v, 3.3v, ground, gpio's)
  • RJ45 LAN

Peripherals

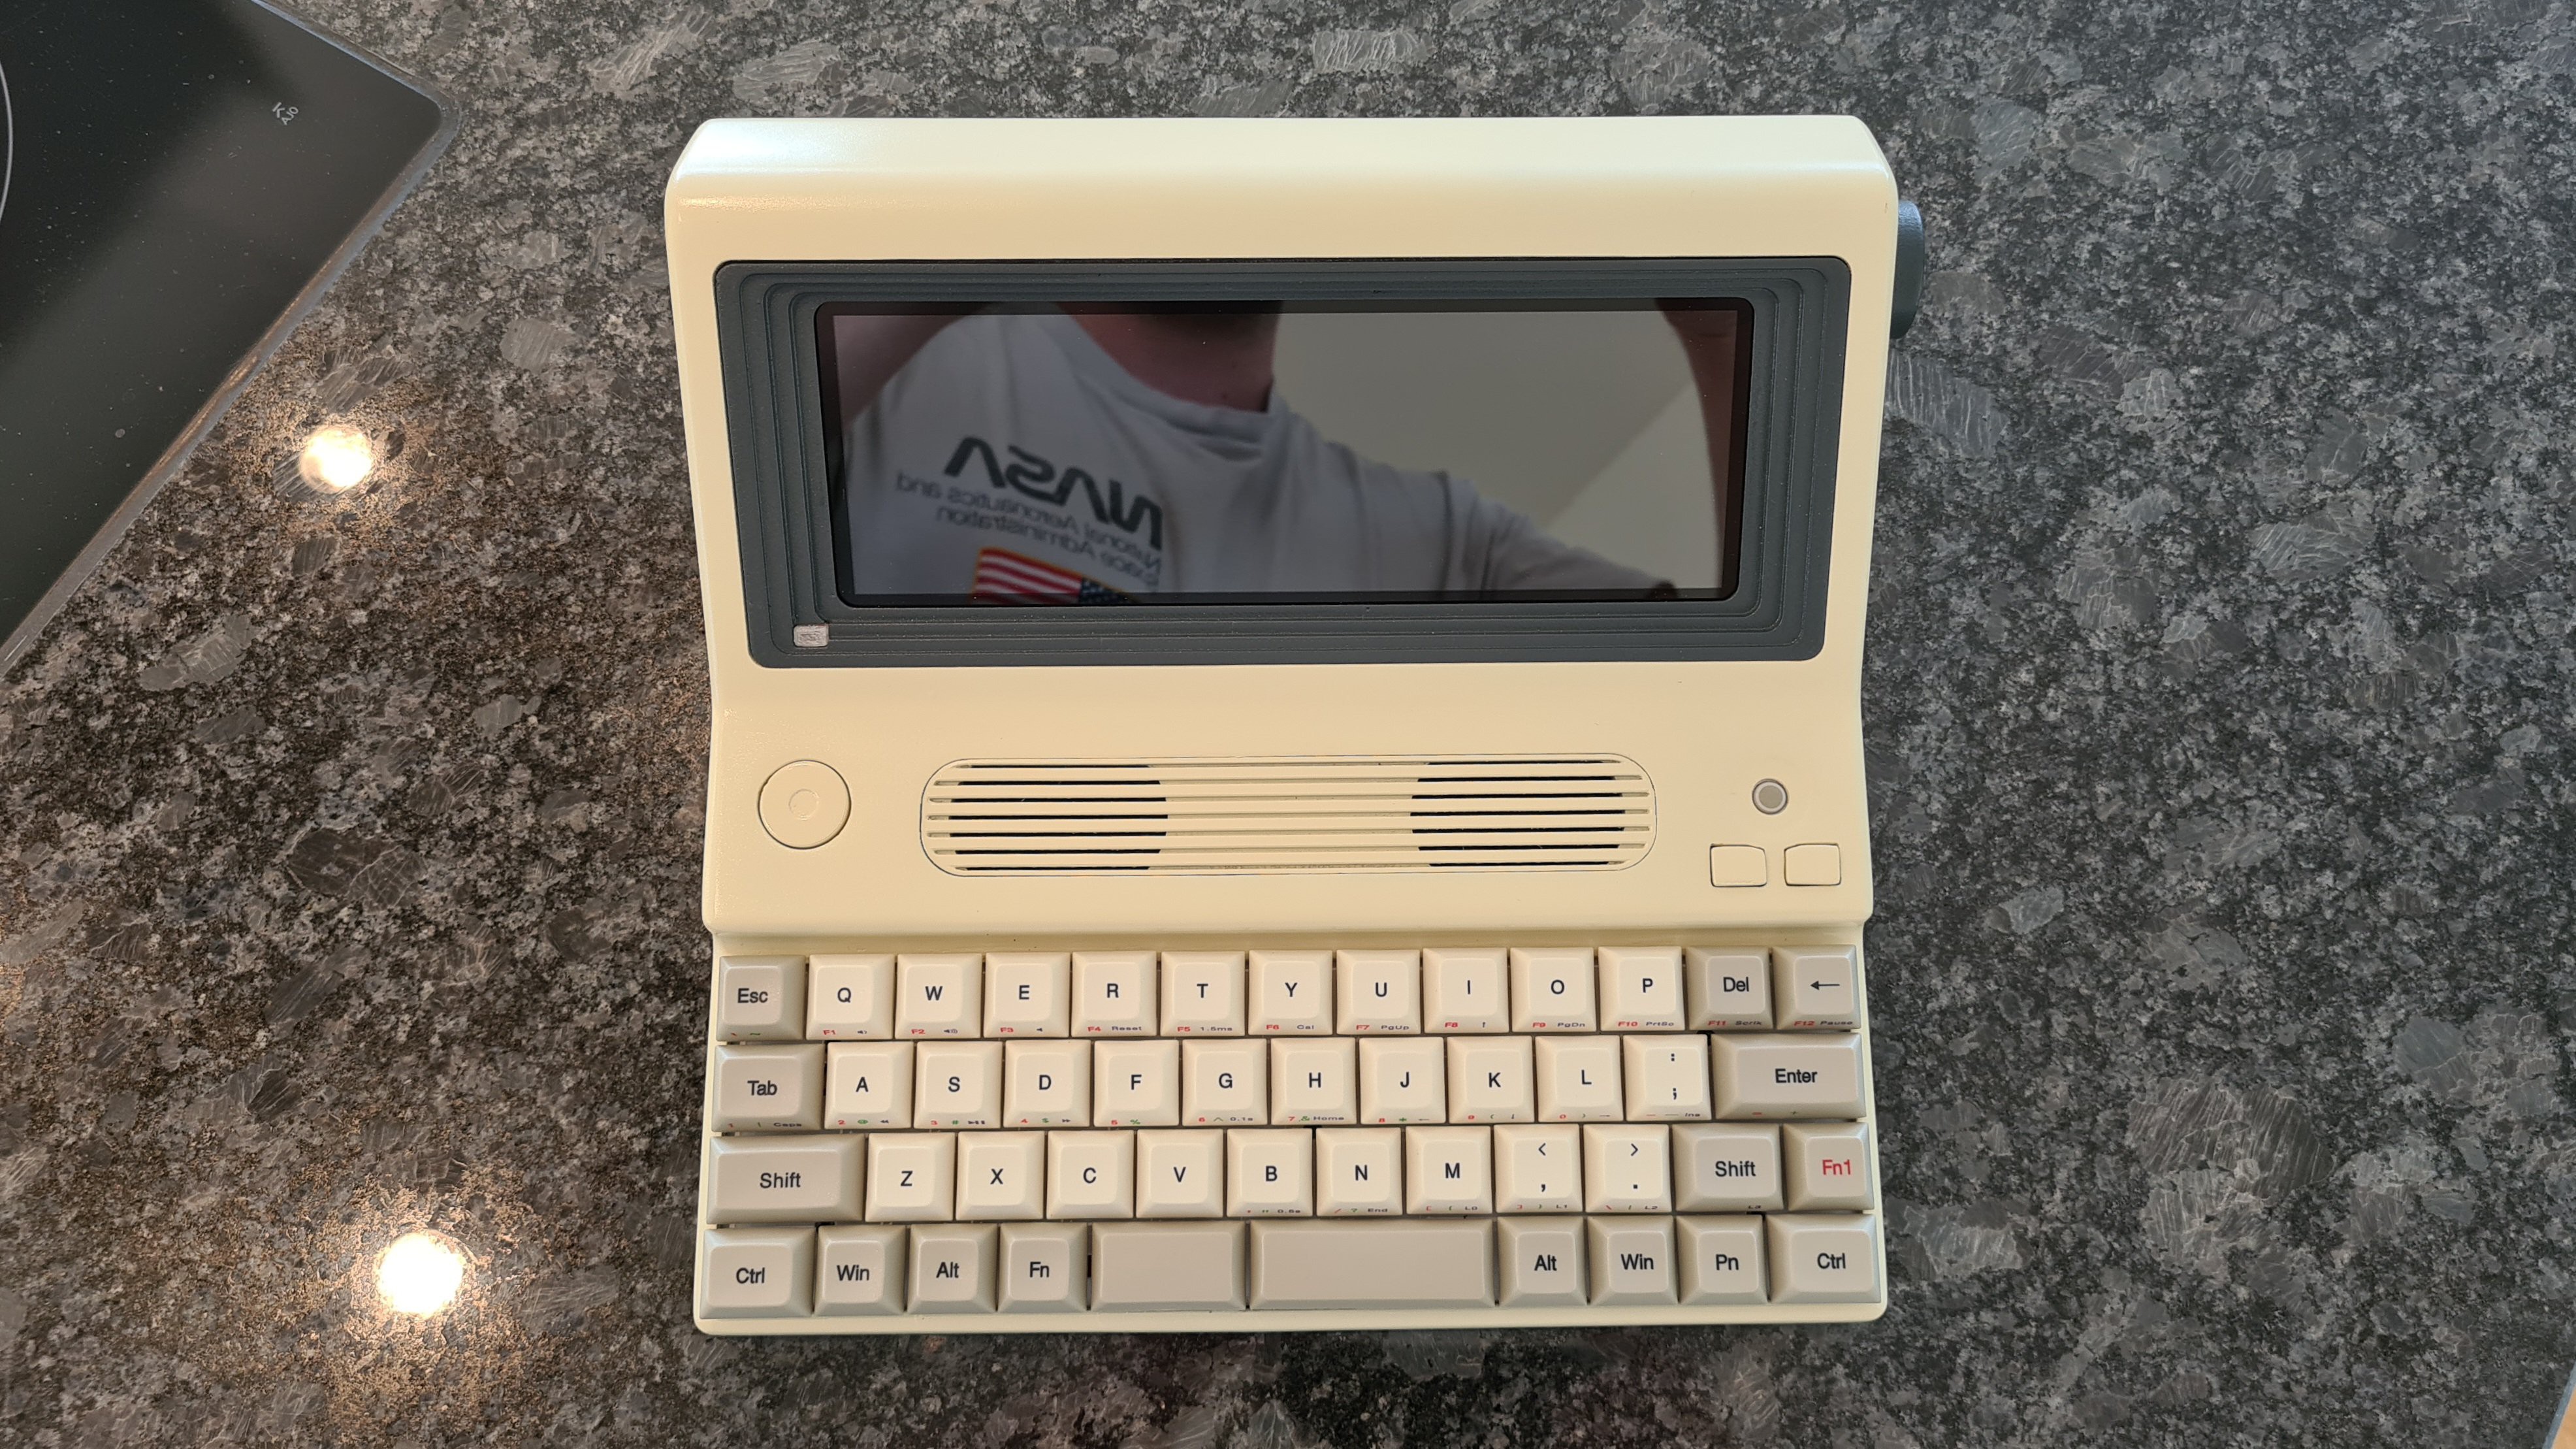
  • trackball and mouse buttons
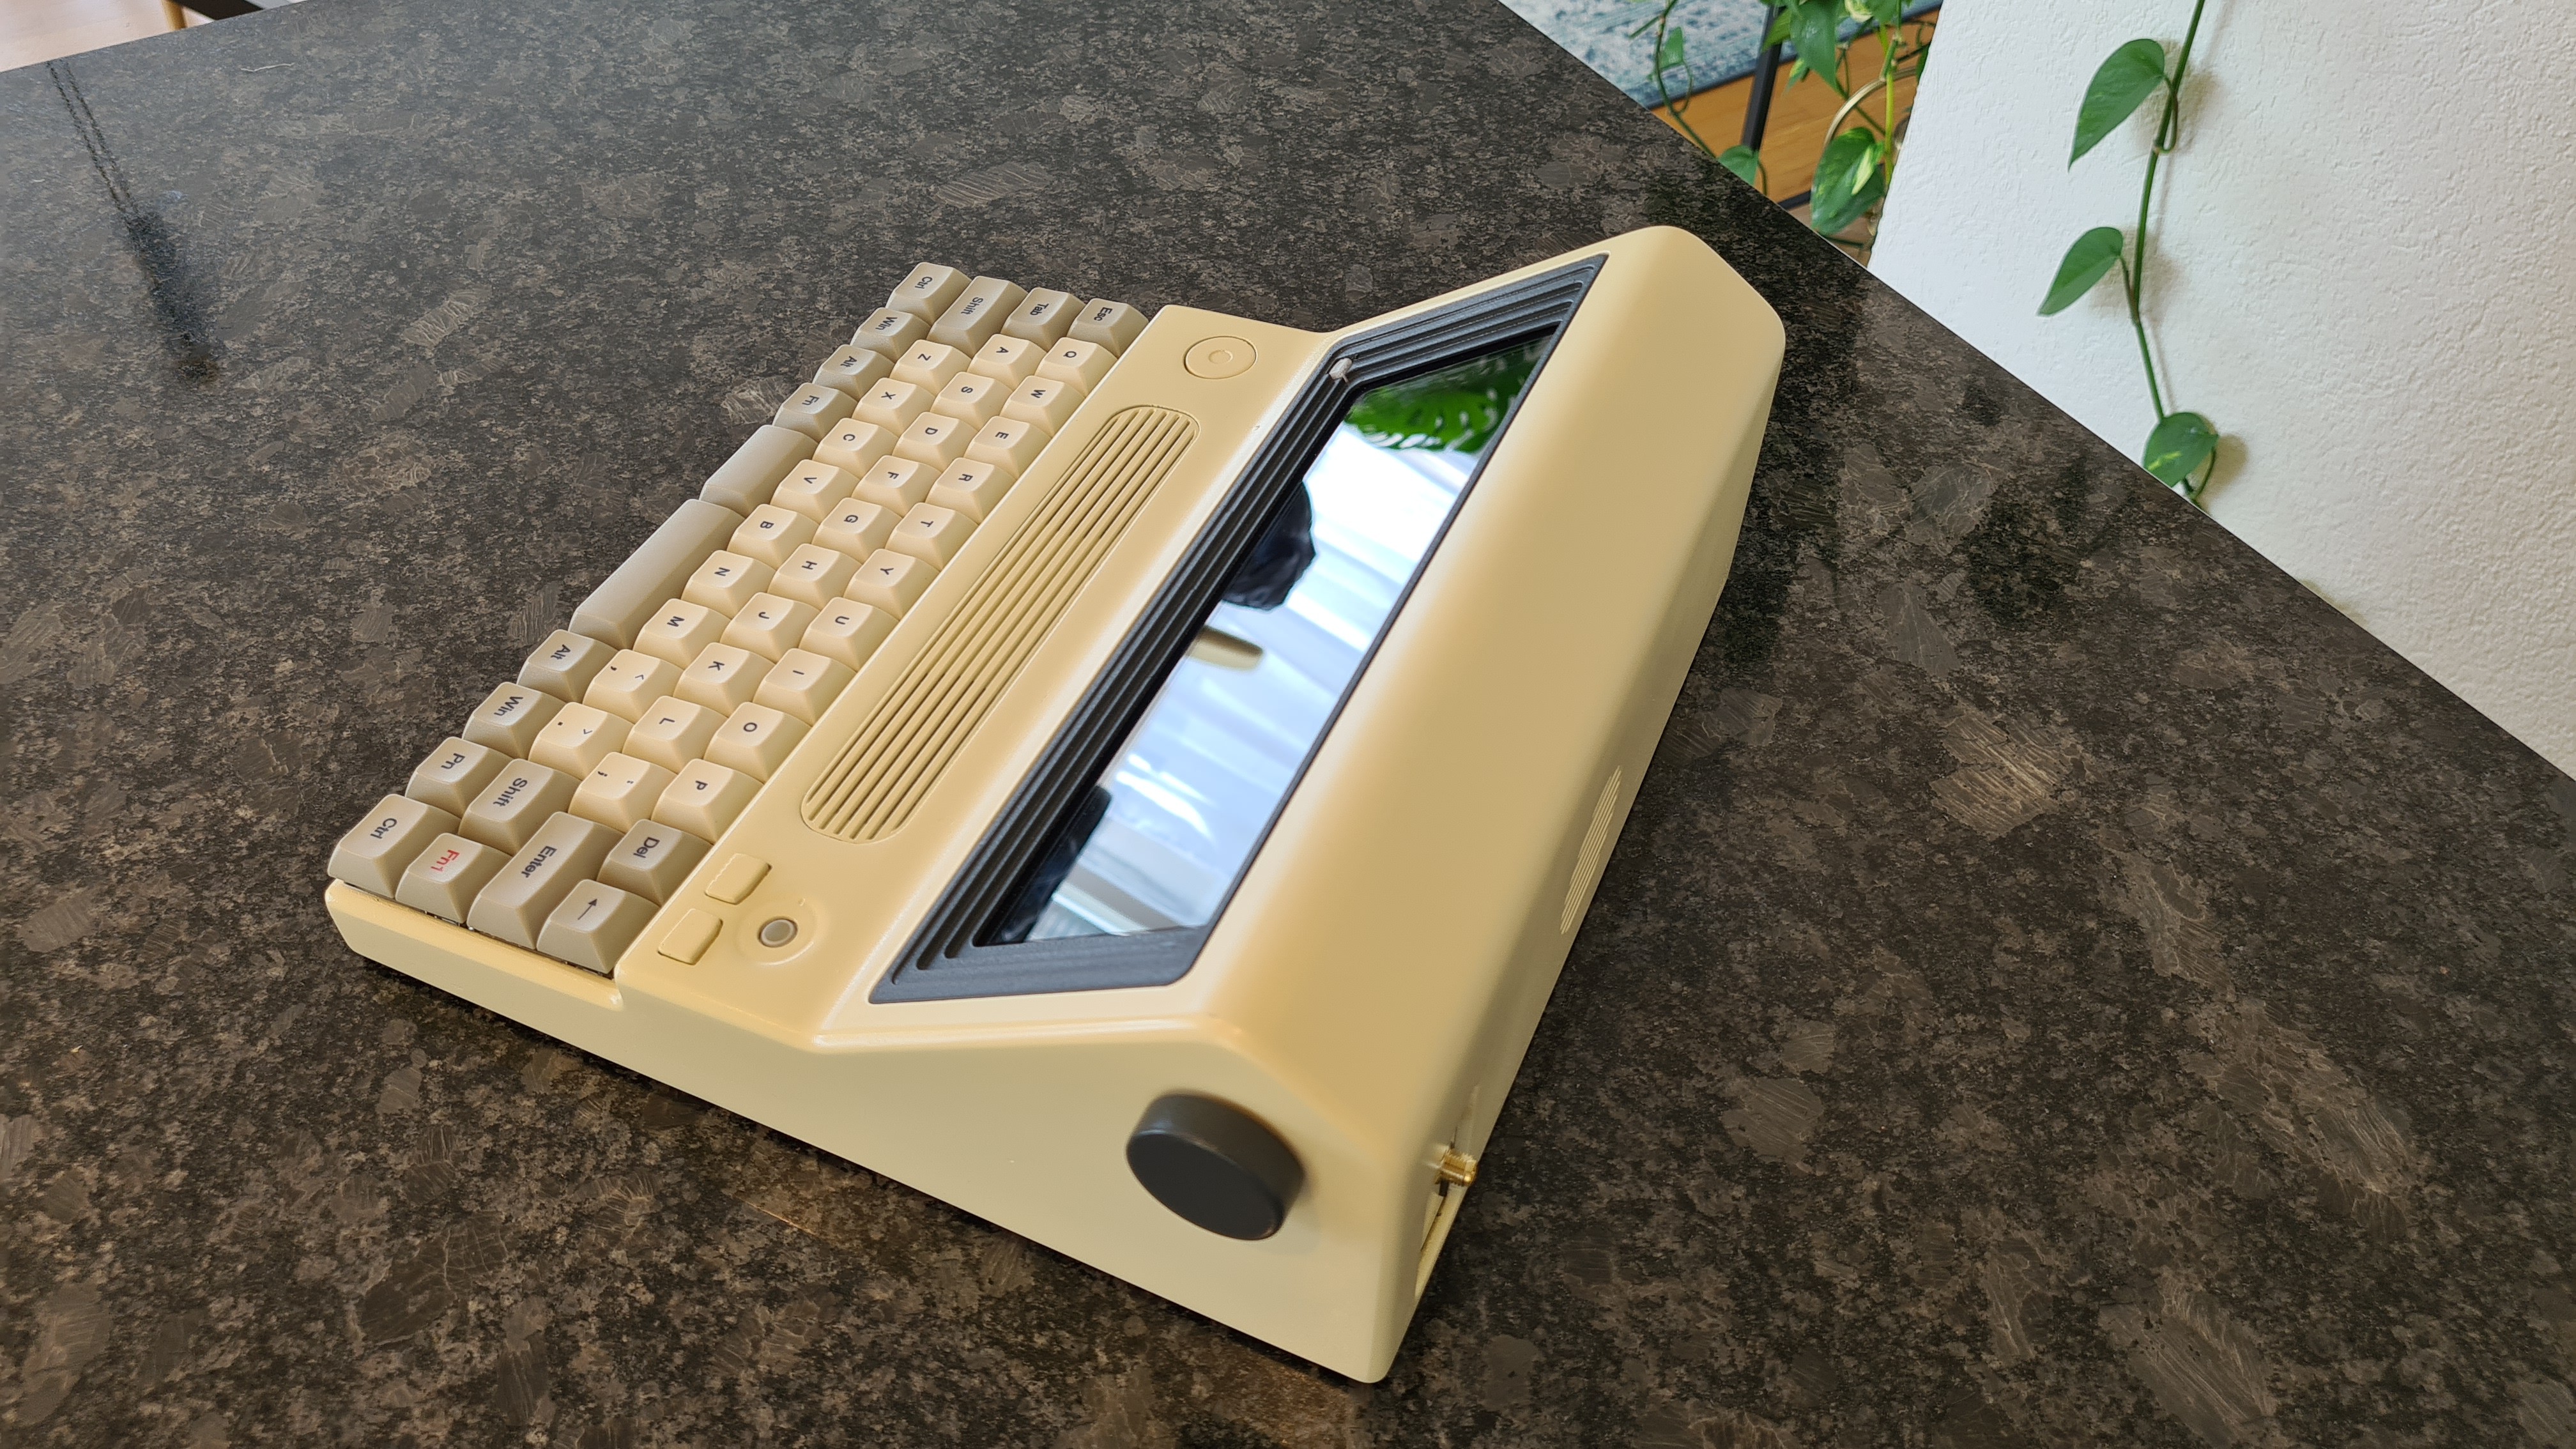
  • knob (for cursor keys and enter)
  • full mechanical keyboard

Other properties

  • good raspberry cooling (so that it is not throttled)
  • stereo speakers
  • capacitive touch screen
  • power and act LED

Painting color

  • primary color: RAL1015
  • Secondary Color: RAL7016

future plans

  • usb micro b and a wide range charging port (5-30V with banana jack (rear panel)
  • HDMI output (IO panel)
  • Battery (the UPS board which can be seen in the CAD drawings turned out to be a flop (aliexpress 52pi UPS plus)

check_throttled_state.sh

simple bash script which checks continuous CPU throttled state and show GPU/CPU Temperature of a raspberry 4

Bourne Shell Script - 537.00 bytes - 08/16/2023 at 17:21

Download

x-zip-compressed - 1.86 kB - 08/11/2023 at 19:34

Download

Adobe Portable Document Format - 129.57 kB - 08/10/2023 at 14:51

Preview
Download

svg+xml - 16.56 kB - 08/06/2023 at 09:37

Download

x-zip-compressed - 3.50 MB - 08/04/2023 at 18:25

Download

  • 1 × Raspberry Pi 4 4GB sbc
  • 1 × Waveshare 7.9Inch HDMI LCD display
  • 1 × 52Pi rpi 4 coolertower aliexpress
  • 1 × Arduino PRO micro or any other arduino which is usable as USB HID Device
  • 1 × ICSH044A trackball breakoutboard aliexpress or sparkfunn trackball breakoutboard

View all 24 components

  • Does it run DOOM without throttling?​

    Nik Reitmann08/16/2023 at 18:28 0 comments

    Whether DOOM runs on a Raspberry Pi 4 is almost a boring question, but it is enough to show how well the cooling and the power supply for the devices in the case are.

  • Last project log entry: Demo videos

    Nik Reitmann08/13/2023 at 15:08 0 comments

    As can be seen in the demo videos, Raspbian does not run as efficiently as kali linux. I will probably use kali linux despite the many packages that need to be updated.

    Taskbar TOP: Kali Linux
    Taskbar BOTTOM: Raspbian

  • Perfect the brightness of the LEDs

    Nik Reitmann08/11/2023 at 15:29 0 comments

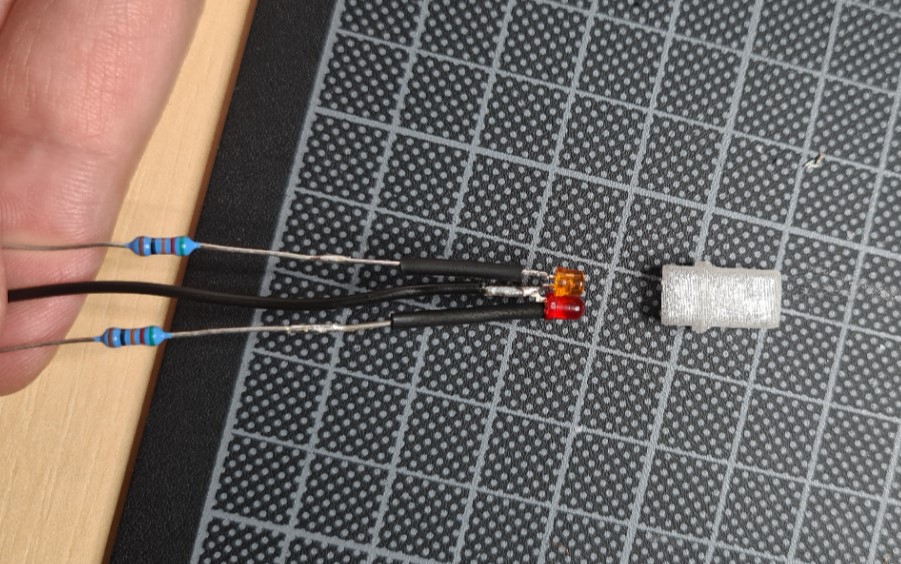
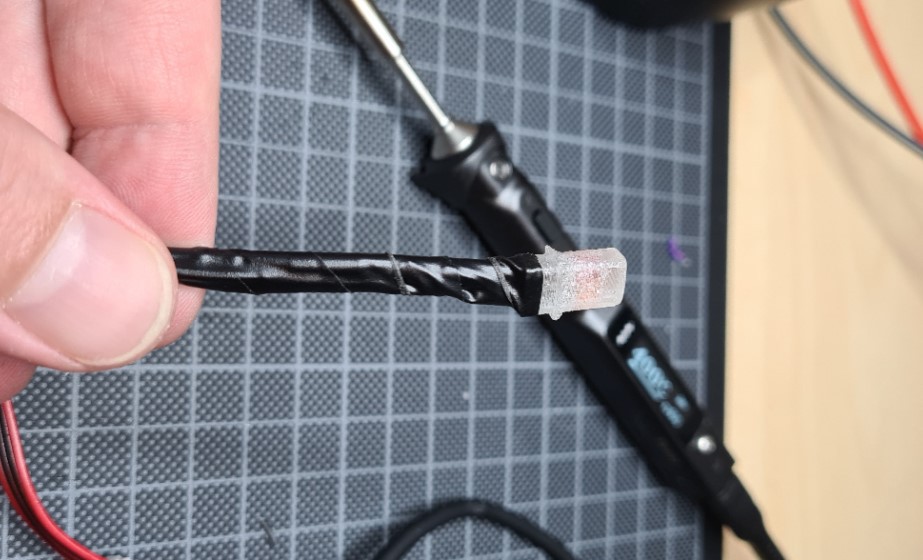
    At the beginning I took two 500ohm resistors, the red LED was much too bright and the orange hardly recognizable. Now the orange LED has a series resistance of 50 Ω and the red 1 kΩ.

    orange is the ACT LED of the raspberry and red is POWER (just like the LEDs on the Raspberry pi board)

  • Installing OS, configure ACT LED and Powerbutton

    Nik Reitmann08/10/2023 at 14:16 0 comments

    Since I have external access to the raspberry microSD, I don't have to make a final decision on an OS.  I am currently testing whether raspbian (32bit) meets all my requirements.  I have already created a kali linux microSD and adapted the OS installation to the cyberdeck, kali linux only has the disadvantage for me that it contains a lot of packages which all have to be updated...

    Power LED now works correctly
    cool-retro-term (is the name of the apt package) ;-)
    The most important thing I have to configure with a new OS is the display

  • Assembly complete

    Nik Reitmann08/06/2023 at 18:43 0 comments


  • Code the "peripherals Arduino"

    Nik Reitmann08/02/2023 at 21:07 0 comments

    I noticed that it's not that easy to write the firmware for the trackball myself, my version was pretty sticky, but it worked. However, that was enough for me to understand the function. Then I have to look for a clever library on the internet, but unfortunately I didn't find any library, but the following brilliant demo code:

    https://github.com/LSChyi/blackberry-mini-trackball

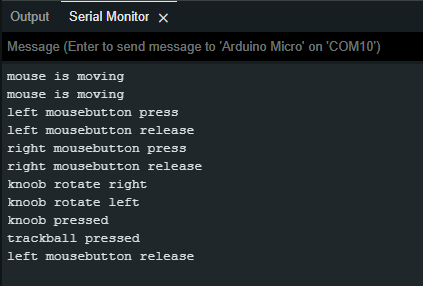
    The trackball works super smooth now. The rotary encoder with the button and the two mouse buttons were then written fairly quickly.

    I will upload the arduino code, all STL's of the case, bash scripts etc. here at the end of the project (hopefully before the cyberdeck contest deadline).

    serial output from finished arduino code


    demo of the peripherals arduino

  • prepare electronics

    Nik Reitmann08/01/2023 at 19:13 0 comments

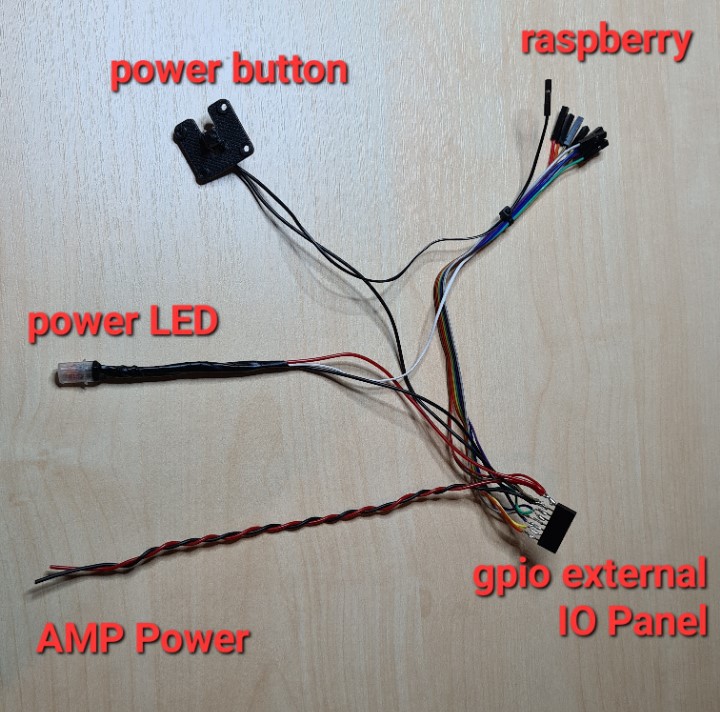
    raspberry wiring harness

    peripheral wiring harness
    prepare power and act LED


    finished LED part


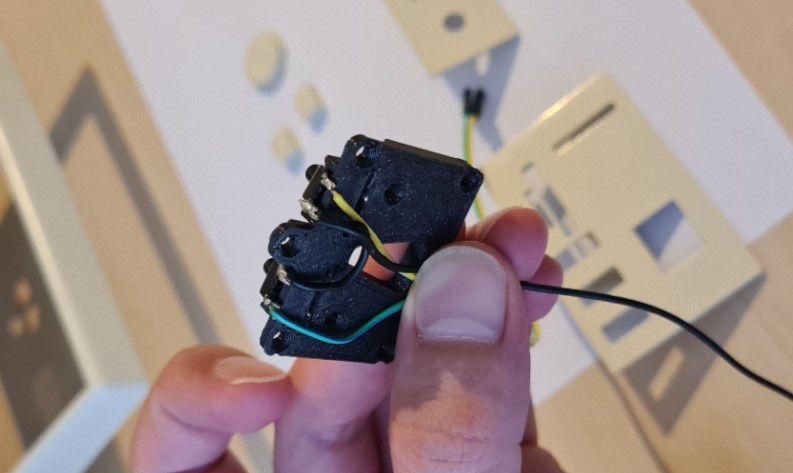
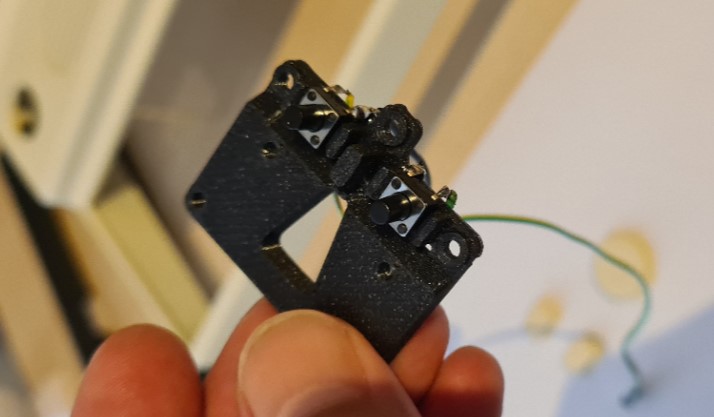
    mousebuttons


    mousebuttons (other view)


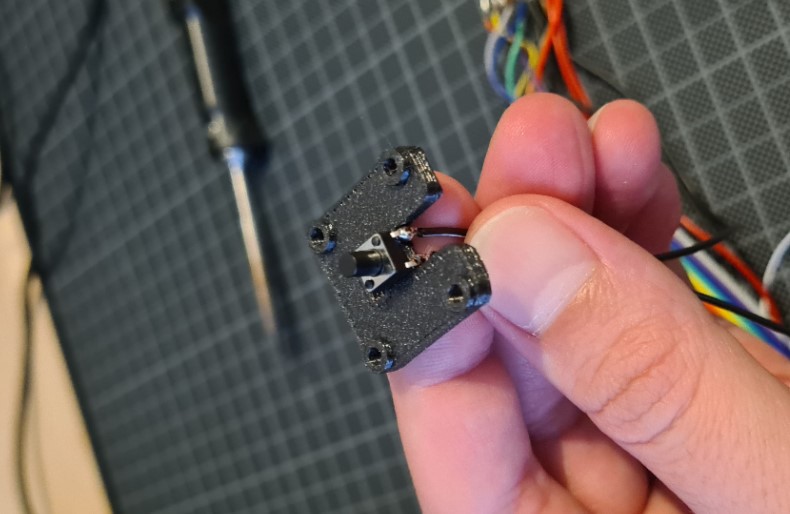
    powerbutton

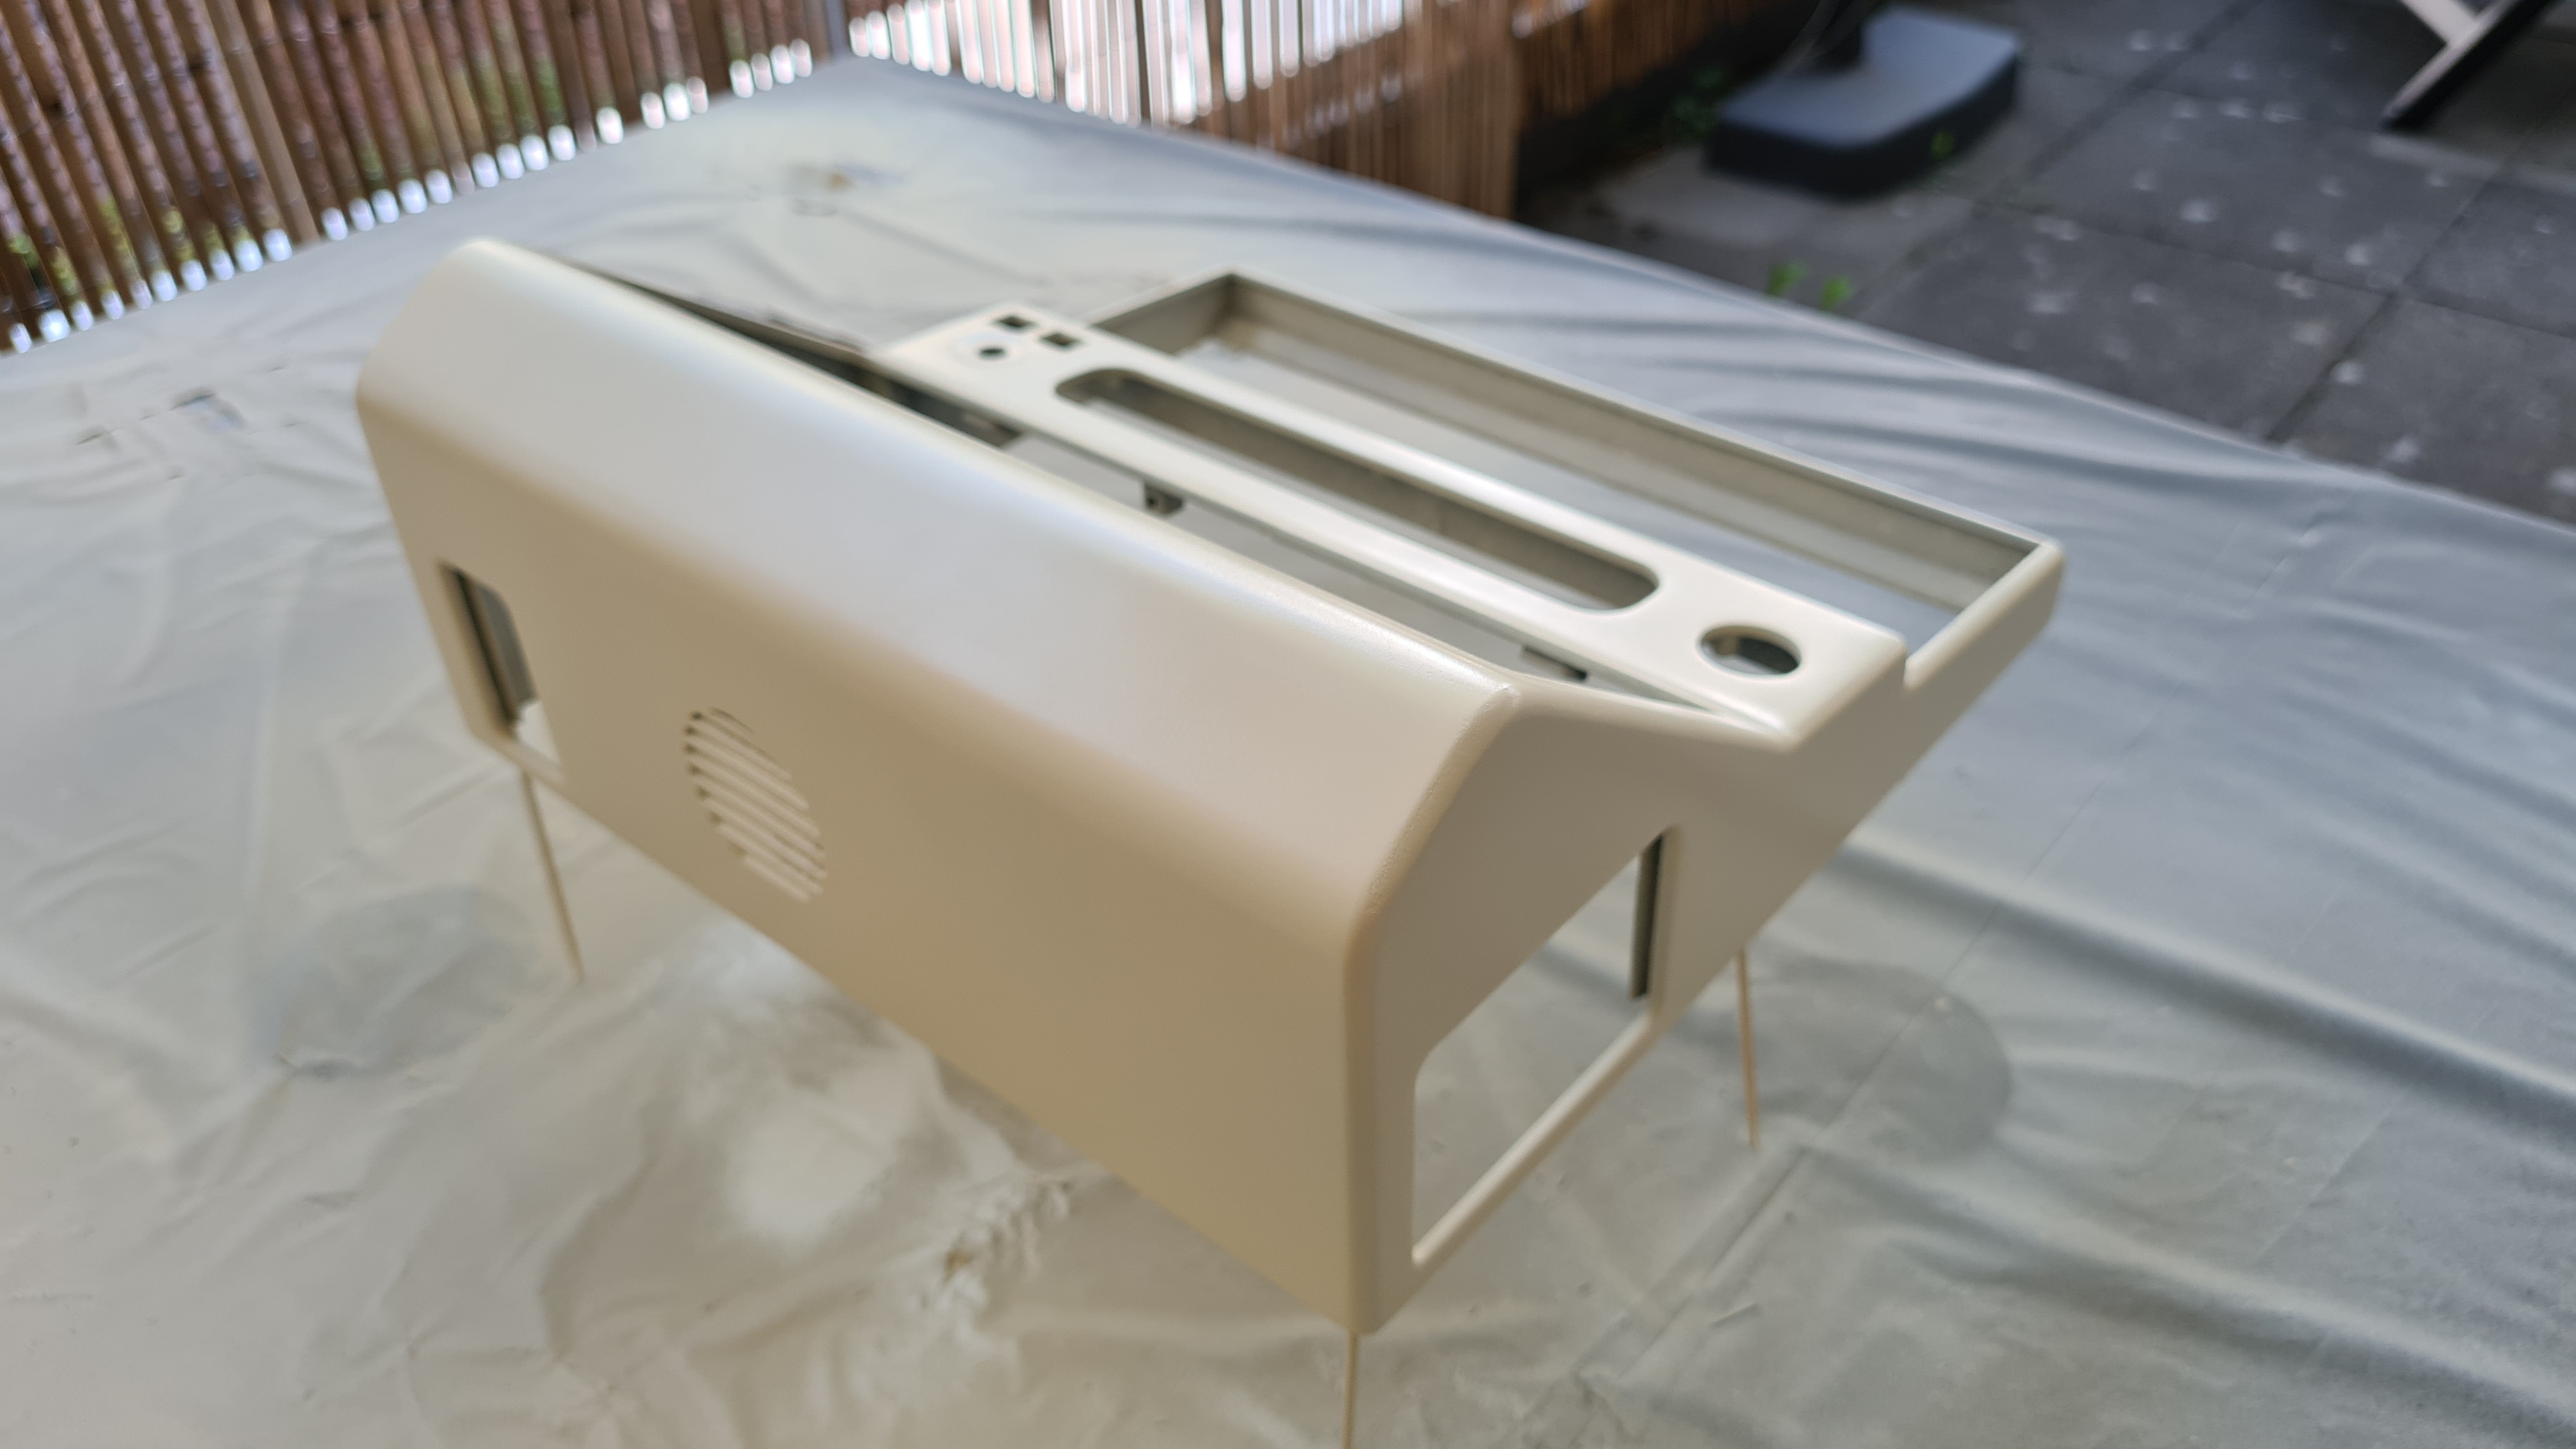
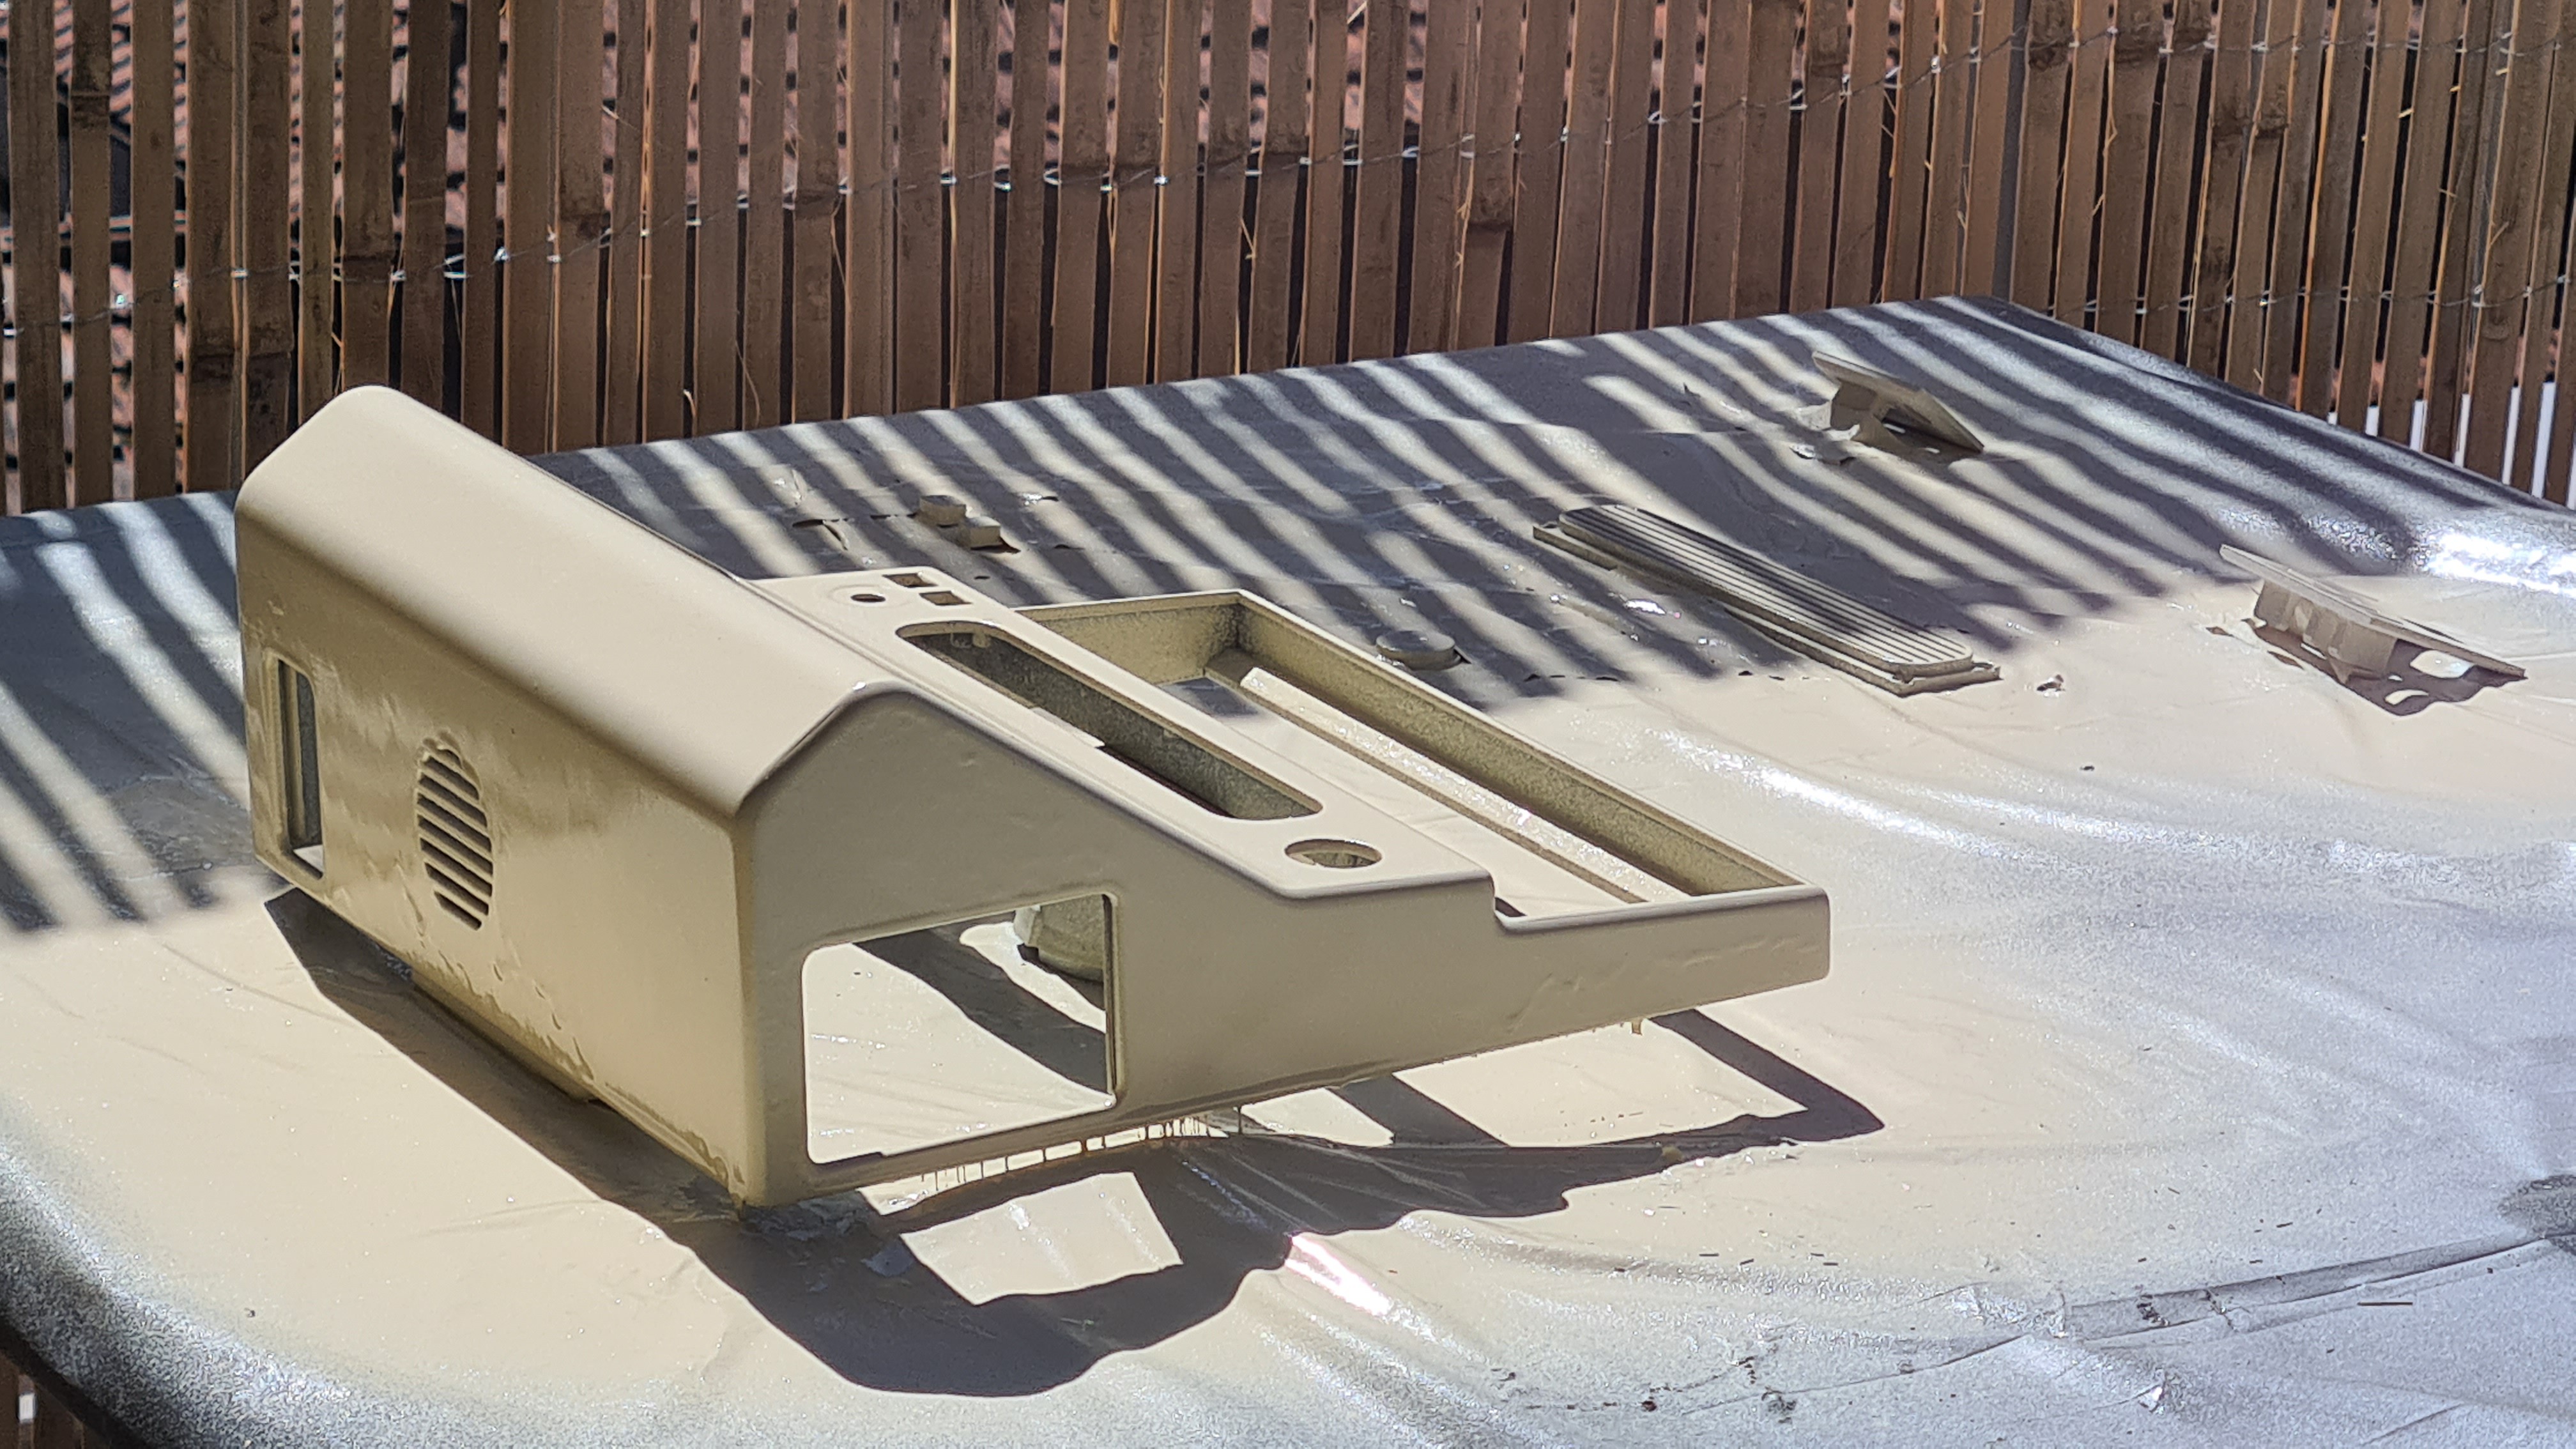
  • Painting successful

    Nik Reitmann07/31/2023 at 20:46 0 comments

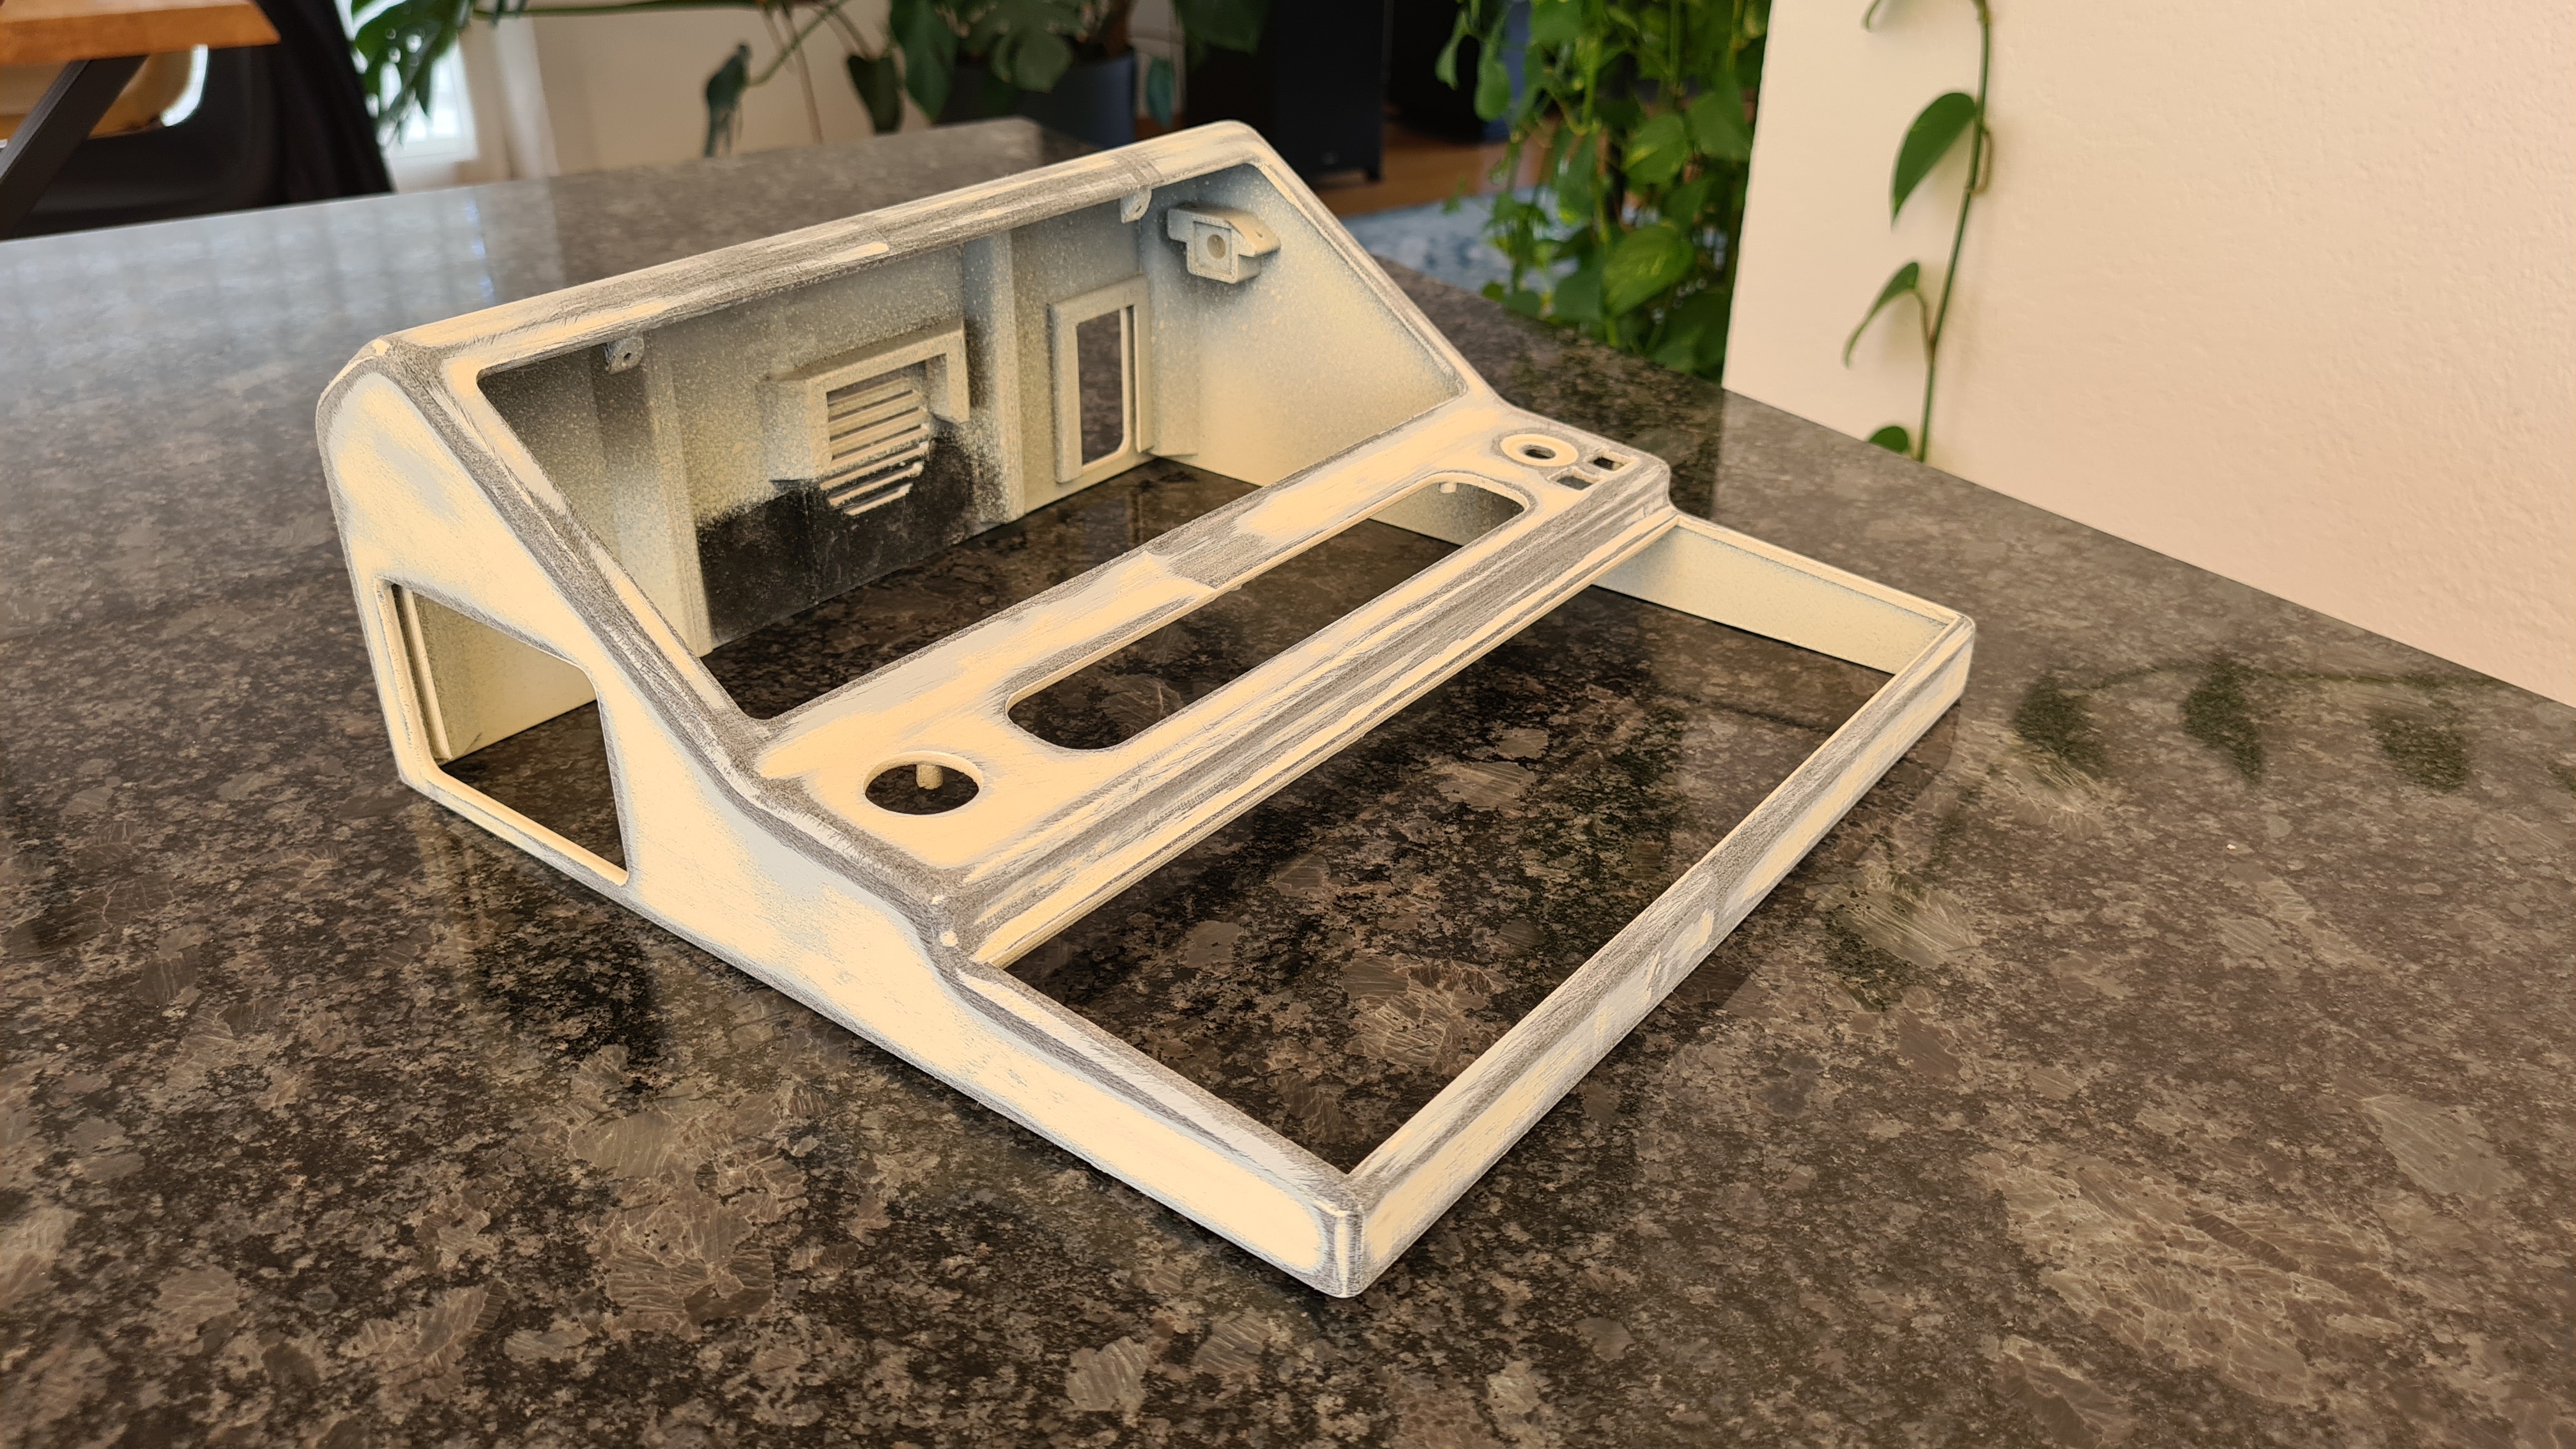
  • Painting failed

    Nik Reitmann07/31/2023 at 12:35 0 comments

    When coloring the case, everything that could go wrong went wrong.  I bought a weird PU spray that splattered so particles and didn't cover at all (not even the gray primer).  So sand and prime again.

    prime: all good
    Too much color because it didn't cover. Pretty sure my fault too, I'm just bad at painting.


    so sand again (this "heavily used" look would look cool too)

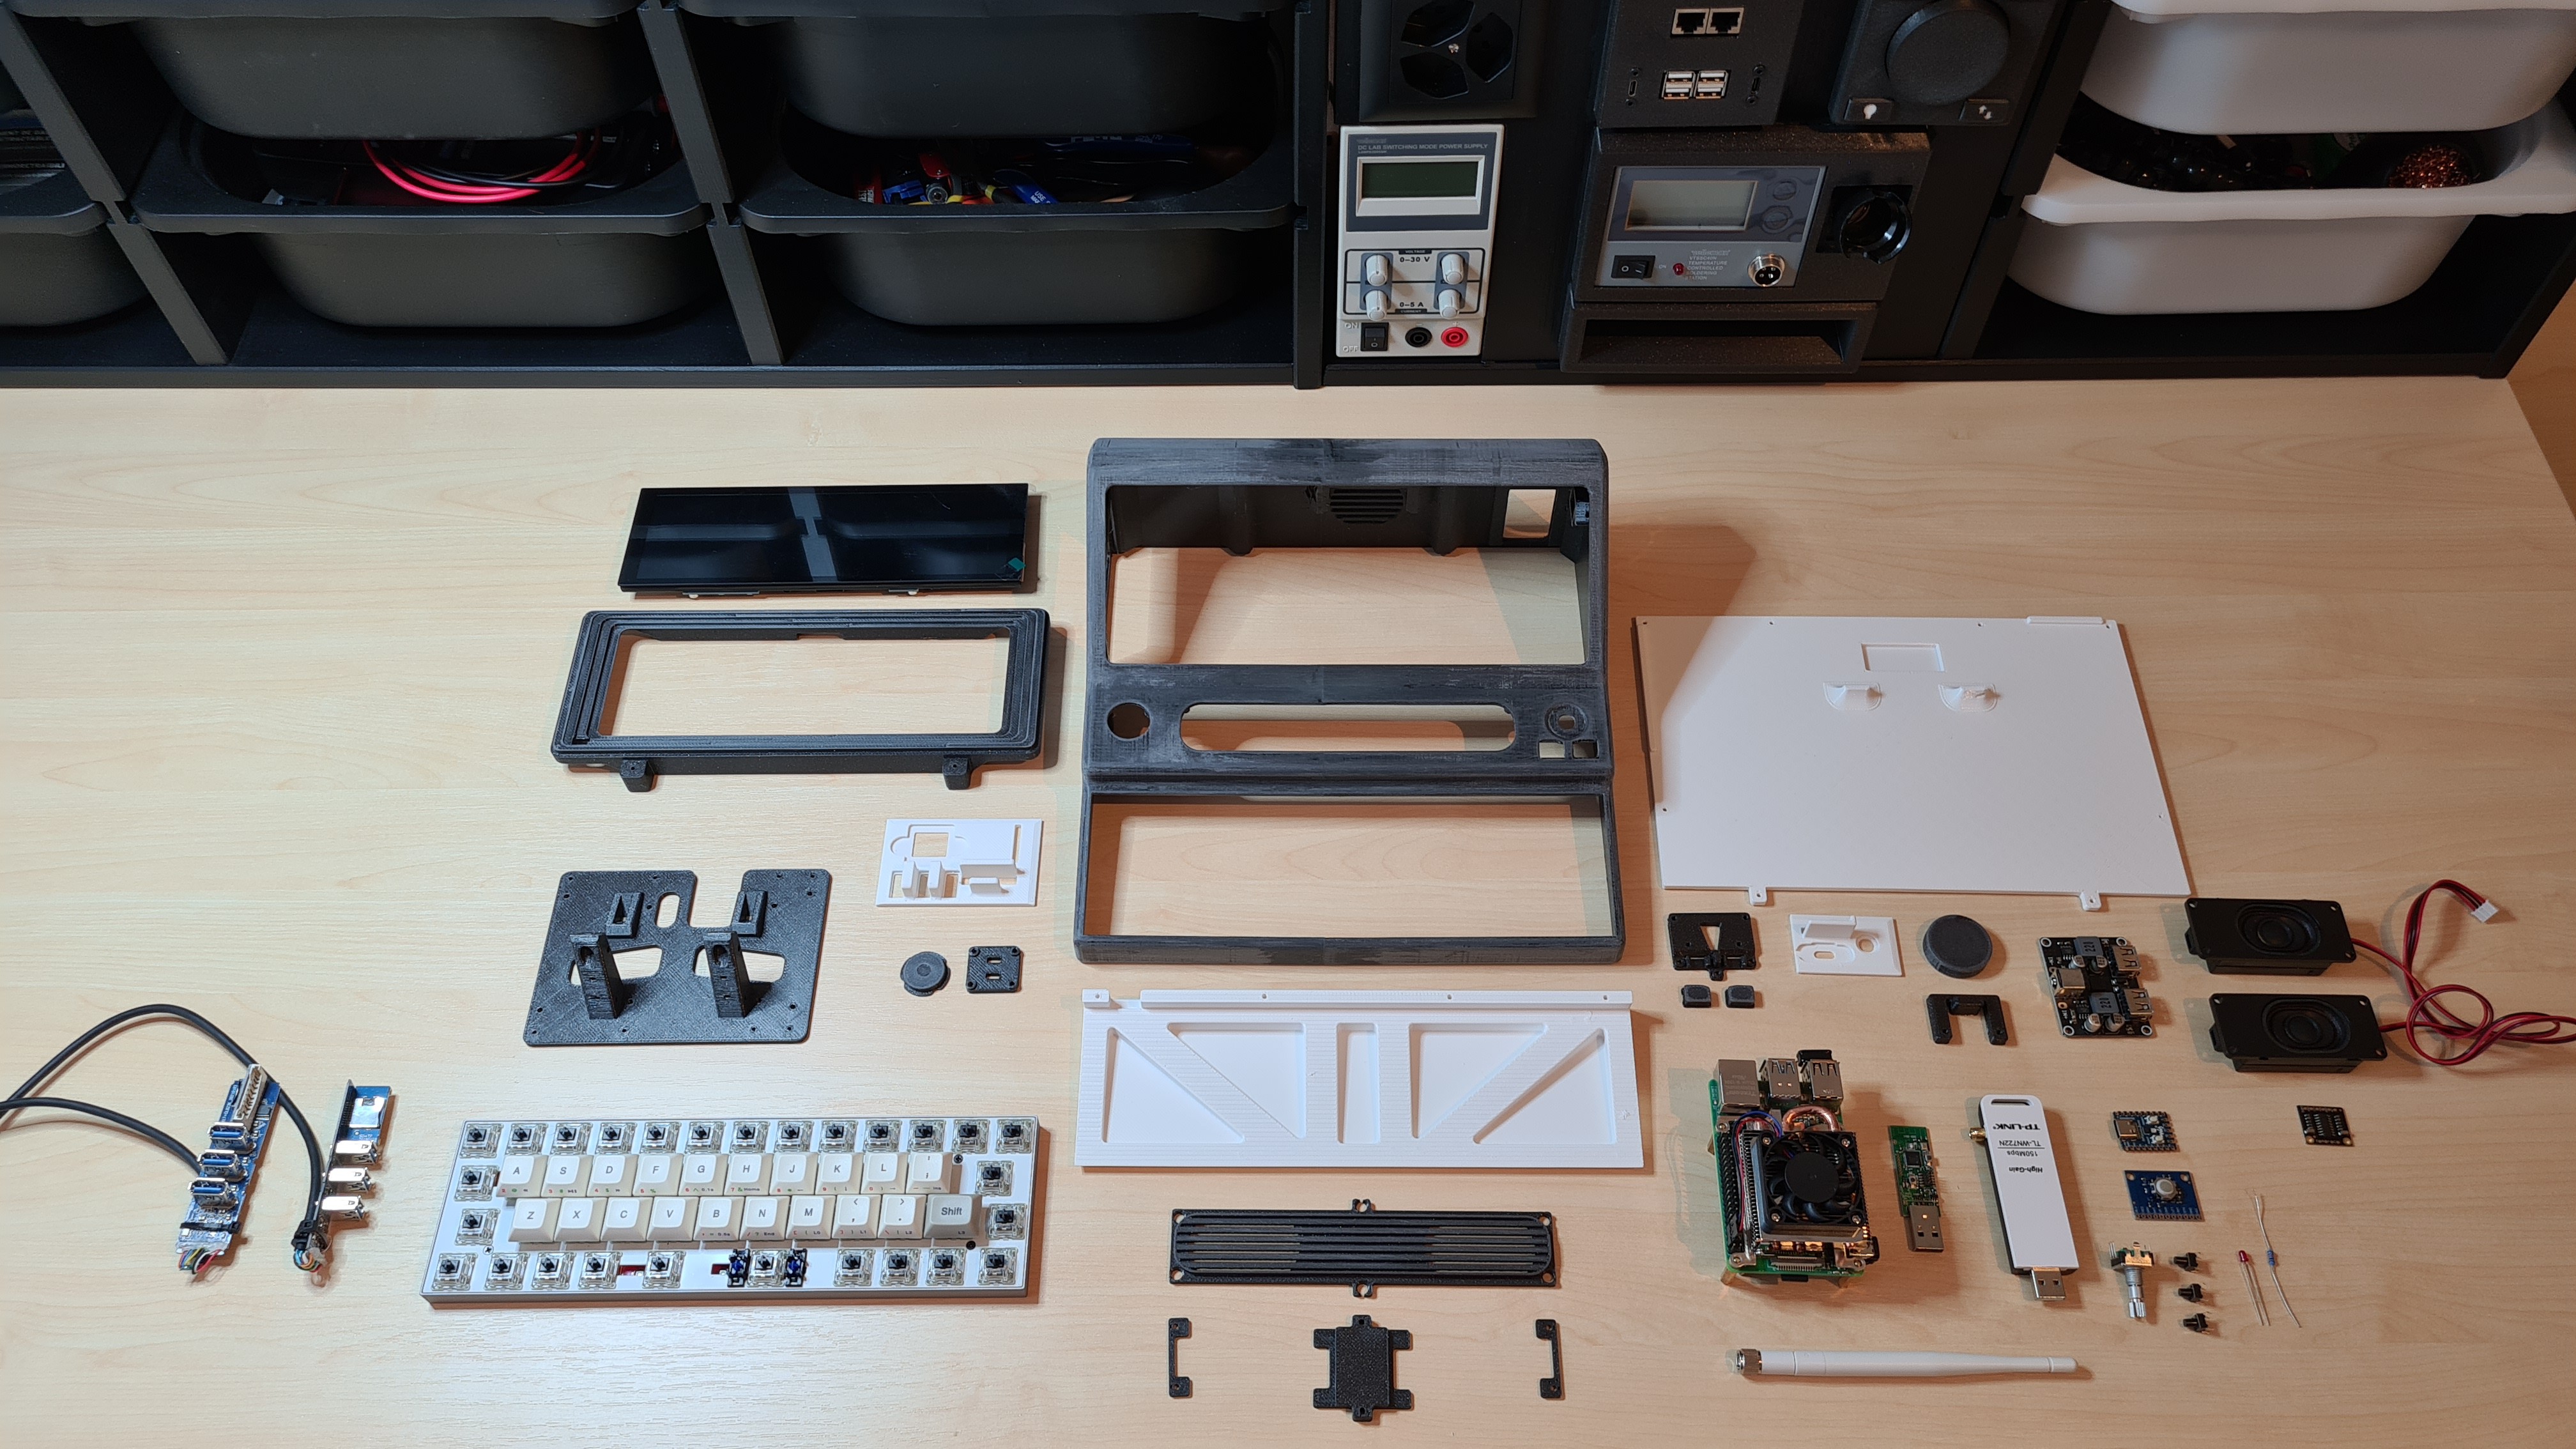
  • All parts printed and the visibile parts sanded

    Nik Reitmann07/29/2023 at 13:46 0 comments

    All printed parts


    All parts (without cables)

View all 13 project logs

  • 1
    Get all parts

    Print

    Case printed in two parts, the rest can be printed in one piece. All printed with a Bambu X1C, a 0.6mm nozzle, in PETG with a layer height of 0.18mm. 

    The printing time for all parts was approx. 20 hours.

    IO Panels are customizable (blank panels are foundable in files in this project).
    The case is also available as [full] and as [splitted] in the files.

    Parts

    Mostly AliExpress, see "components" in this Project.

  • 2
    Post processing

    Glued with epoxy resin and sanded with 320 grit sandpaper. Then primed several times, sanded wet with 600 grit sandpaper and painted with two coats.

  • 3
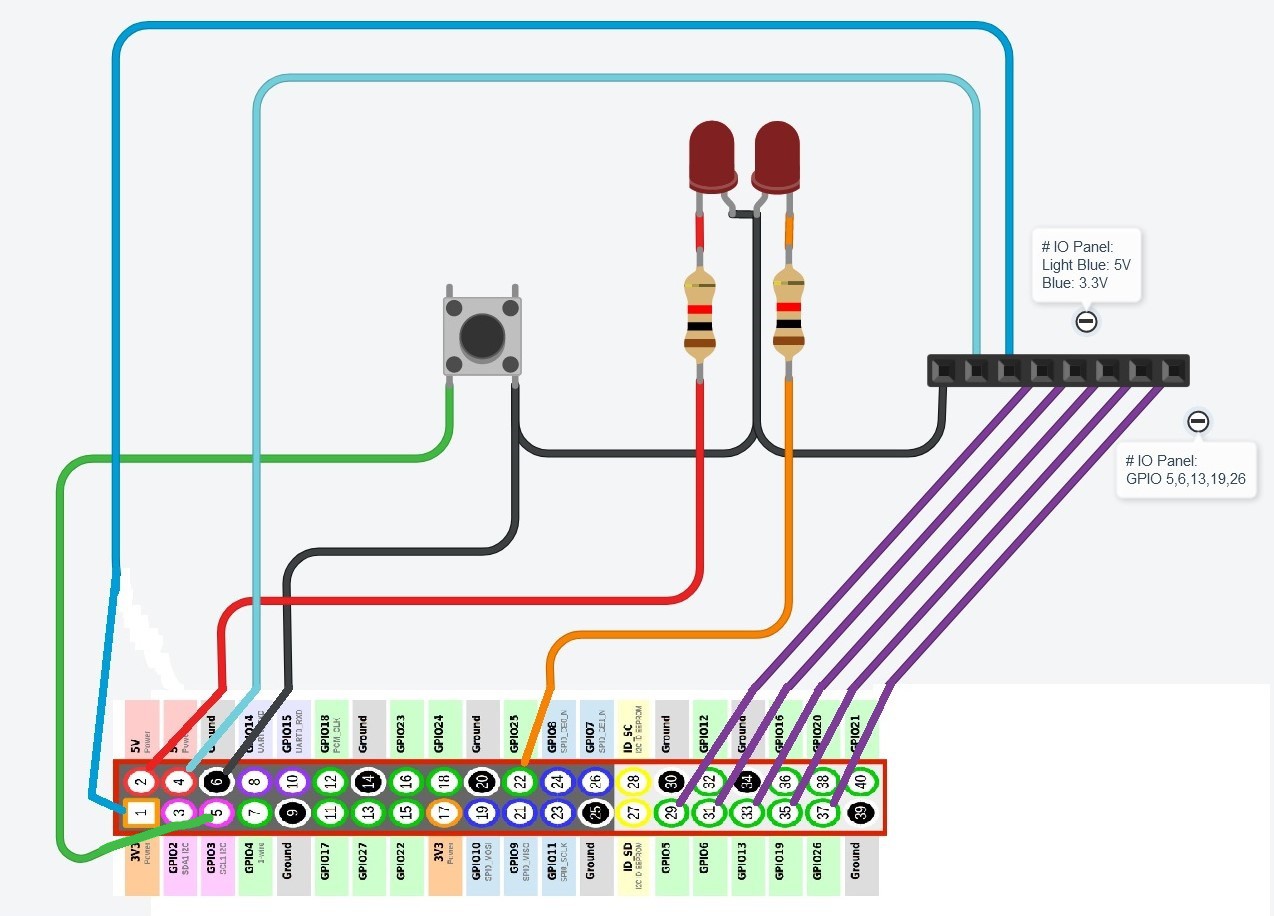
    ​​​Raspberry cables


    raspberry circuit diagram
    raspberry wiring harness

View all 12 instructions

Enjoy this project?

Share

Discussions

Human Controller wrote 08/29/2023 at 20:18 point

The beauty of the case is amazing, which makes it hard to believe that it was printed with a 3D printer. I think it was hard to make this one.

  Are you sure? yes | no

Nik Reitmann wrote 08/30/2023 at 16:20 point
Thank you. With enough sanding work, every 3D print becomes a beauty :-)

  Are you sure? yes | no

RobsonCouto wrote 08/14/2023 at 22:36 point

Nik, this is looking incredible! Rooting for you on the contest! Amazing work in such a short time!

  Are you sure? yes | no

Nik Reitmann wrote 08/15/2023 at 07:31 point
Thank you. Unfortunately, I didn't have enough time either, otherwise I would have concentrated even more on the software part. Your deck also looks incredibly good, there are a lot of nice decks in the contest.

  Are you sure? yes | no

Nik Reitmann wrote 08/13/2023 at 15:23 point
Thank you very much, it would also be a pity for your cyberdeck if it broke during the apocalypse :-P Really a very nice and cyberpunky build

  Are you sure? yes | no

mkdxdx wrote 08/13/2023 at 15:12 point

That is one slick build worth keeping workbench clean for!

  Are you sure? yes | no

Similar Projects

Does this project spark your interest?

Become a member to follow this project and never miss any updates