 Pamungkas Sumasta
The Rationale
ChatGPT and the whole generative AI scene? Now that's some seriously mind-boggling stuff, isn't it? The buzz around these things is off the charts, and it's no wonder why. I mean, think about it – we're talking about AI that can spin out text and creations like pure magic. It's like having a digital wizard by our side, whipping up ideas and content that we never thought possible.
I'm far from the expert in this field, but ChatGPT, despite its marvels, comes with a handful of limitations. It's like the forgetful friend who can't hold onto a variety of past conversations, lacking that personal touch that comes from remembering details. Contextual awareness is hit-and-miss, leaving us with moments of confusion akin to talking to someone who wasn't quite paying attention. And let's not forget the awkwardness of reading text that doesn't quite capture our unique style – it's like wearing a suit that's one size too big or too small. So, while it's impressive, it's got a way to go before it truly becomes our digital twin.
That's where prompt engineering kicks in – it's our way of telling the AI exactly what we want in a language it gets. We're basically giving it a nudge in the right direction, so it doesn't go off on some wild tangent. It's like we're talking to a friend who's super smart but occasionally gets things hilariously wrong.
"The use of generative AI can altogether succeed or fail based on the prompt that you enter" - Source
So, having said that, my project's main "Research questions" are more like:
- How can we whip up an open-source hardware wizard to help us "prompt through" the imperfection of Generative AI?
- What's the coolest hardware to slot in without messing up our groove?
- Can we make the variable prompts adapt like chameleons to match our intended context?
The Hypothesis
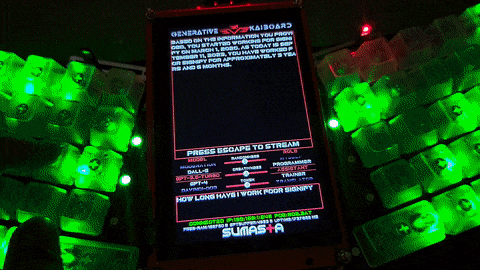
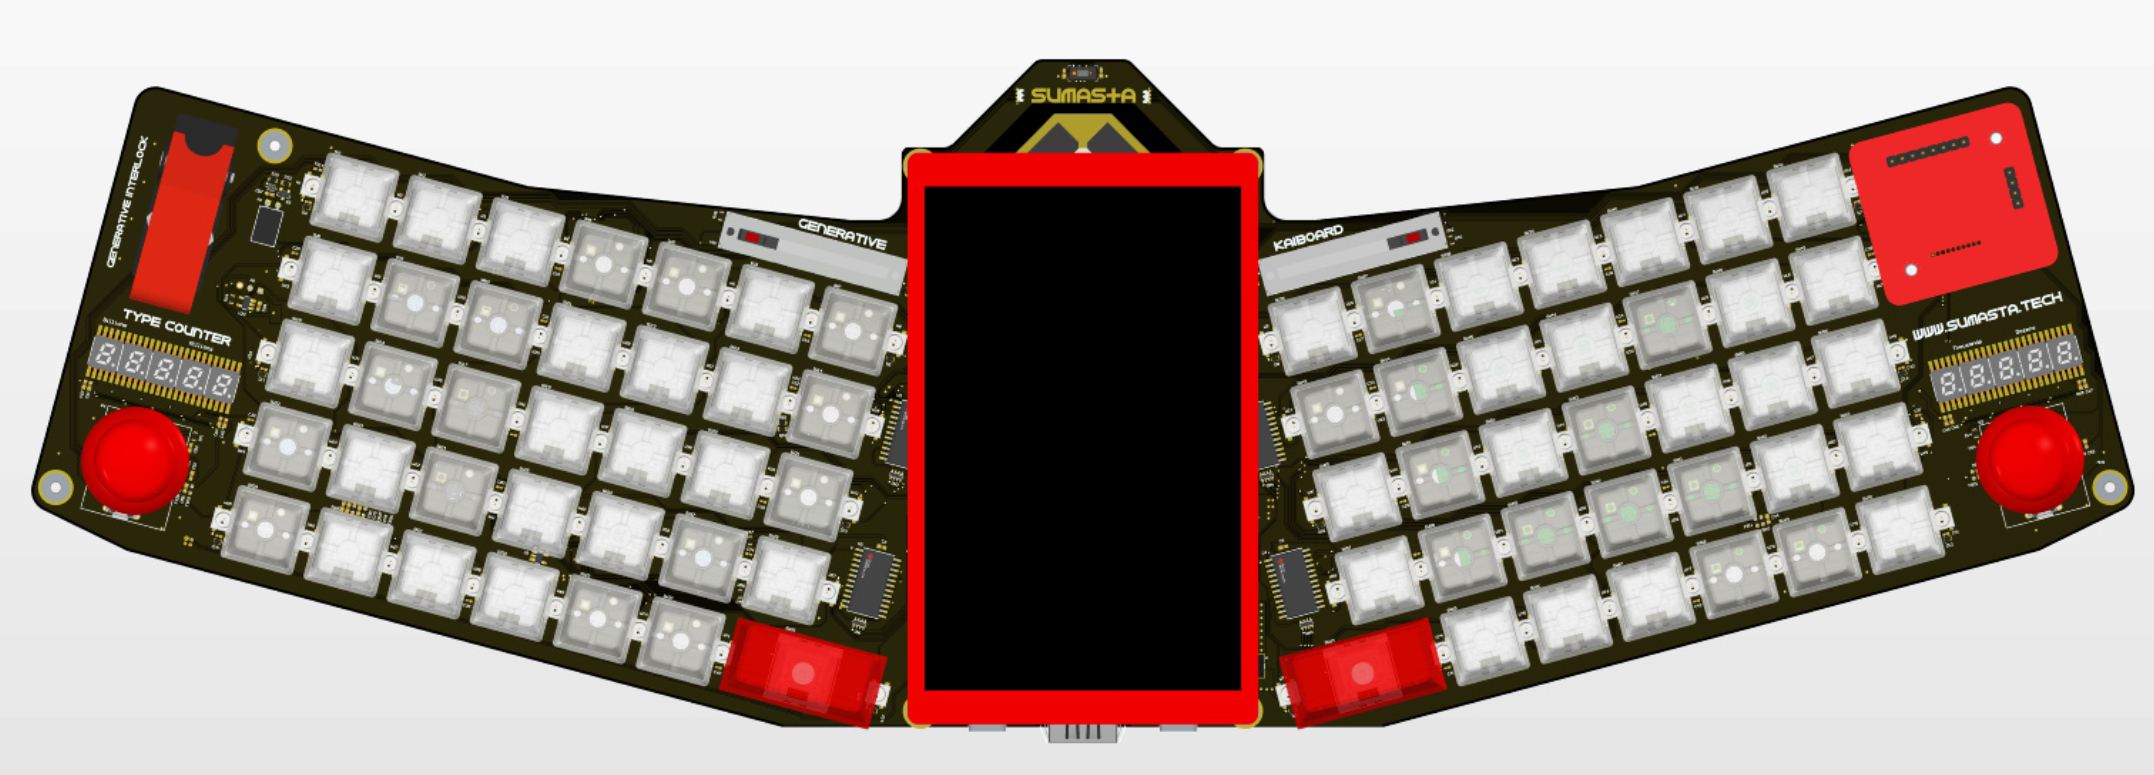
Introducing Generative kAiboard
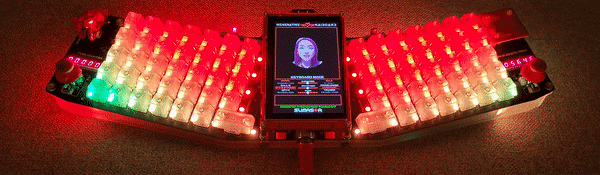
Wait, hold-on-a-minute, a keyboard? Yes, let me explain.
When you think about it, there is actually a lot of similarity between generative (text) AI such as ChatGPT and a keyboard. they both generate text! while chatgpt relies on pretrained large language model, our keyboard relies on our brain to convert our thought in the analog domain into the digital realm. In fact you are probably holding one as you read this. But of course, mostly keyboard as we use today is just an extension of us, a tool, nothing more. What if we can make it more intelligent, make it a complement, make it a part of us as we surf through the age of generative AI.
Just think about it for a sec: if I threw this question at you – who's the real expert when it comes to your writing style, the handpicked words you dig, when you usually kick off your day, and how long you grind on stuff? It's gotta be your trusty keyboard, right? I mean, let's pretend it's all "smart enough" just to play around with the idea. In my book, I'm all in on the notion that our keyboards have some untapped superpowers. And you know what cranks up the excitement? The cool new trend of prompt engineering has cranked this whole concept up a notch.
And here's the kicker: we're talking about a keyboard here, so it won't mess with your groove, if you catch my drift. This ain't an extra gadget you gotta drag around, or some software headache that needs installing and babysitting – it's just a good ol' keyboard. You know, that thing you kinda take for granted, sitting on your work desk at the office or your home setup. The real gem is making this a sidekick instead of just another needy gadget shouting for your precious attention.
The Goal
Before we start getting all nerdy with the technical nitty-gritty, let me say few things about the goals. And I'm not just talking about the project goals from a tech perspective – I mean, those are important too. But what really takes the spotlight is the personal aim, the push, the reason why I jumped into this project in the first place – to me that's what holds the greatest significance....
Read more »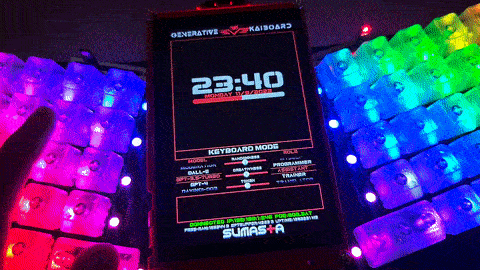


 Paul_Beaudet
 Mike
Mike
 TAIBHSE DESIGNS
 Paul McClay
This kind of adaptive hardware prompting can greatly enhance the usefulness and interactivity of AI-powered applications. https://www.myaarpmedicares.us/