Close
0%
0%

ChipTack: SMT breakouts for rapid wire prototyping

Wire-wrap prototyping; brought into the 21st century.

Similar projects worth following
0 followers
If you ever want to quickly experiment with a SMT part faster than it would be to design a PCB for it, then this project is for you.

The idea at the surface isn't too novel, it's a breakout board design for various SMT footprints brought out to a small yet hand solderable distance, pitch and pad size while not increasing the size too much. I'm surprised nobody tried this yet but here I am now.

This project's deliverable will be more or less a series of Flex PCB stickers containing assorted footprints and breakouts and you cut out what you need and stick it on a perf board, and then solder wires across pads to connect the various flex bits together to make your circuit. This is one step better than trying to wire-wrap the whole thing or make a PCB.

I hope it grows into an ecosystem where SMT parts are reasonably accessible and these small pieces of sticky flexible breakout boards become like electronic 'Lego-like' blocks which can rapidly prototype

There was once a time when I used to build all circuits by hand (before PCB fabrication was as cheap as it is now), it was how I got into building circuits on the very venerable veroboards of 2.54mm pitch available in all shapes and sizes. Even when I started experimenting with SMT components (Nokia 6610 LCDs  with 10-pin hirose connectors and STM32 microcontrollers), the very first circuits I built with them were using enamel wire. Of course it took a lot of time and patience to solder down the chips but it was extremely satisfying.

Today I see a trend of castellated sub-assemblies growing - both with lower cost devices (like the Pico and other small boards) and I have often felt that having tiny breakouts of fine-pitch SMT parts can help accelerate prototyping. They can be as complex as FPGA boards or as simple as a breakout board. However castellation imposes the constraint of them being on 2.54mm pitch to be able to solder them down on conventional perfboards. There are 2mm boards also available but less common. Folks may have tried unconventional veroboard designs but they haven't been scalable or widespread. Enter flexible PCBs.

The pitch (pun intended) of this project is to build tiny breakout adhesive-backed pieces of flex in a panel with all possible SMT footprints of your favourite parts or stash (think 0603/0402 SMT, crystals, SOT, LEDs, QFP/QFN/BGA, WLCSP, DFN) with the pads brought out to hand-solderable yet tiny pads to enable rapid prototyping between the SMT parts once you cut out the pieces of flex and paste them down on a PCB like Lego(tm) blocks, and just have to use a soldering iron and magnet wire to wire up the stuff together. This could be ideal for uses where you may not be ready to build a PCB yet but want to try out the newest and fancy SMT part in the house.

ChipTack.zip

First iteration, add more footprints to this.

x-zip-compressed - 94.13 kB - 09/11/2023 at 18:08

Download

  • 1 × Flexible PCB panel with footprint breakouts
  • 1 × Bring your own components
  • 1 × Perf board or something solid to act as substrate

  • Add RP2040 Footprint

    Kumar, Abhishek09/12/2023 at 14:00 0 comments

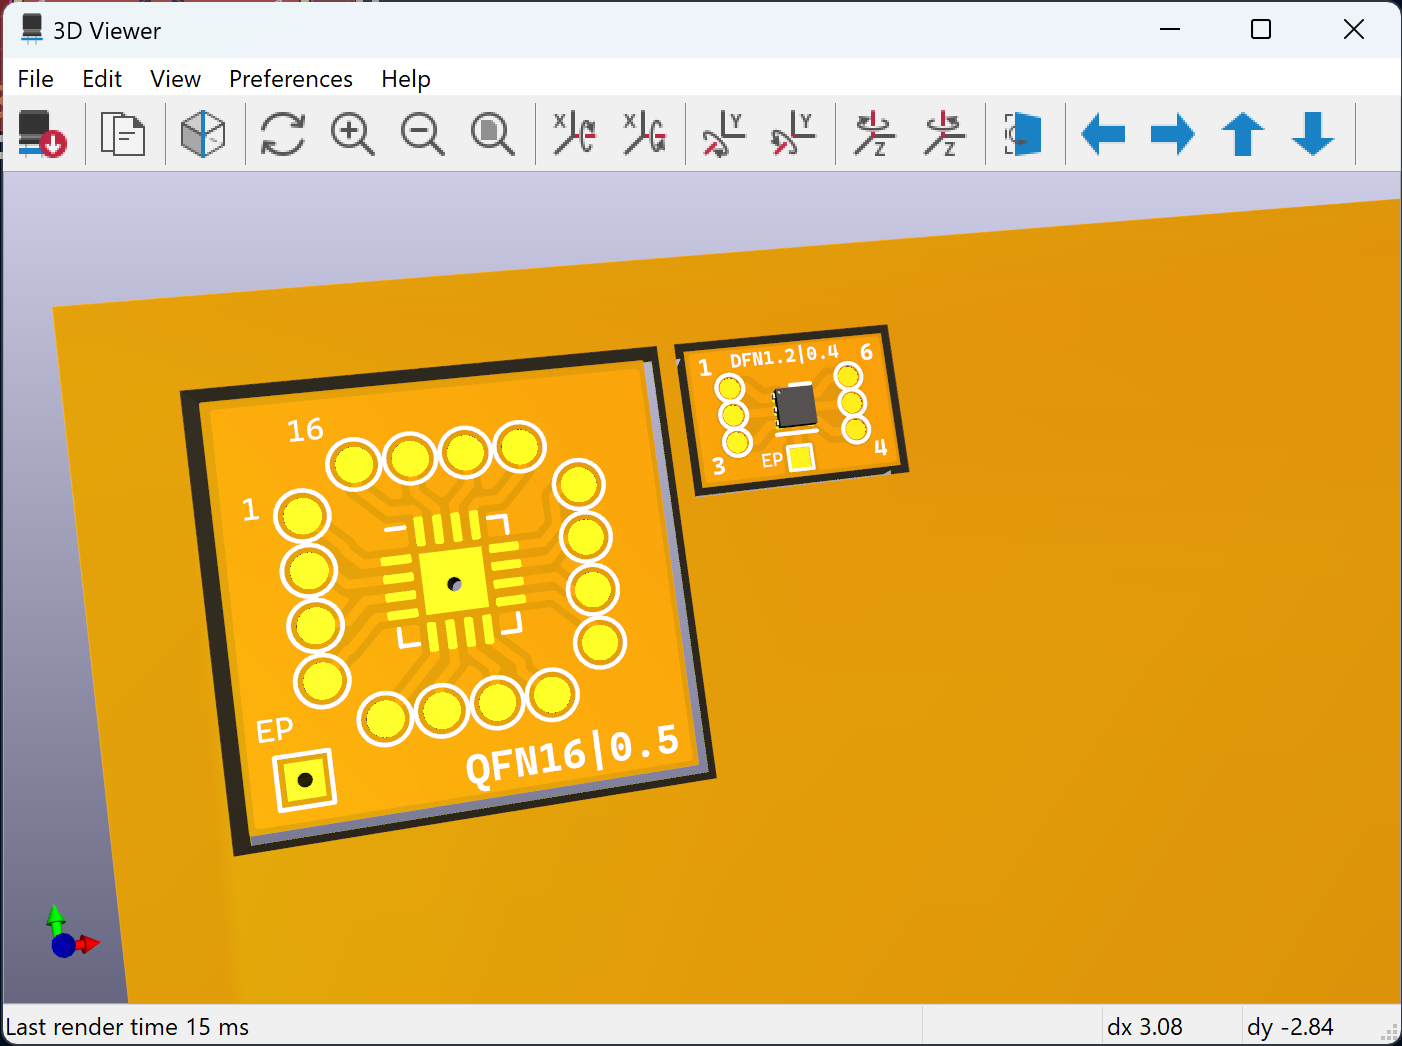
    As I am going to use RP2040 in my next project, I decided to add it to the prototype. Here is how it looks now:

  • Schematic Entry for PoC

    Kumar, Abhishek09/11/2023 at 18:14 0 comments

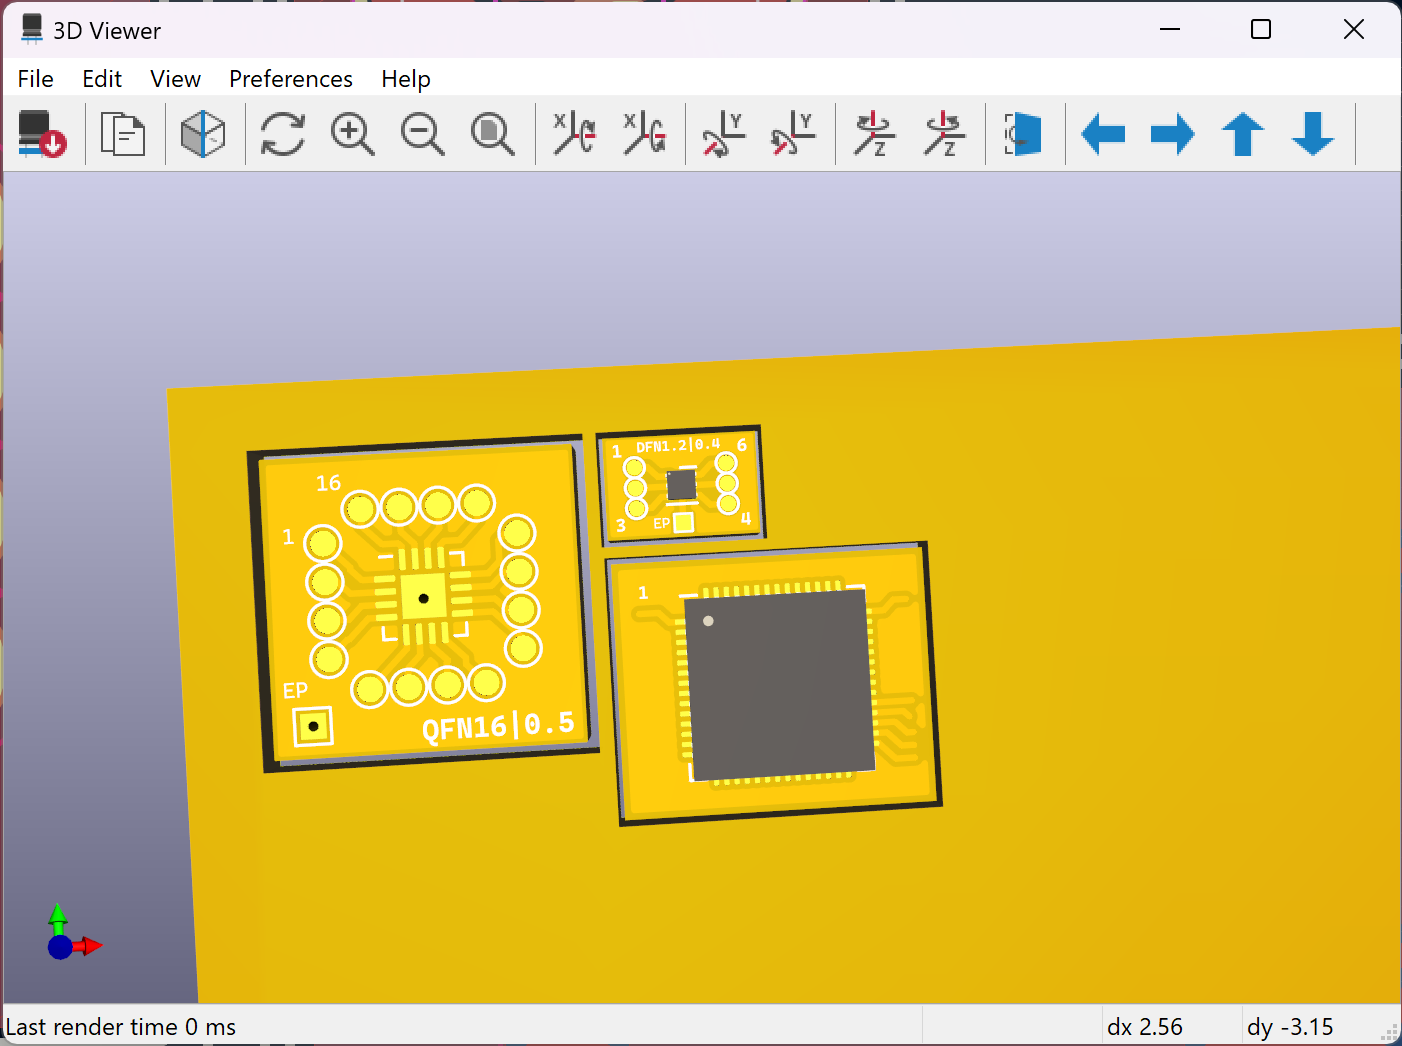
    Here are the first two footprint breakout designs for this project made in KiCad. The first one is a 16-pin 0.5mm pitch QFN chip, the second is for a 6-pin 0.4mm pitch DFN chip which is 1.2mmx1.2mm in size. Notice all pins are brought out as-is, including the exposed pad.

    This is more of a proof of concept, I have to add more footprints that I intend to use and create a 100mmx100mm Flex Panel that I can send off to a Flex PCB vendor for fabrication.

    This should give an idea of what the project aims to solve.

View all 2 project logs

  • 1
    Cut pieces of footprint breakouts

    Using scissors, cut out from the Flex board, the area of interest for you from the different footprints on the board

  • 2
    Peel off backing adhesive and stick down to substrate

    Substrate here can be any thing like a PCB or a piece of plastic or acrylic

  • 3
    Make connections between subcircuits using magnet wire

View all 4 instructions

Enjoy this project?

Share

Discussions

Similar Projects

Does this project spark your interest?

Become a member to follow this project and never miss any updates