Close
0%
0%

SD card sized board, let's say "SDuino"!

Once I was excited to see Intel's announce that they will release "SD card sized computer" but it was not true. This time I made it true!

Similar projects worth following

New SDuino variant. I would call it "SDuino-Qi", wireless power transfer system embedded SDuino! Details can be found in daily log!
Now SDuino is on your wrist
Details can be found in daily log. Please check it....

=======================================

I would proudly present, my ultimate SDuino,

SDuino ZERO

SDuino with SAMD21G18A ARM processor. Here comes new generation of SDuino!

Please see additional information at daily log..!

-----------

Thank you everyone, and I am so glad my SDuino project is selected as "semifinalist of Hackaday Prize"!!! I made a short summary video of SDuino! Have fun!!

**** Please also check "daily log" below ****

And finally SDuino has an embedded graphic display.
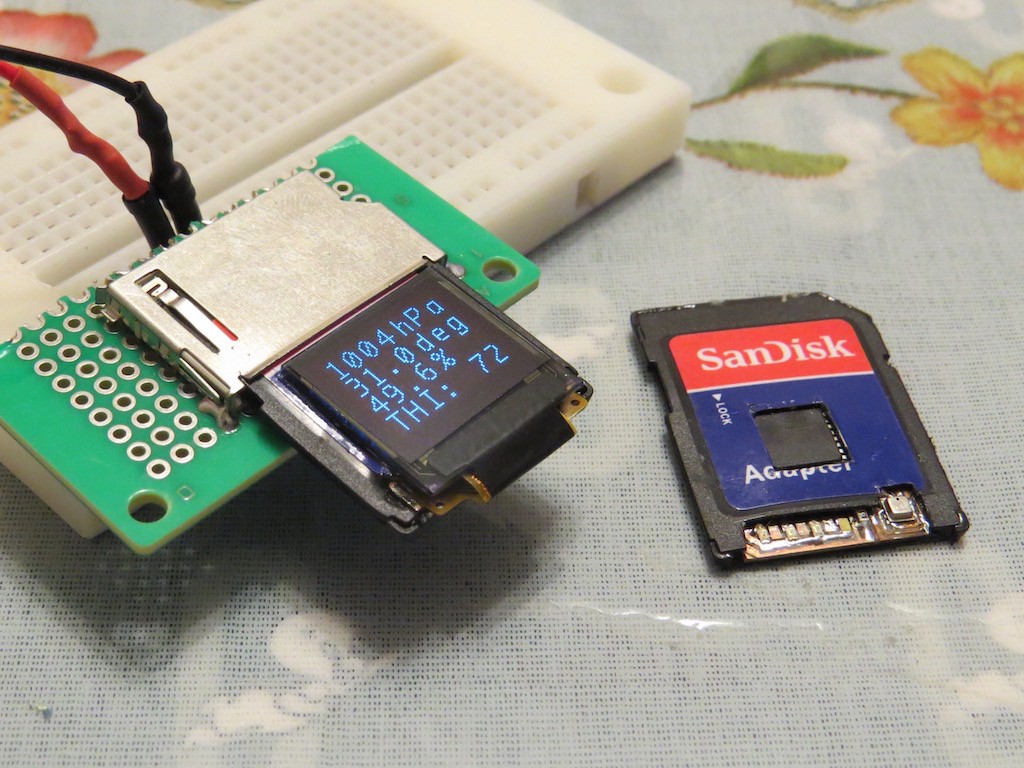
Details can be found at daily log!

--------

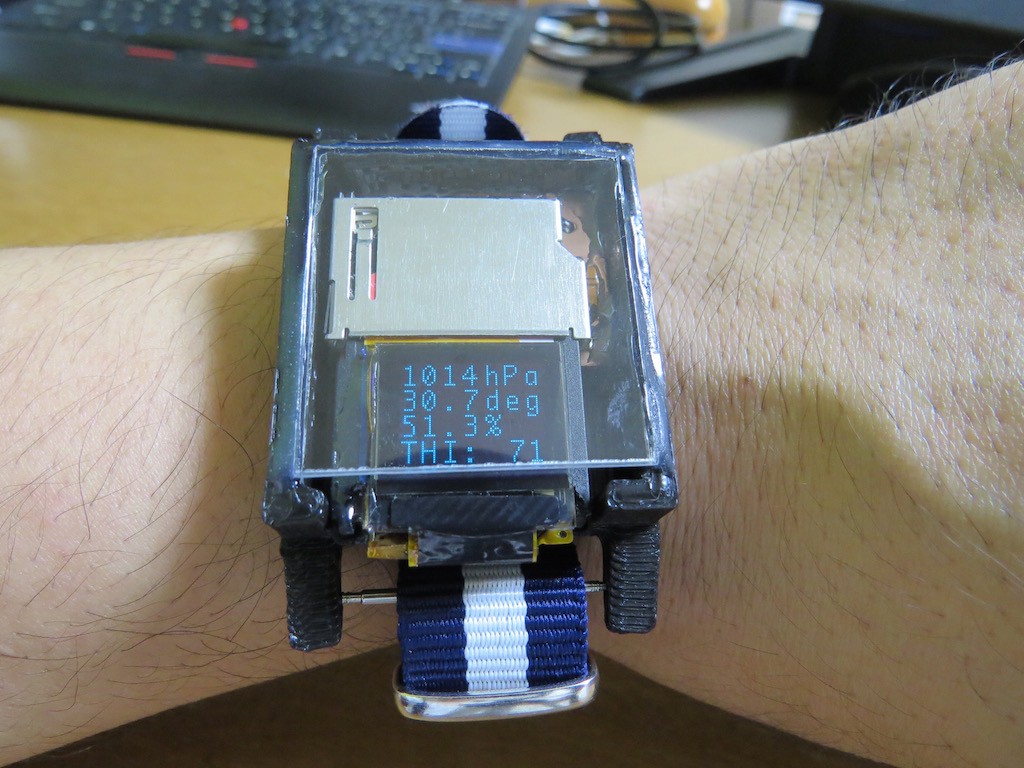
Now SDuino can measure pressure, temperature, and humidity. By measuring these values, SDuino will show the current temperature-humidity index, which is quite important to avoid heatstroke, the fatal disease in summer season!! (In Japan, hundreds suffers and a lot of people are dead, even well-organised 21st century!)

----------

history....

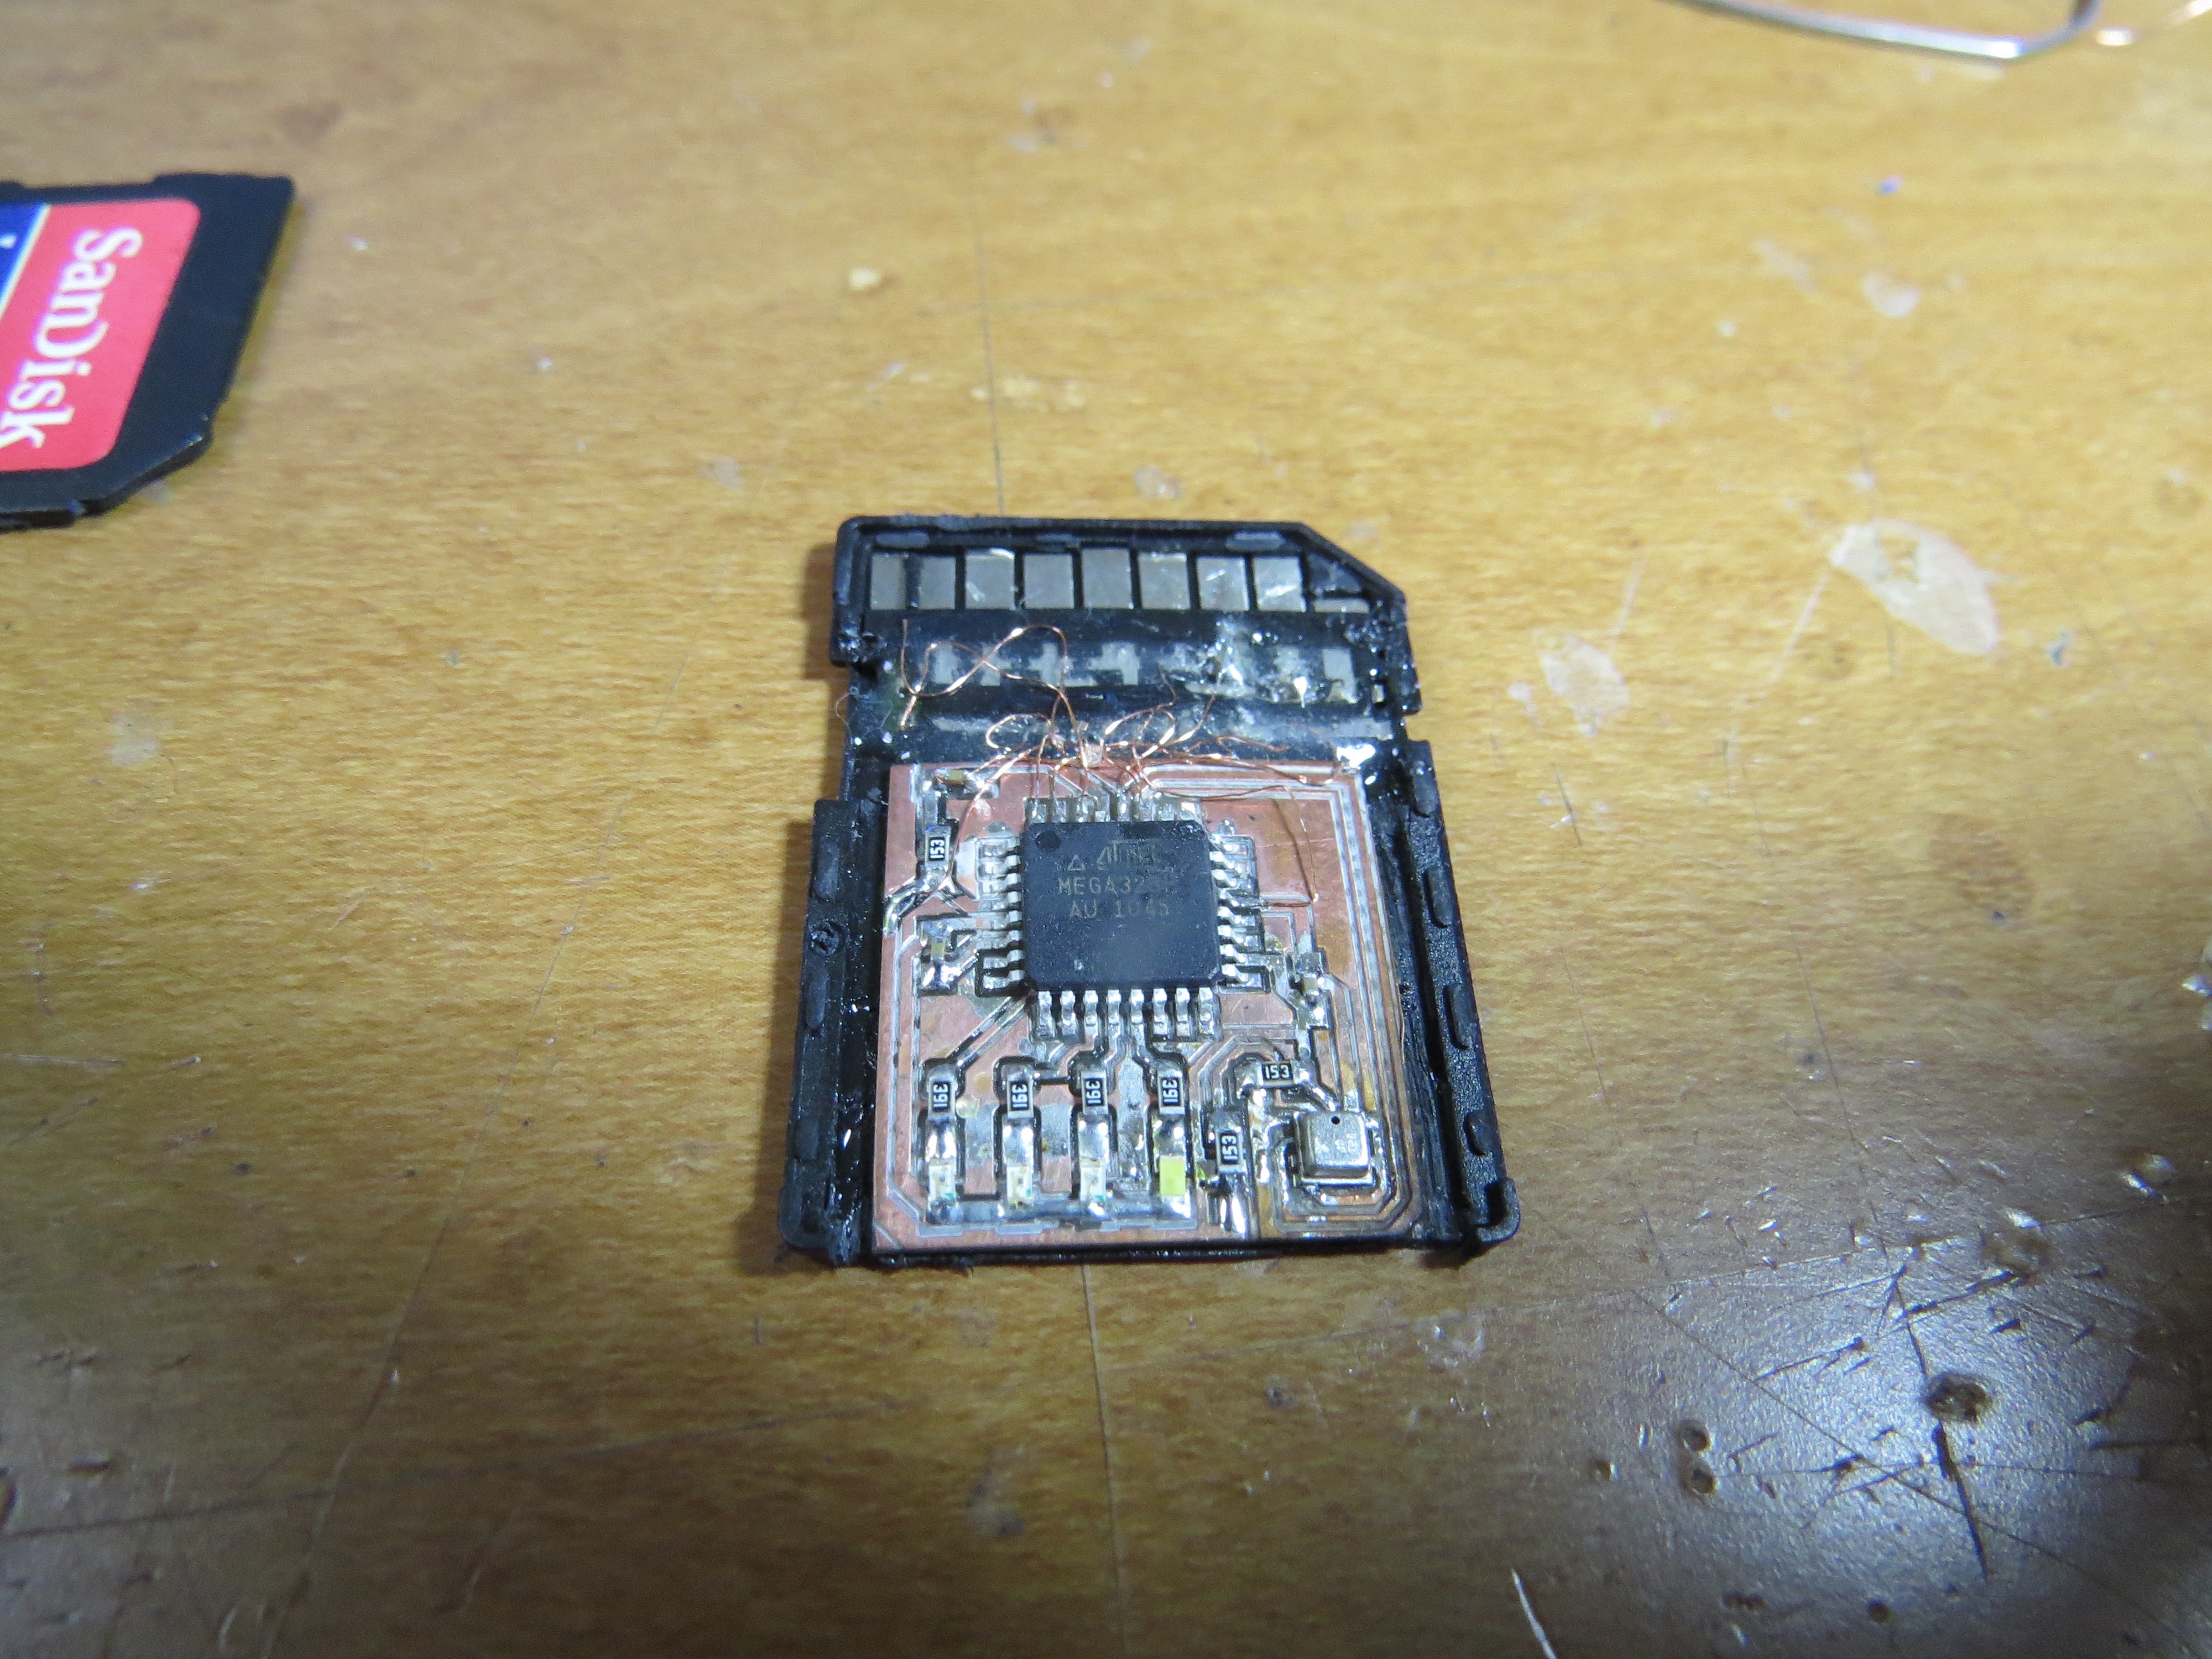
Once I was excited to see Intel's announce that they will release "SD card sized (SD card shaped) computer", but it was not true. This time I made a real SD card sized full programmable (indeed, Arduino pro compatible) small computer board!

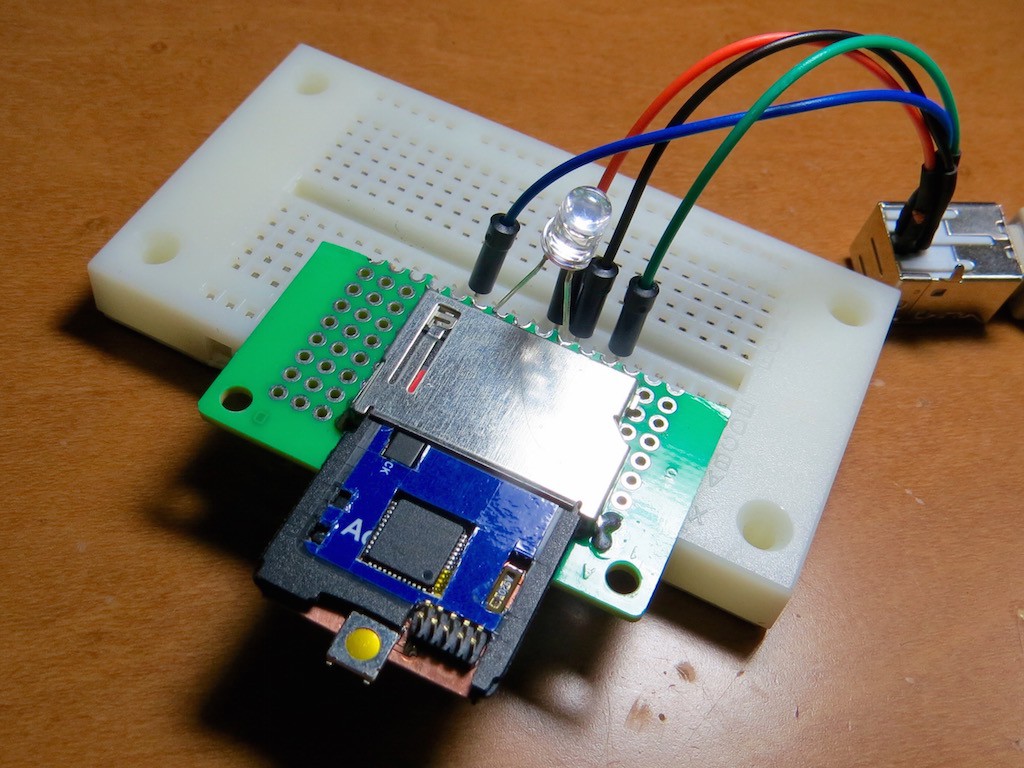
It consists of ATMega328P and four LEDs connected to D6 to D9. (red, blue, green, white).
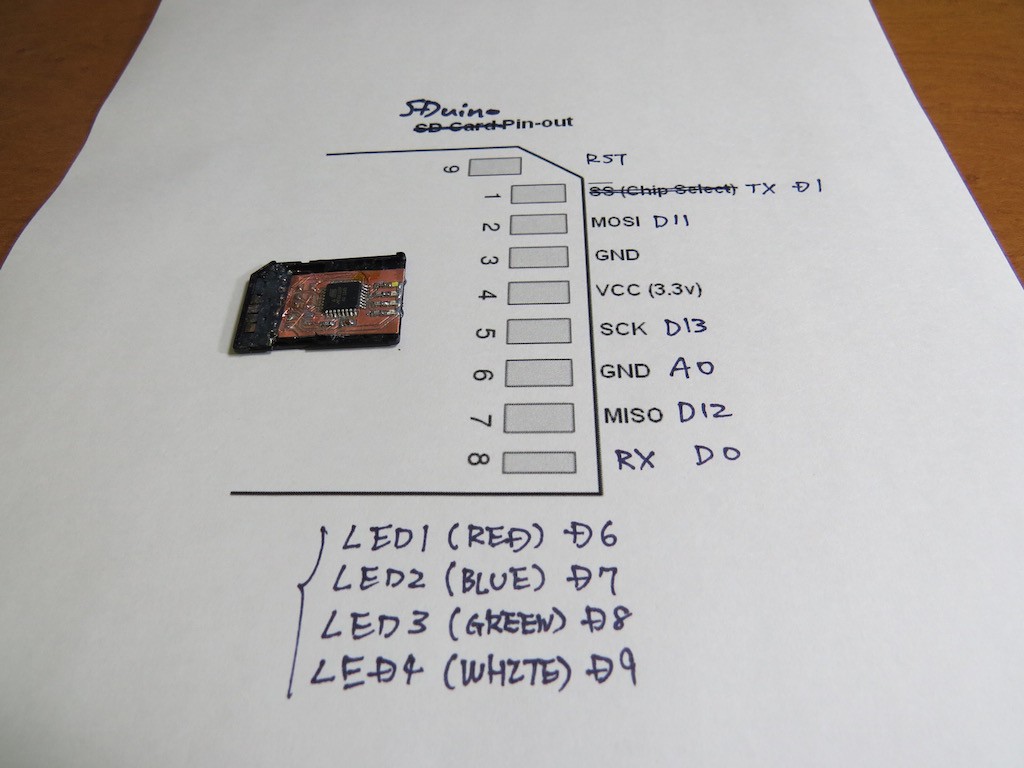
As shown in above image, I assigned several non-standard function to SD card interface, but I needed to be careful for VCC and GND, not to make short circuit even if my wife puts it to computer by mistake. A0 is assigned to one of GND, which will not make fatal side-effect for computer connection.

Detailed operation can be found in the following movie...

And now I made very smart SDuino writer! Details can be found in the daily log!
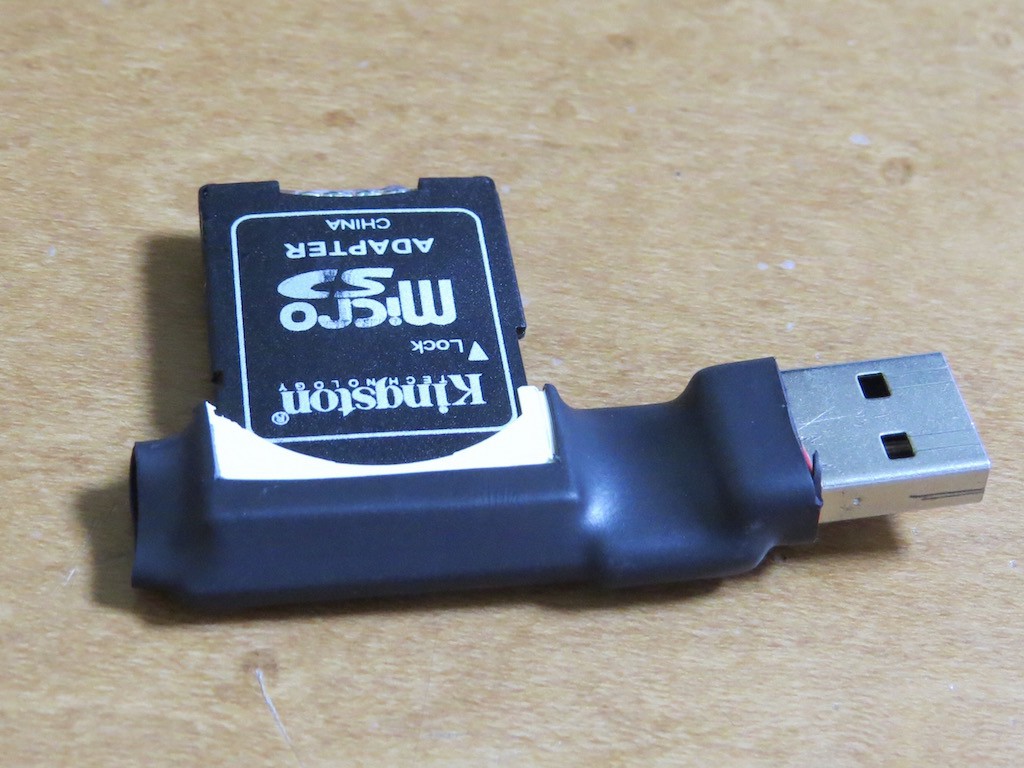
actual operation can be found in the following movie. Have fun!

.... actually I had an ambition to make self-powered (battery inside) SDuino, but smallest with enough current-out battery was 50mAh Lipo , which has more than 2mm thickness... Dammit!

(manganese dioxide has smaller one, but it can provide very small current around 0.5 mA...)

And now SDuino has pressure sensor init!
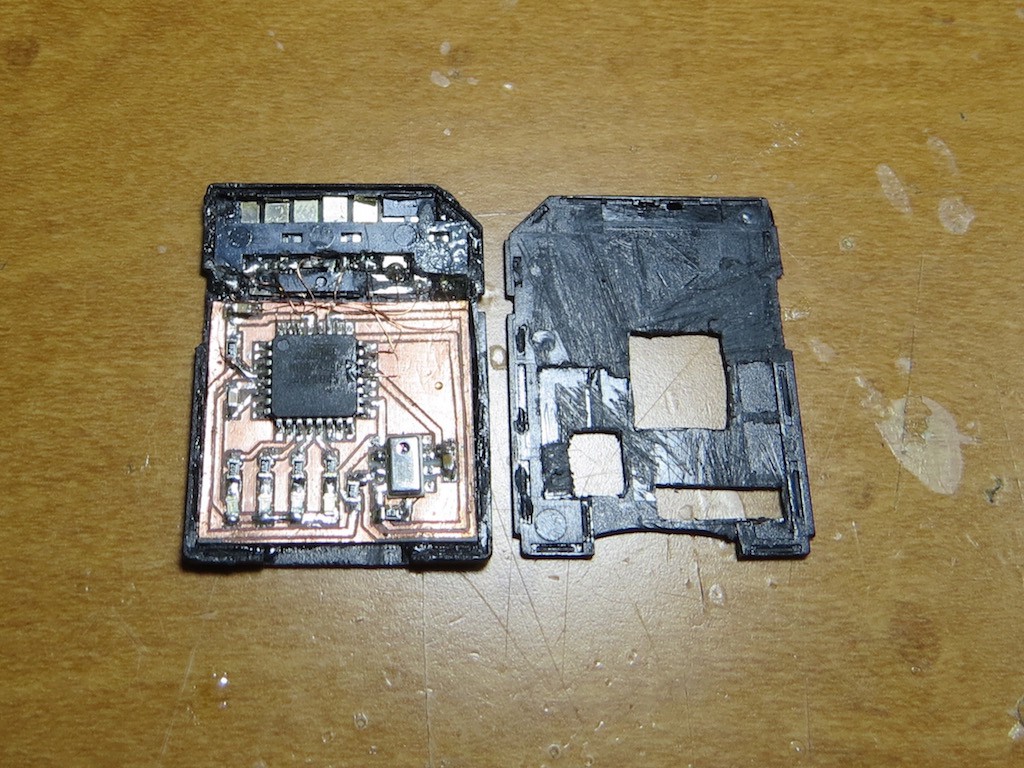
and now it can play music!!!!

,, and now it can measure pressure, temperature, and humidity. By measuring these values, SDuino will show the current temperature-humidity index, which is quite important to avoid heatstroke, the fatal disease in summer season!! (In Japan, hundreds suffers and a lot of people are dead, even well-organised 21st century!)

  • 1 × ATMega328P Microprocessors, Microcontrollers, DSPs / ARM, RISC-Based Microcontrollers
  • 1 × LEDs Electronic Components / Misc. Electronic Components
  • 1 × BME280 sensor Temperature, pressure, humidity sensor
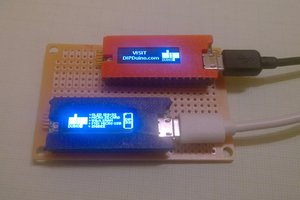
  • 1 × OLED module 64x48, 64x32,.... with SSD1306 controller
  • 1 × 0.1 uF using at reset line

View all 9 components

  • New SDuino family, I would call it "SDuino-Qi"

    kodera2t11/07/2015 at 09:48 3 comments

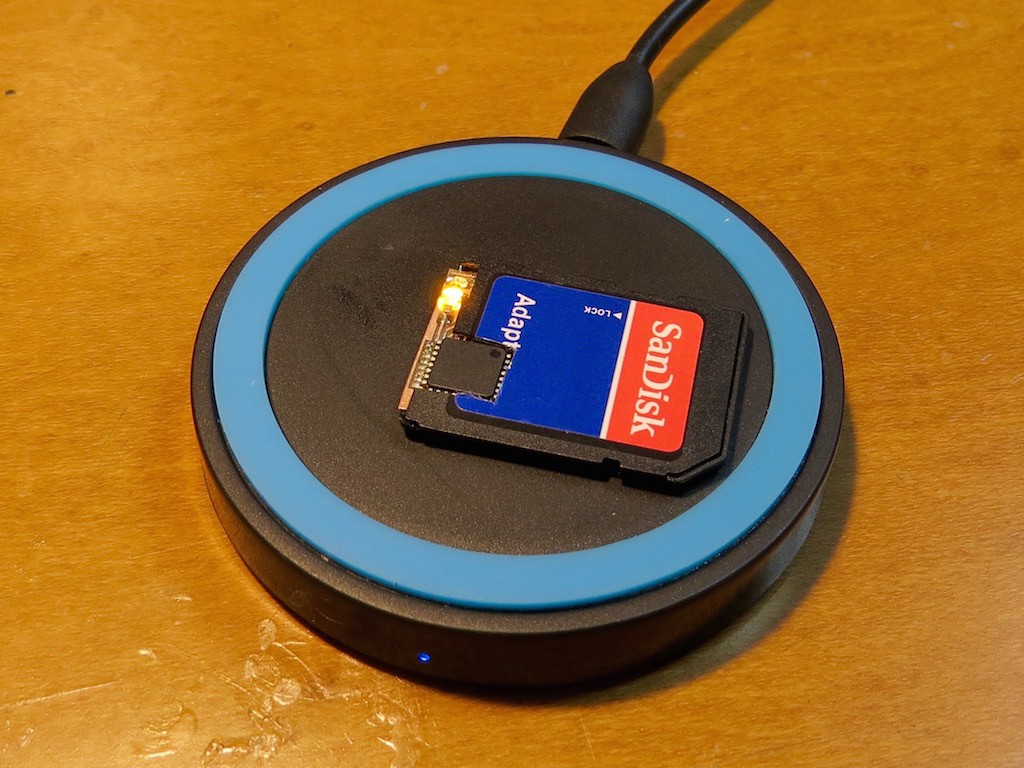
    Here I would introduce one additional SDuino variant, SDuino-Qi ! Qi is a wireless power transfer system and widely used for cellphone charging. This time, small coil is embedded inside SD card shell with Qi interface card and minimum Arduino compatible. As same as my previous SDuino series, this card can be programmed through SDuino writer (FTDI embedded interface...)

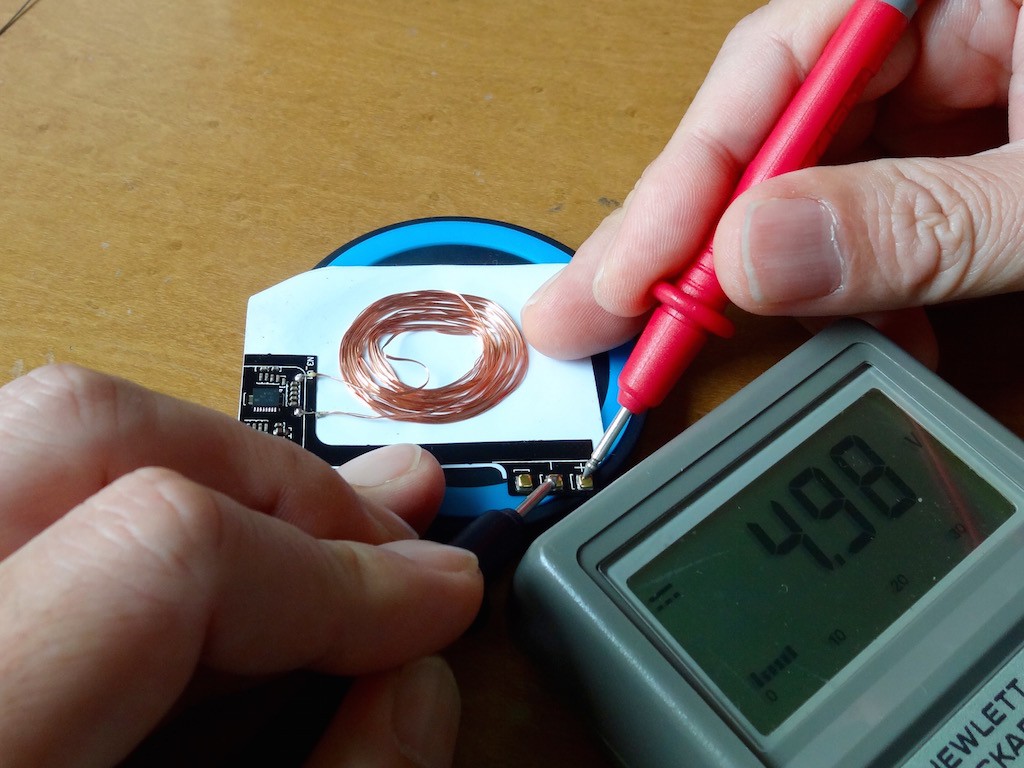
    In the another project (color OLED watch), I confirmed that roughly re-winded coil still works as a receiving coil of Qi. As you see, this very rough coil produces 4.98 V !!

    I quickly re-size the coil dimension almost half of original and put it in my small watch connecting with Lipo charging circuit. working perfect!

    When I see the case of SDuino, it surely requires 3.3 V as power supply. I have been searched "thin battery" can be accommodated inside SD card shell to solve power supply problem, but I could not.. So this time, I have tried to put Qi system inside SD card, and confirmed surely working!!!

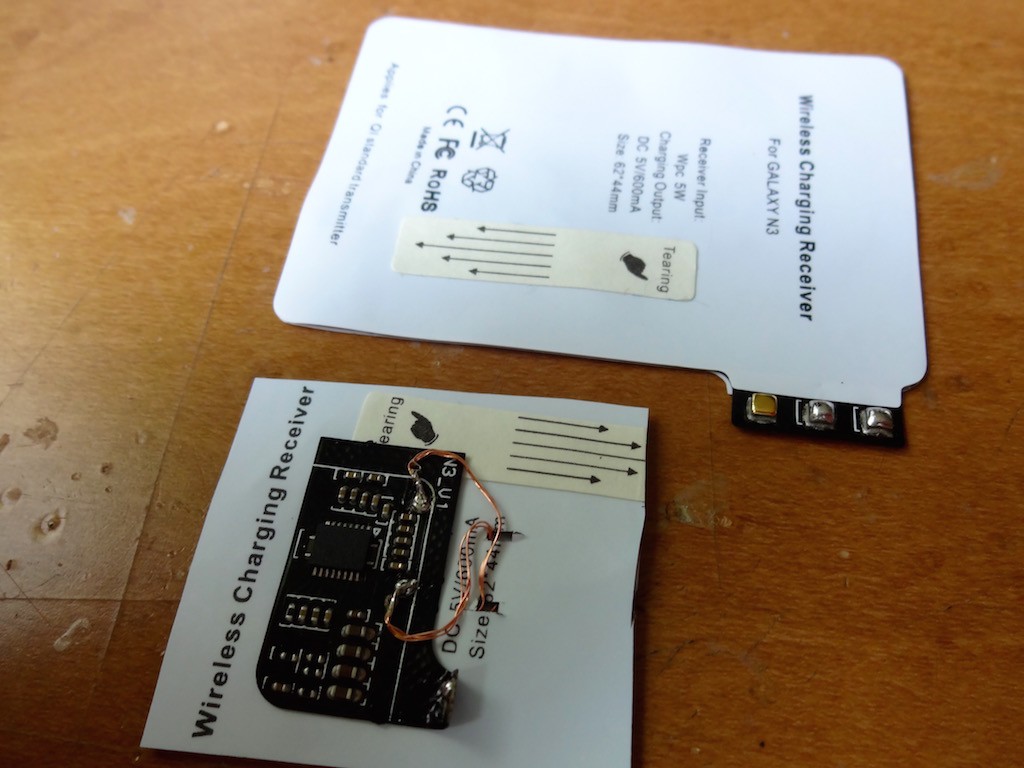
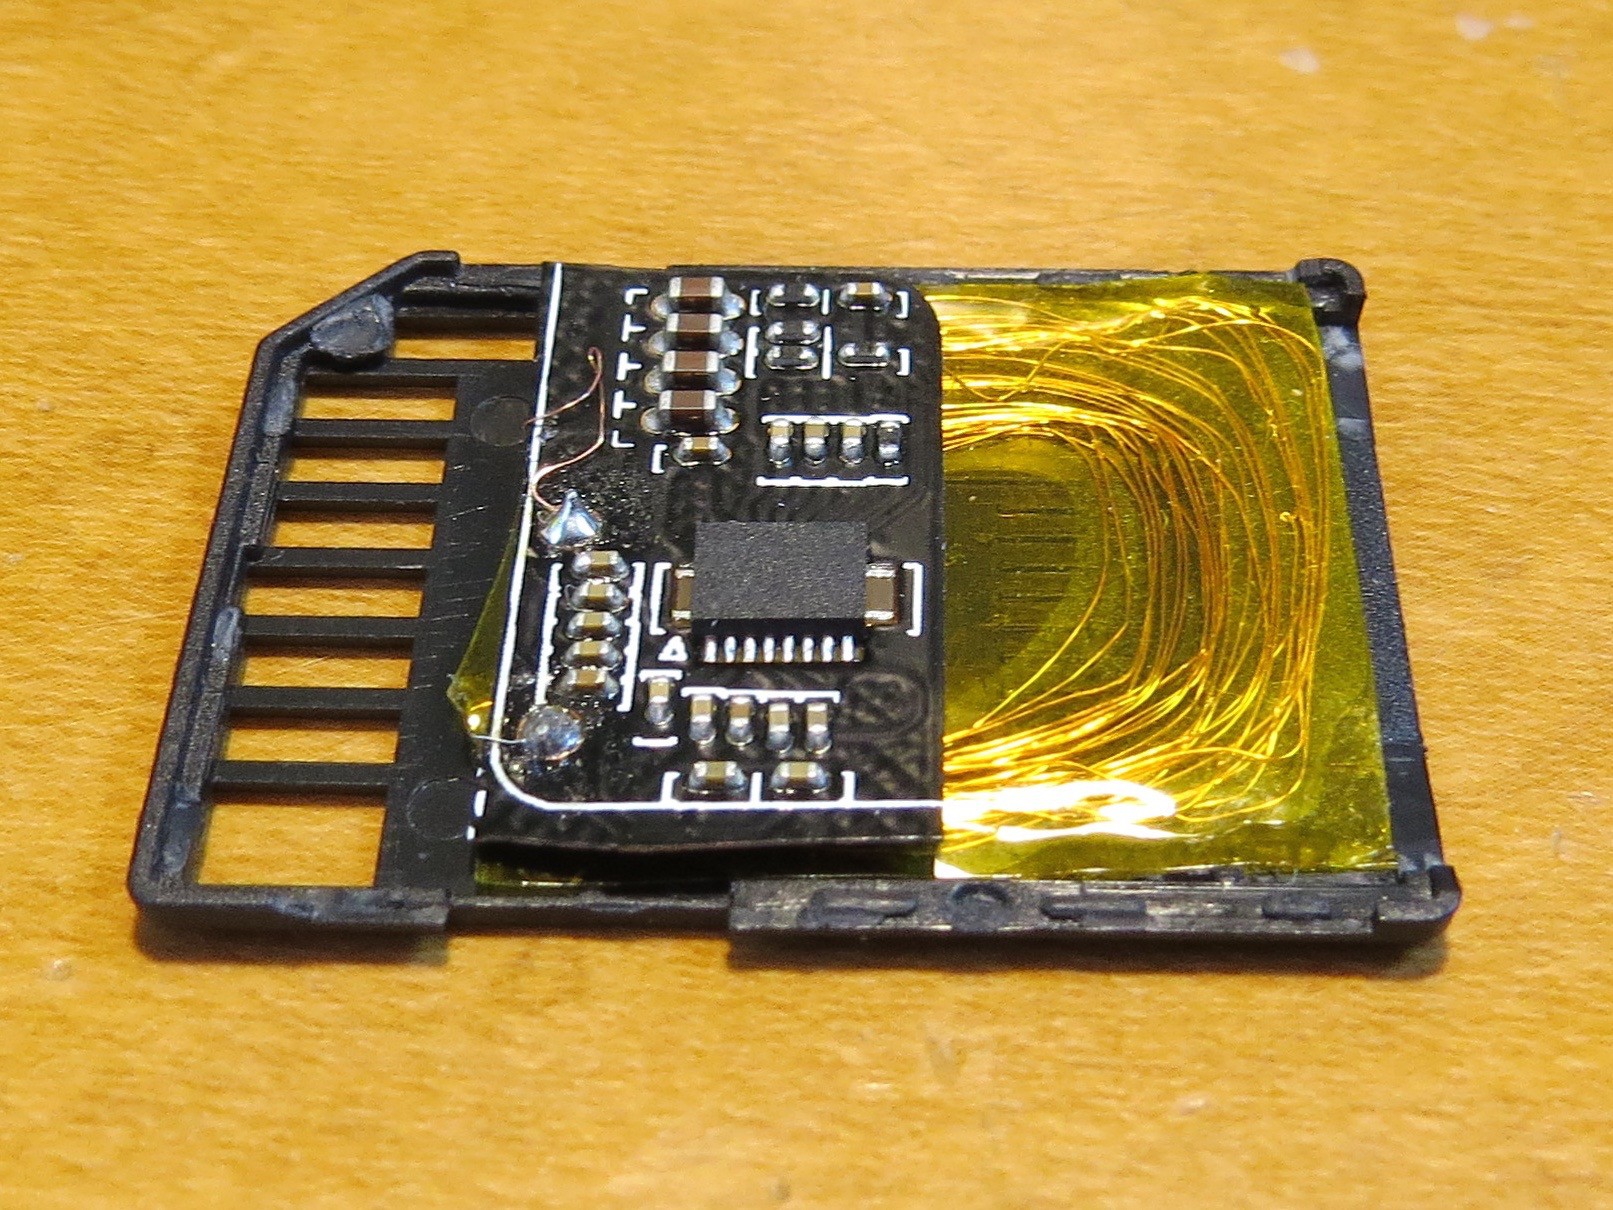
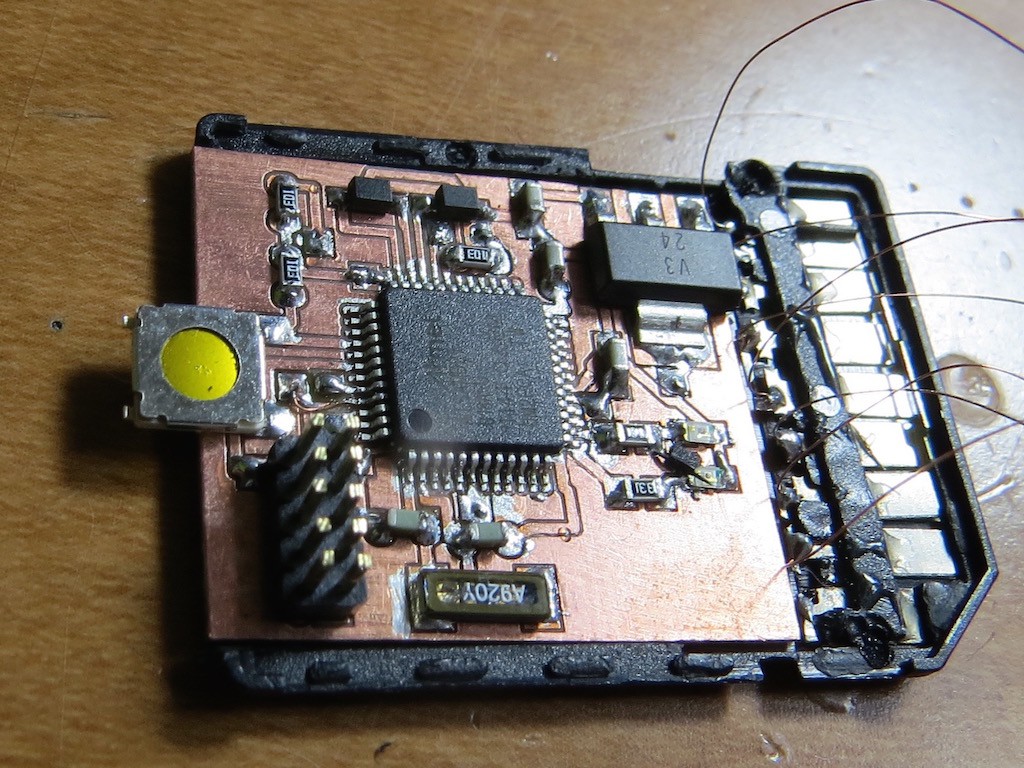
    This is the inside view, without Arduino (ATMega328) part. Very rough coil is put bottom of SD card shell, and it is made of thin coated wires inside Kapton® tape. During power transfer, coil will produces some heat and this type of heat-resistant tape is indispensable (Please never try with general Scotch tape). The Qi interface part is simply cut down from Qi cell phone charger in the above picture. Indeed, half of space is occupied by Qi.

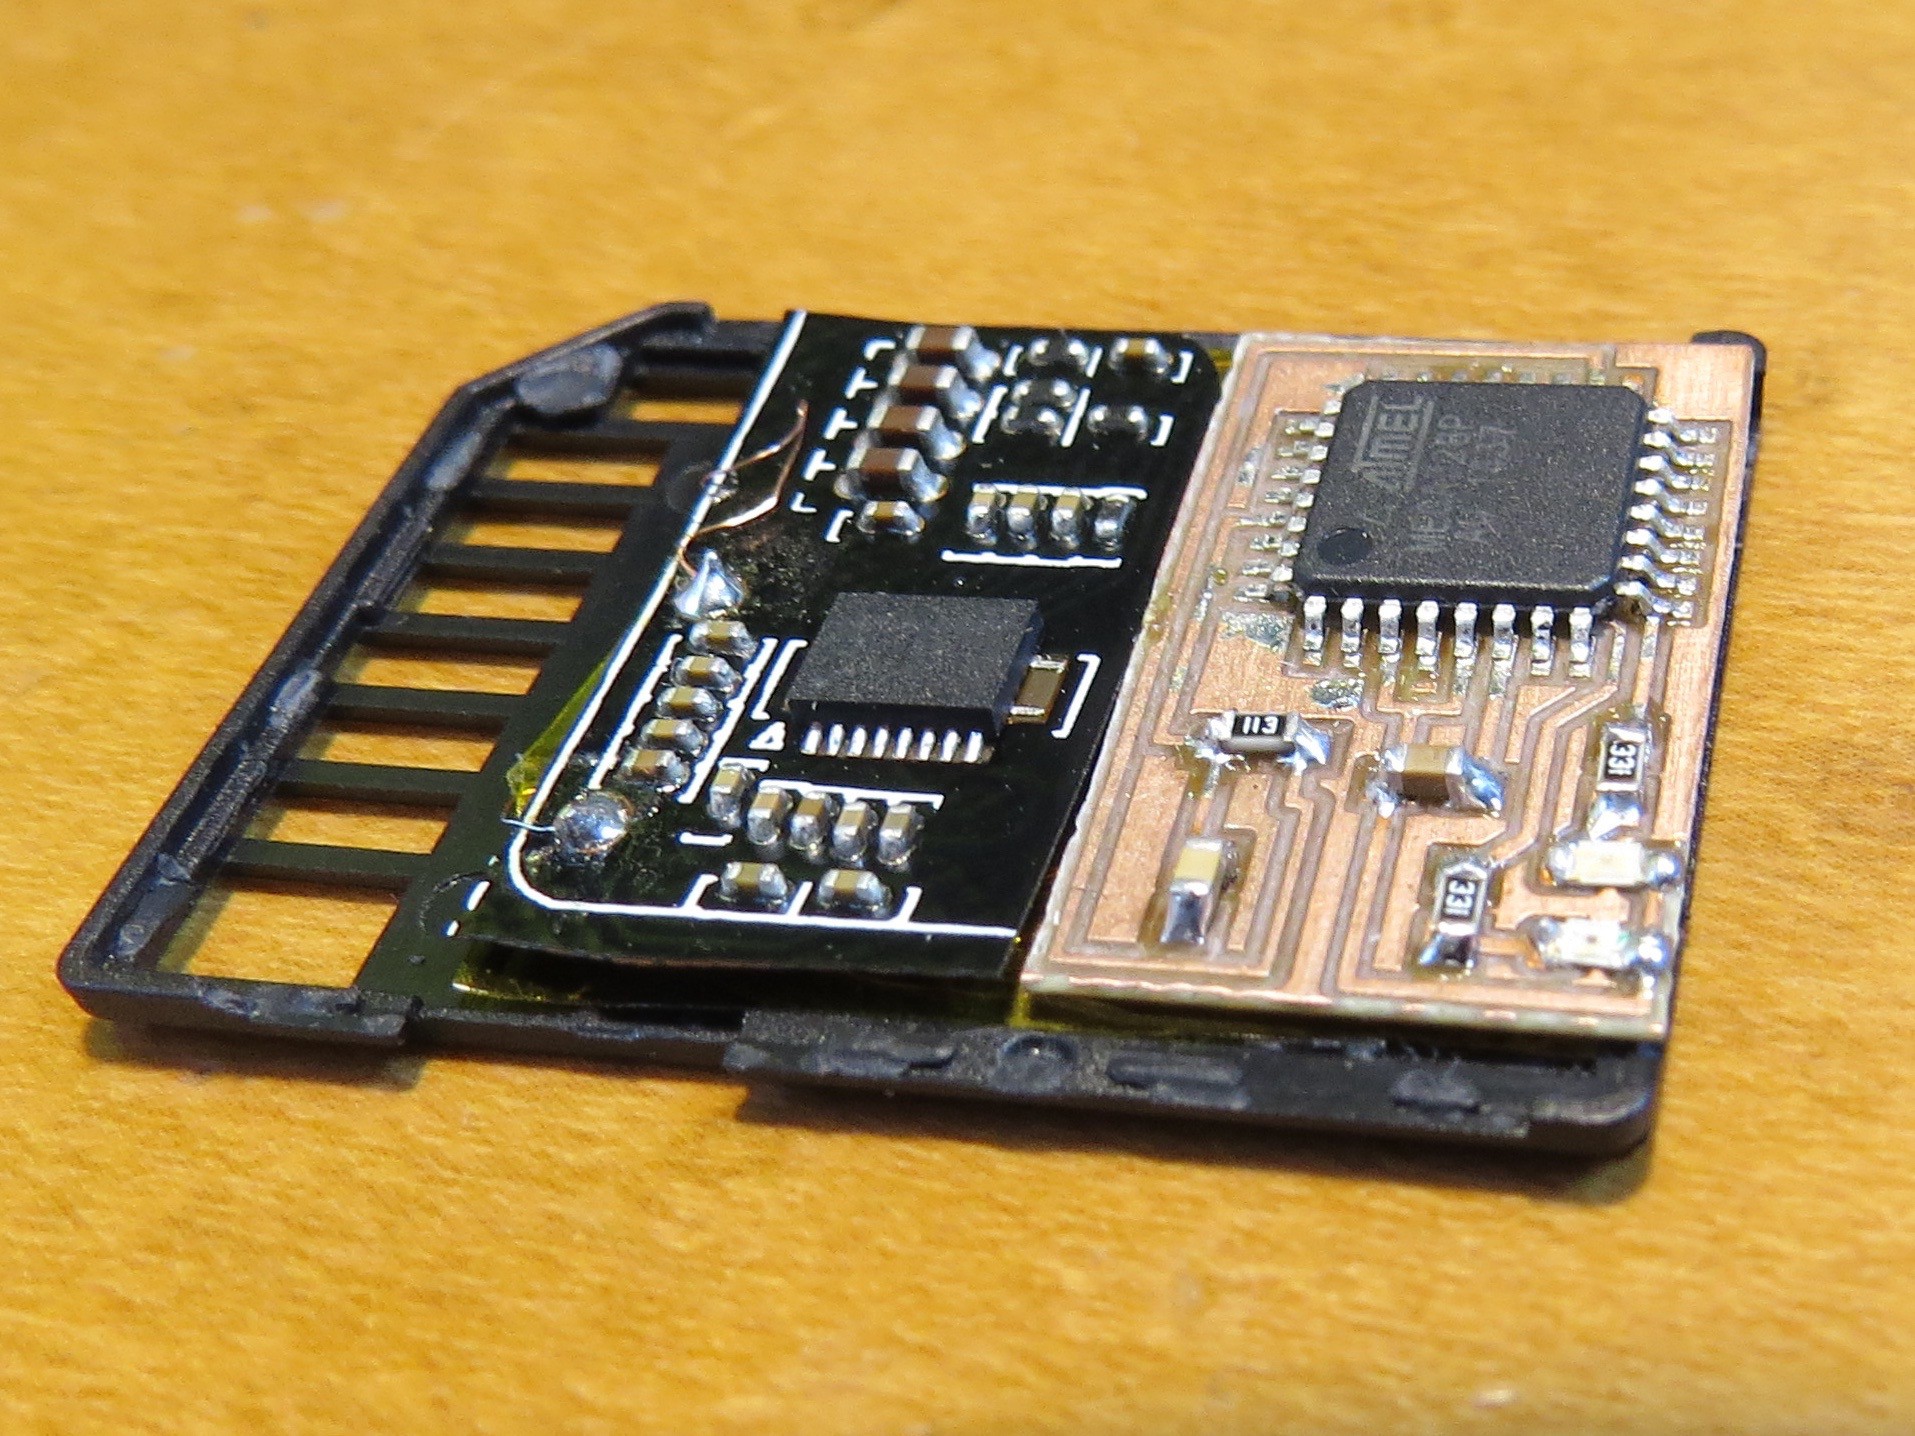
    This is the full mounted shape. Very tightly arranged and I have to forget my ambitions to put OLED... ATMega328 part is full compatible with Arduino Pro 3.3V 328 version.

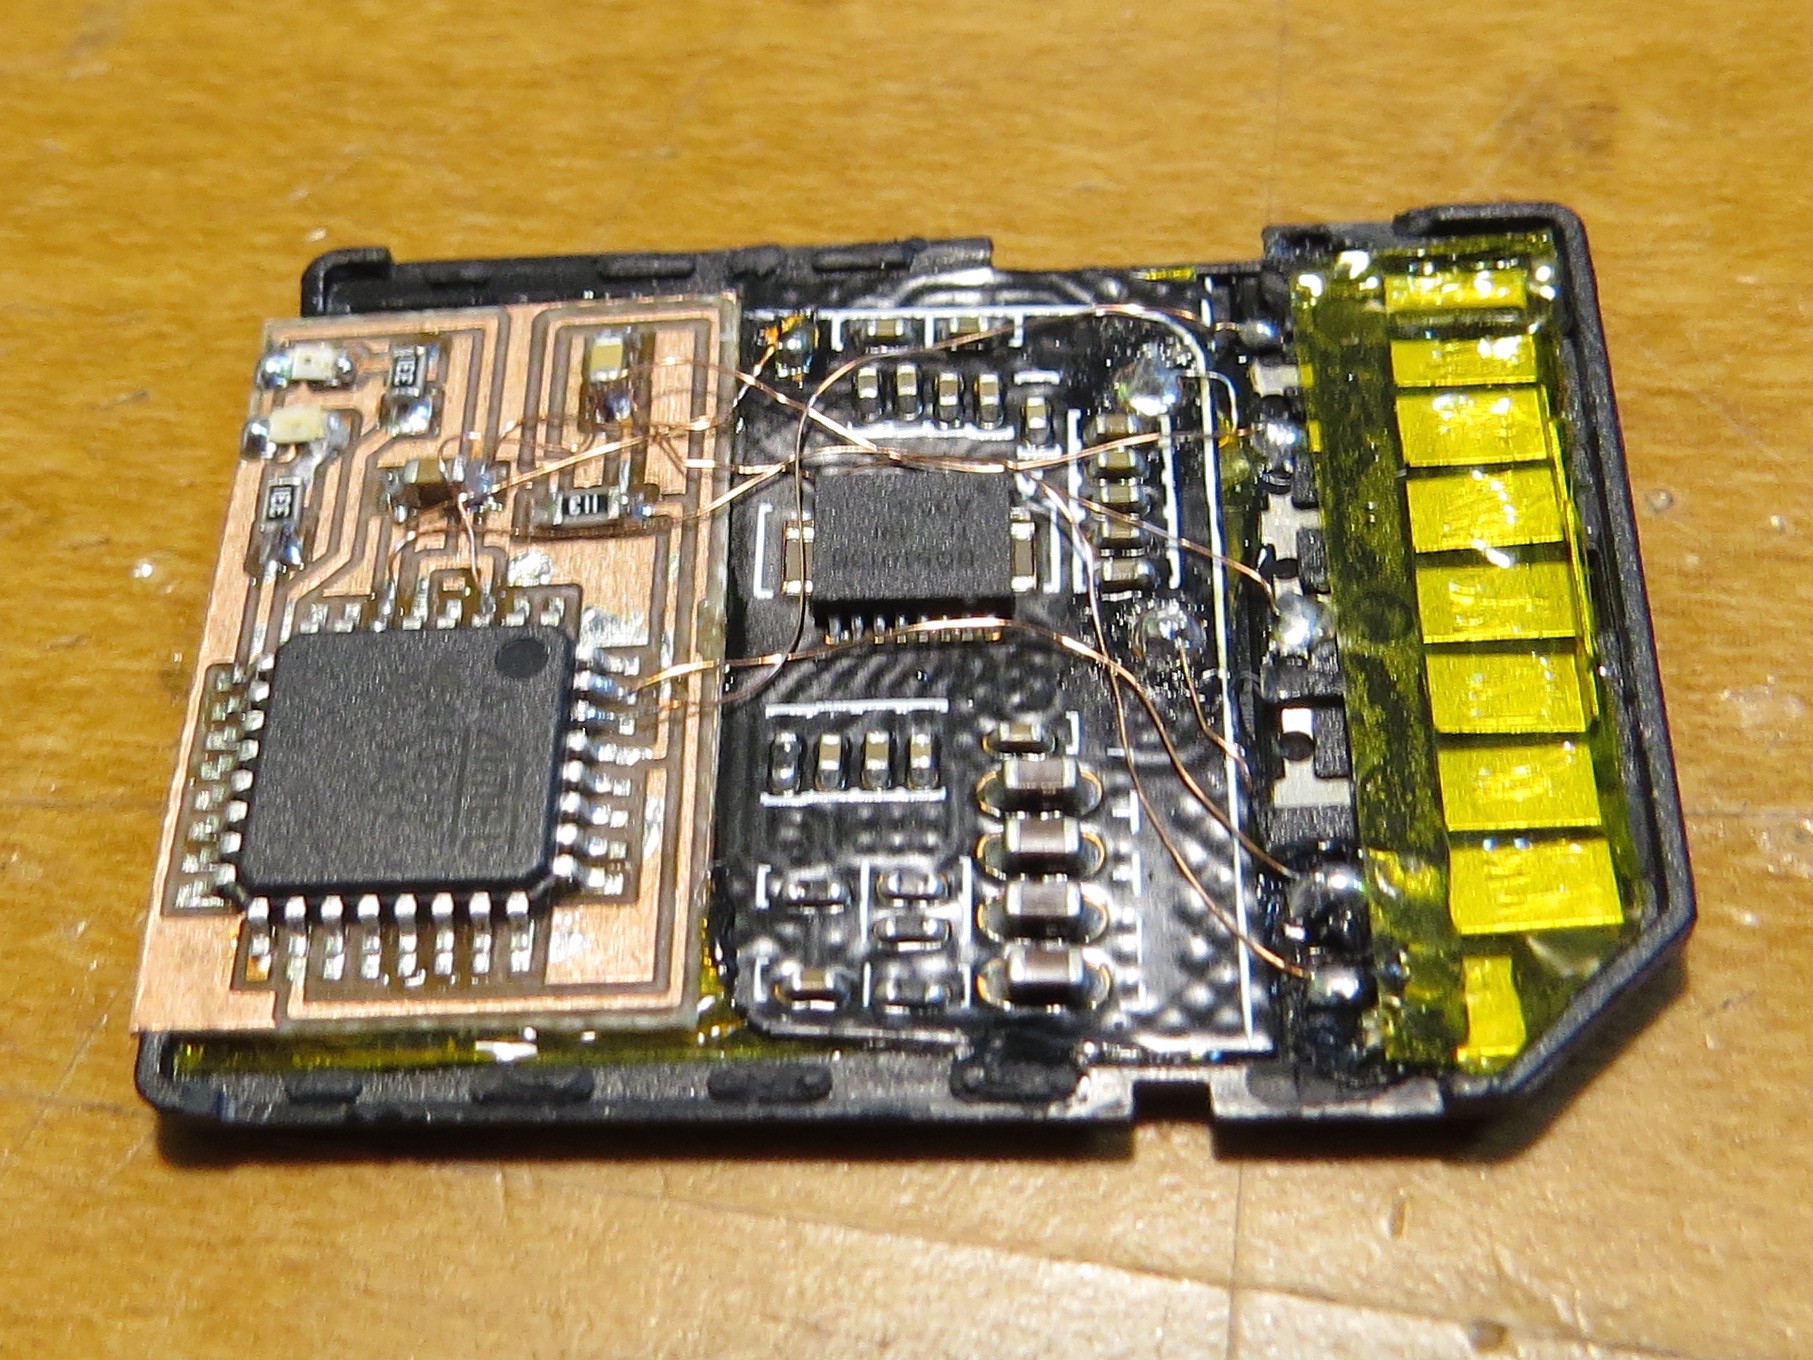
    This is the wired state. SD card shell is very weak for heat and need to solder terminals as short time as possible...

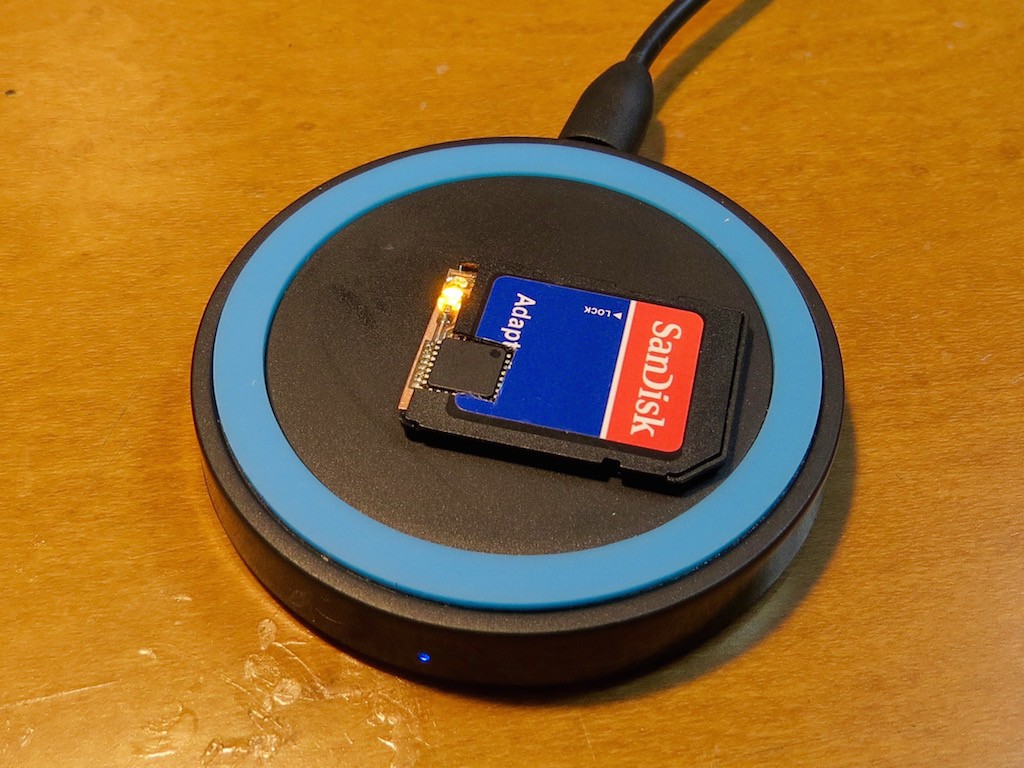
    And finally SDuino-Qi is working!! Actual operation can be found in the following movie... Have fun!

  • Now it's on right direction

    kodera2t09/14/2015 at 13:16 3 comments

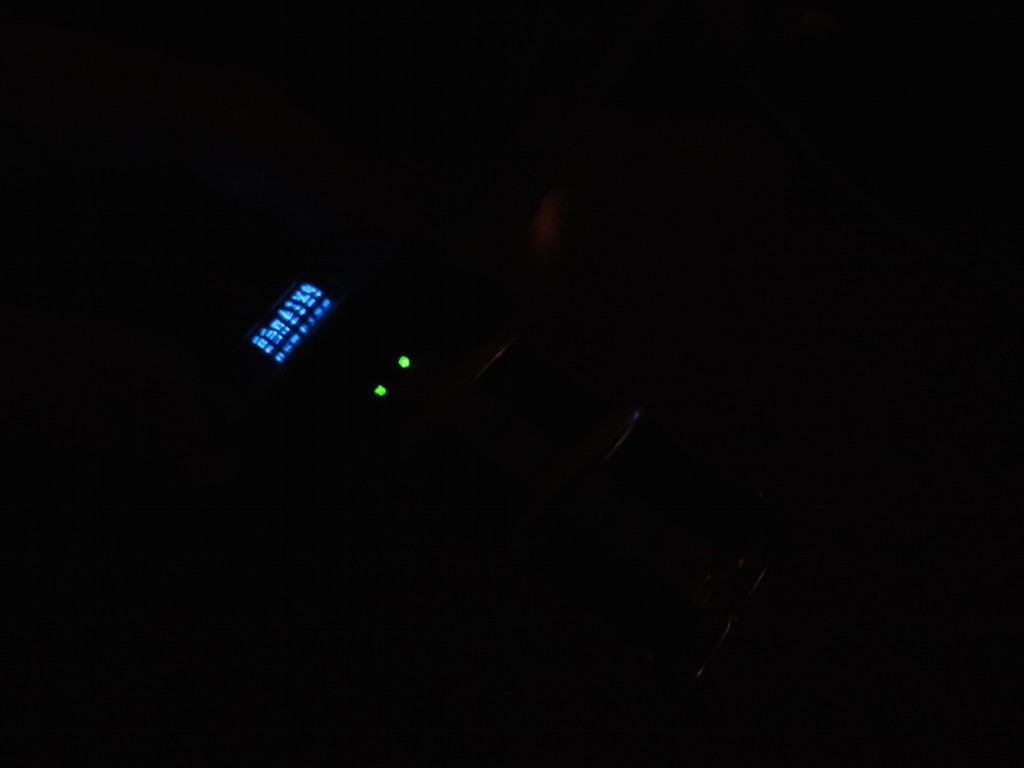
    The previous "SDuino on wrist" was a bit hard to read its digit and Nyancat, so this time,,

    I rotate 90 deg to read well !

    The function and circuit is exactly the same (Lipo battery and charging circuit), but

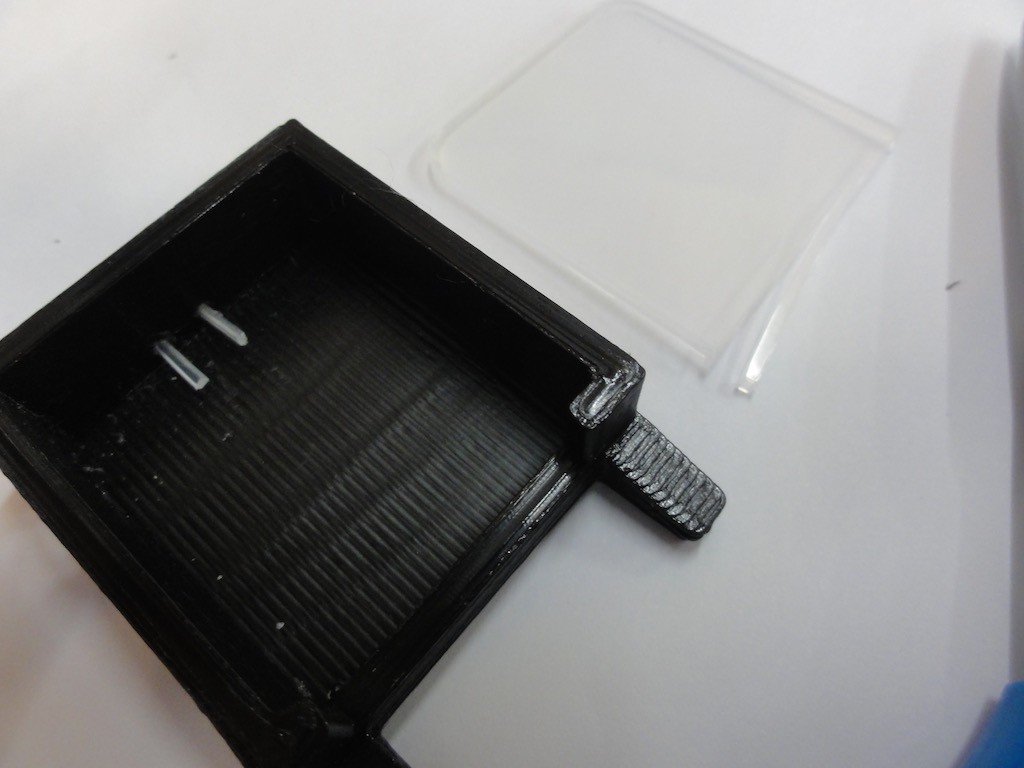
    I inserted a string of plastic sheet (actually it is SD card holder cut by scissors...)

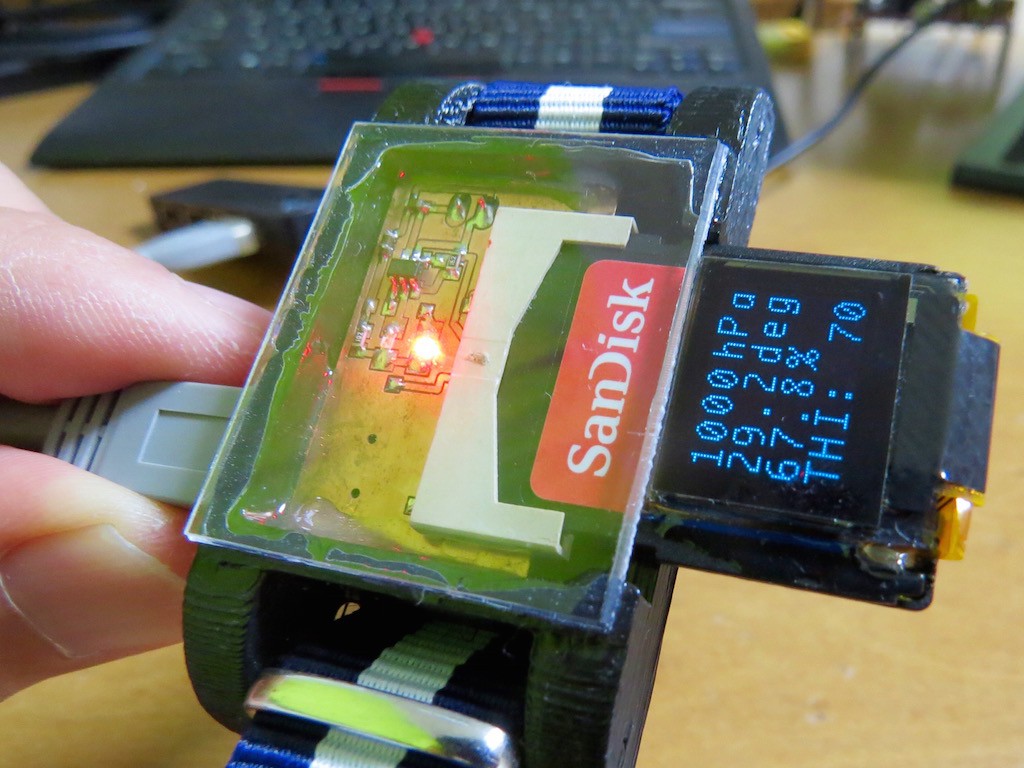
    and it is working as "very low-efficiency light-wave waveguide". When it turns green, battery inside is full, and will turn red during charging....

  • Now SDuino is on your wrist!

    kodera2t09/10/2015 at 12:09 5 comments

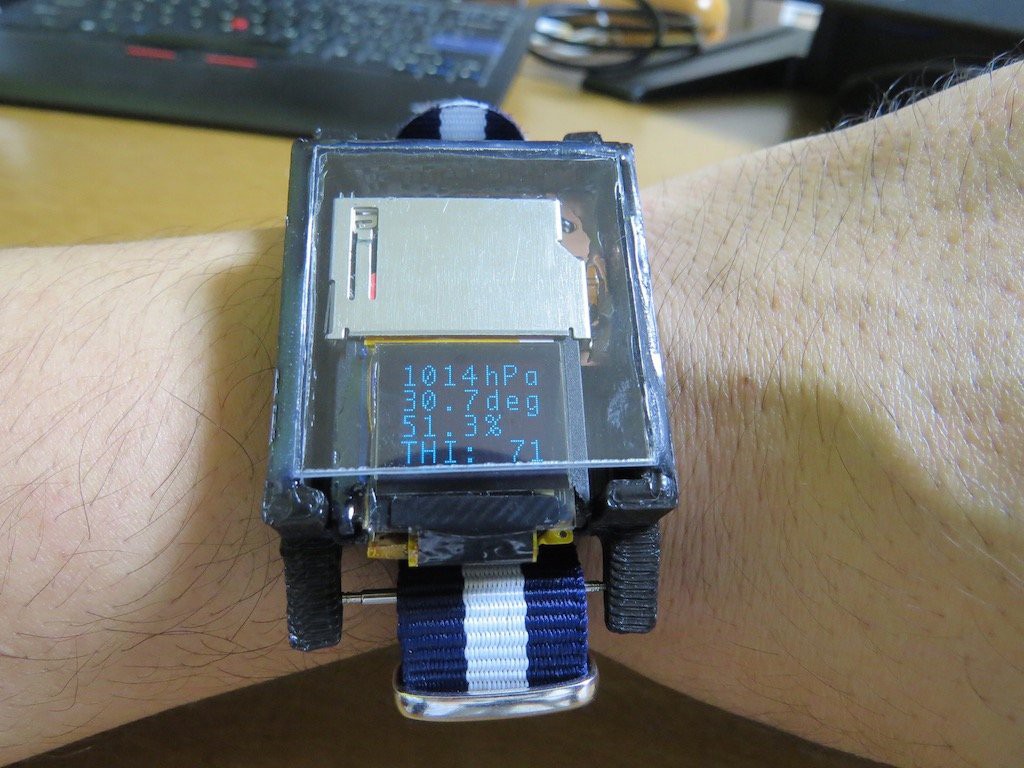
    Now SDuino can be on your wrist!!

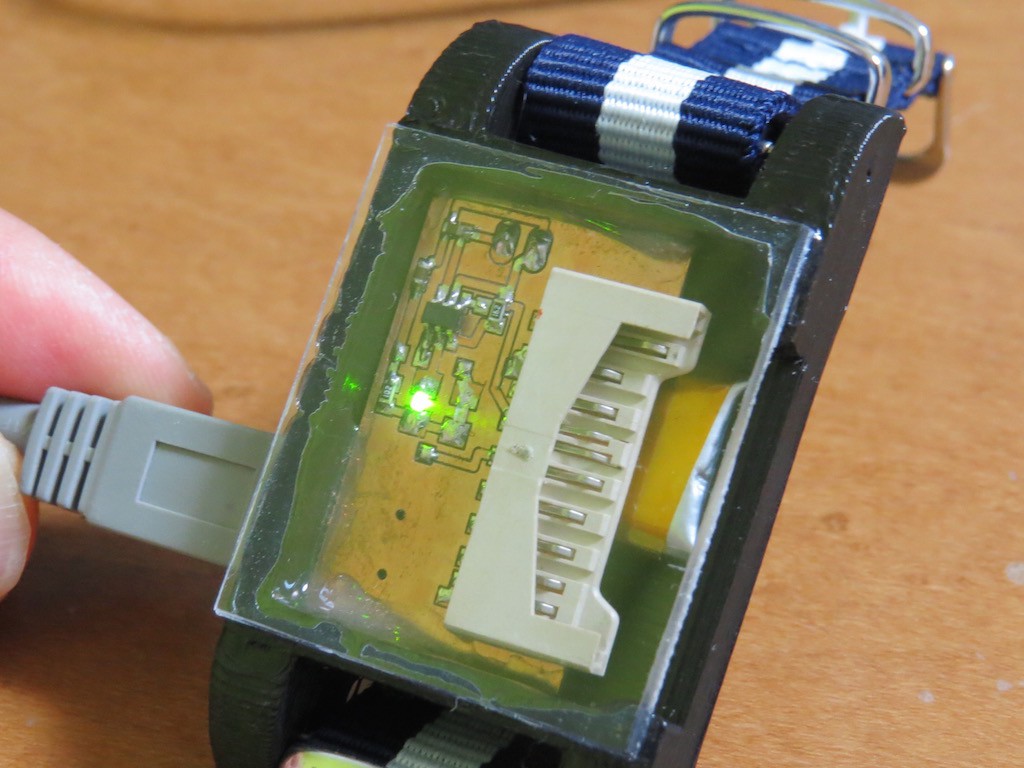
    It is a base unit, consisting of Lipo charging circuit with small LiPo battery.

    Battery charging is through USB interface, and during charge, red LED turns, and

    After full charge, LED turns GREEN, and charging circuit will stop charging current. Details can be found in the following movie... Have fun!

  • SDuino Zero can drive OLED display!

    kodera2t08/30/2015 at 02:20 0 comments

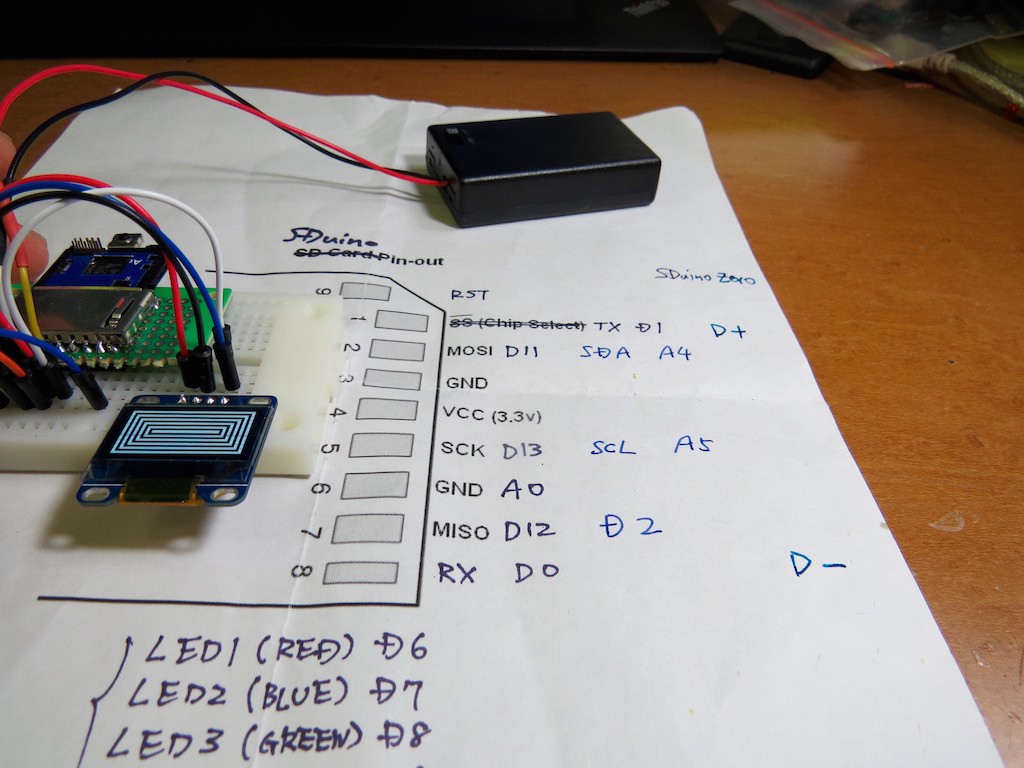
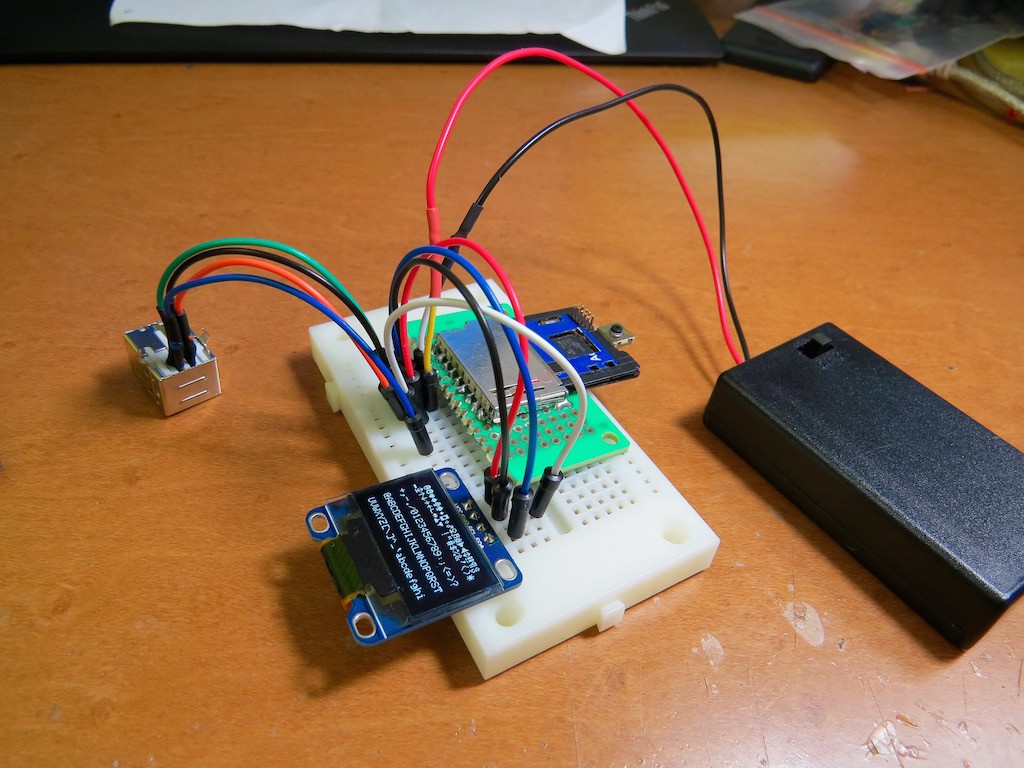
    So I test my SDuino Zero driving OLED display.

    New SDuino Zero does not have serial I/O. Instead, it has

    USB interface!

    I change the pin assignment Tx to D+ of USB, RX to D- of USB. Except for that, pinout has same as original SDuino, meaning I2C interface.

    I quickly upload the OLED driving test sketch through USB. Just applying voltage, SDuino Zero working with powerful potential. It is 32bit ARM architecture with 256kB flush memory, 32kB SRAM.

    Schematic and board information is released on github !

    Here you are watching future! Details can be found in the following movie!

    Have fun!

  • Proudly introducing SDuino ZERO

    kodera2t08/29/2015 at 13:32 2 comments

    I would proudly present NEW generation of SDuino,

    SDuino ZERO

    SDuino with Atmel SAMD21G18A, ARM architecture MCU SDuino, which is full compatible to Arduino Zero!!!!!!!

    Before wiring.

    Just before wiring!

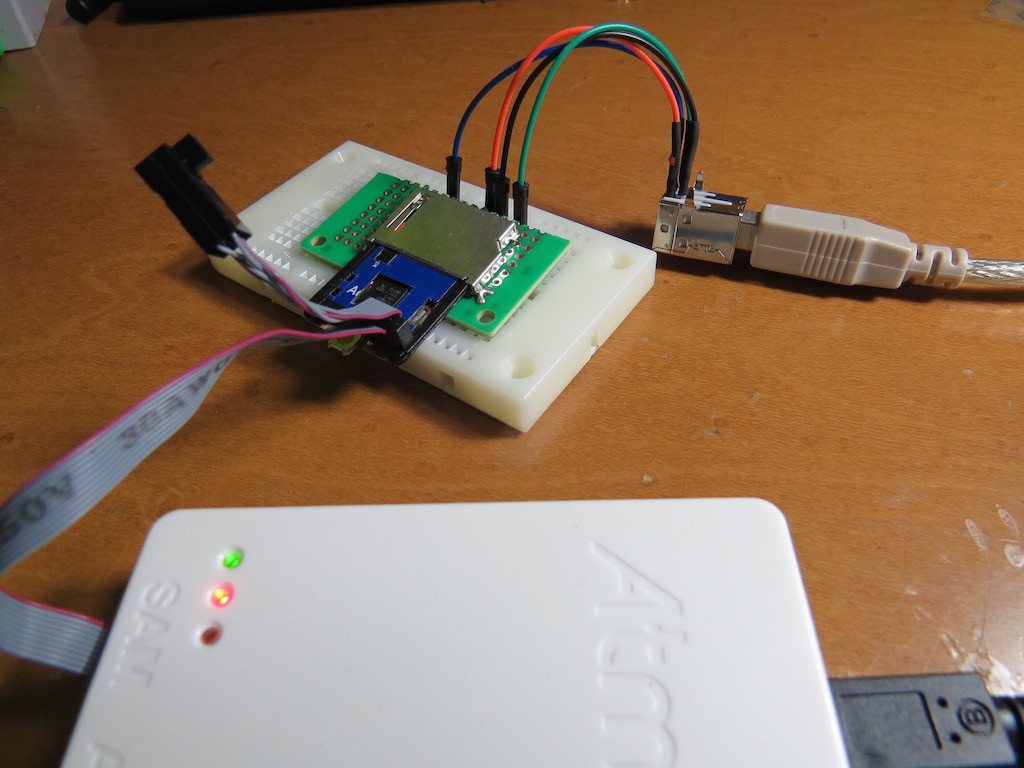
    Writing Arduino Zero boot loader by ATmel ICE

    Here you have!!! No need for FTDI anymore, just USB connection is enough to upload your binary!!!!!

  • Hackaday Prize video for semifinal selection!

    kodera2t08/26/2015 at 07:55 0 comments

    Thank you everyone, and I am so glad my SDuino project is selected as "semifinalist of Hackaday Prize"!!! I made a short summary video of SDuino! Have fun!!

  • Quick measurement on flight

    kodera2t08/16/2015 at 06:38 0 comments

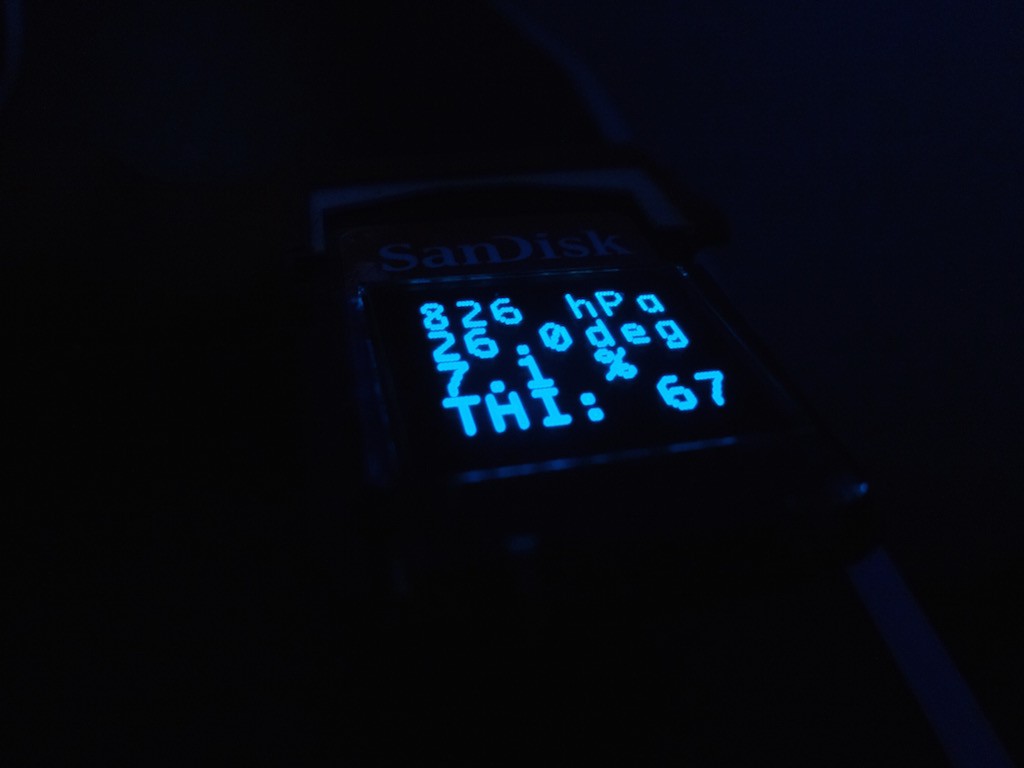
    I had a short visit to New York, and during flight acrossing pacific, I measure its atmosphere. (Fortunately inspection at border did not forbid me to bring it, of course no-harmful so it is natural, but ..) As in the following picture, pressure is very low as I had imagined, but humidity is beyond my imagination. Wow!! just 7.1 % !!!!

  • SDuino Advance: Display embedded SDuino!

    kodera2t07/22/2015 at 12:49 8 comments

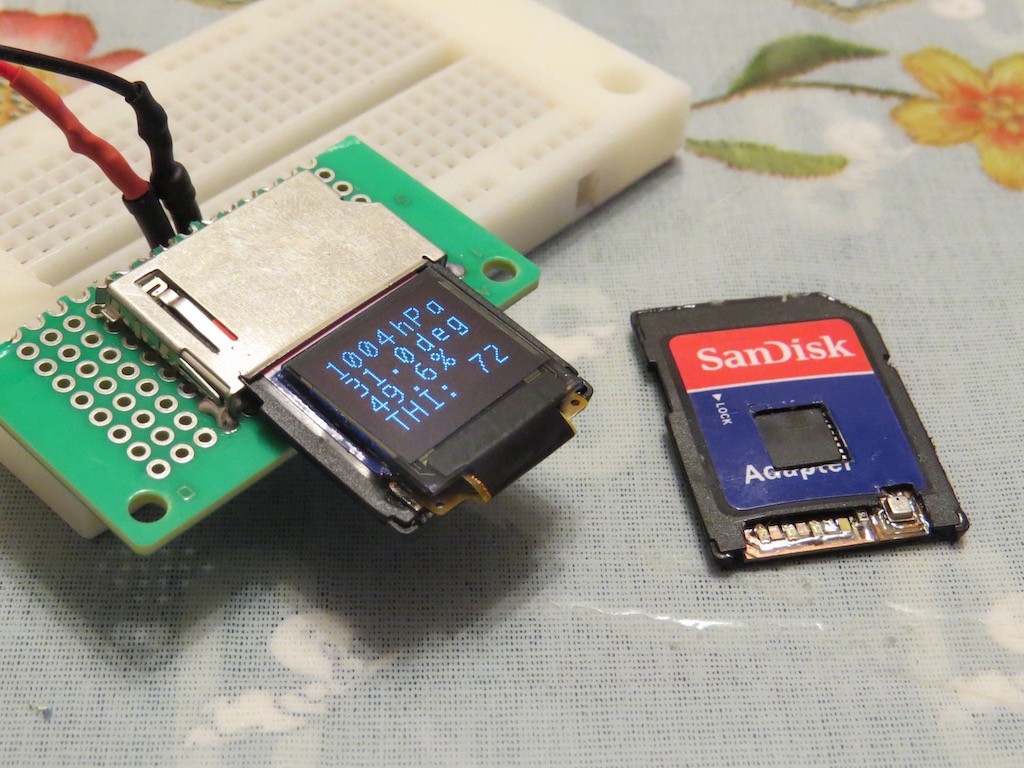
    Finally SDuino has an embedded graphic display.

    I am not professional of this type circuit, but I would like to say this is very close to professional work (Excuse me, real professional, I know you are far beyond.)

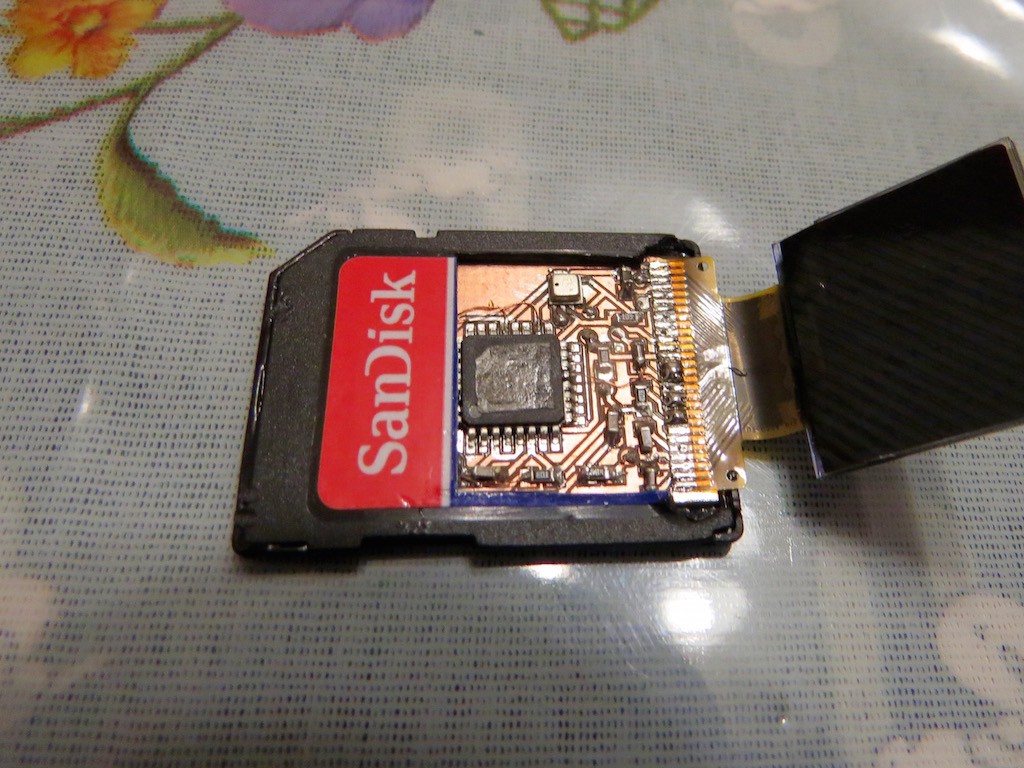
    Previous SDuino case, the computed THI (Temperature, Humidity Index) is presented by simple LEDs, but this time, all the information measured by sophisticated BME280: pressure, temperature, humidity and finally THI in digit is shown in small embedded display!

    Of course, this is still Arduino compatible, and you can upload any sketch working with OLED as you wish! (Not limited to atmosphere measuring, for example this can be ultra-small BASIC computer, and ultra-small Bitlash console, and... as you wish, as you imagine!)

    Actual operation can be found in the following movie. Have fun!

  • More advanced SDuino, temperature, humidity, pressure!

    kodera2t07/18/2015 at 06:53 0 comments

    Now my SDuino gained a bit more advanced sensing using very sophisticated sensor module (BME280) by Bosch. In general, humidity sensor is more space-taking one (as well known as BHT-11 ?) but this sensor is even smaller than general pressure/temperature sensor!

    Small square metal can package is BME280, and very small means hard for hand-soldering. In my case, I just do it soldering iron as usual.

    By measuring humidity, SDuino can evaluate "discomfort index" ( or temperature-humidity index) by following equation

    , where T_d is temperature in deg. H is humidity in percent. Color of blinking LED will change for THI<60: blue (cold), THI<75: green (comfortable), and THI>75 (hot!).

    SDuino operation does not need computer and one it is programmed, just applying 3.3 V will show you current index. This type of index is very useful to avoid heatstroke, the fatal disease in summer season!

    Actual operation can be found in the following movie.. have fun!

  • Now SDuino has OLED display

    kodera2t07/16/2015 at 11:04 0 comments

    The original Sduino had a SPI interface(SCK, MOSI, MISO) and they are useful for boot-loader writing or direct .hex file writing. But it take more wiring than I2C, so I changed its pinout and tried to connect OLED display. Naturally it works!

    Actual operation can be found in the following movie... have fun!

View all 15 project logs

Enjoy this project?

Share

Discussions

bardurel wrote 08/18/2020 at 22:11 point

How to make ssd1306 adaptor in sd-format?

  Are you sure? yes | no

Cliff wrote 09/21/2018 at 07:55 point

You can refer to FPC Lithium-Ceramic Battery

  Are you sure? yes | no

tink wrote 10/05/2016 at 22:17 point

Hi, does the SDuino emulate an SD card toward the host device that it is plugged in to?

I would like to do exactly that. This has been requested at https://www.raspberrypi.org/forums/viewtopic.php?f=44&t=135915 . The very closest to this I've seen implemented anywhere is  http://webpages.uncc.edu/~jmconrad/ECGR6185-2008-01/notes/SD_CARD_DISPLAY_MICROCONTROLLER.pdf / ftp://ftp.circuitcellar.com/pub/Circuit_Cellar/2007/209/Davaine-209.zip .

How do you do this?

Either using the SDuino or using some other device like "Ultra Zero" or Teensy 3.5 . Any pointers would be much appreciated.

  Are you sure? yes | no

Mike Maluk wrote 11/07/2015 at 15:34 point

Very awesome! Great work!

  Are you sure? yes | no

kodera2t wrote 11/07/2015 at 22:35 point

Thank you!

  Are you sure? yes | no

Shawn Kirsch wrote 07/08/2015 at 04:31 point

soo cool

  Are you sure? yes | no

kodera2t wrote 07/10/2015 at 11:48 point

Thank you!!

  Are you sure? yes | no

kodera2t wrote 07/05/2015 at 02:44 point

Hello Jacob. Right, but it requires storage controller (8051?) and flash and also arduino part (328P?). In theory it will work well, but when I make simple SDuino writer, of course it depends on application, I am hesitated to go for complex direction.

  Are you sure? yes | no

kodera2t wrote 07/04/2015 at 11:16 point

I had an ambition to make self-powered (battery inside) SDuino, but smallest with enough current-out battery was 50mAh Lipo, which has more than 2mm thickness... Dammit!

  Are you sure? yes | no

kodera2t wrote 07/04/2015 at 11:14 point
I examine and did some google search, and binary uploading through SD card interface will require storage-alike part on the board if it will be done through storage mode access. (indeed, very natural) But just putting SPI eeprom on board will not be enough because SDuino should talk SD-card command for that, leading to requirement of additional controller. (will also lead to high complexity, I am not sure I will put it on SD card by myself).

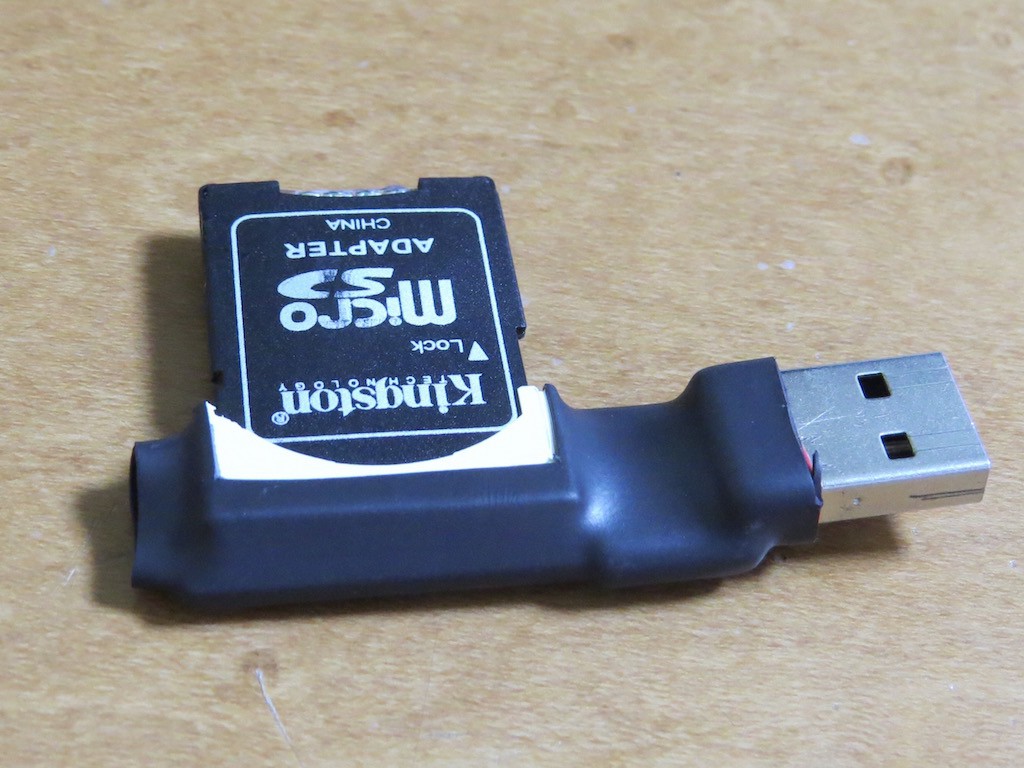
This time I made some another way. I made simple writer small as general SD-card reader. This might be enough because its size is not heavy nor depressing but enough handy. As uploaded, the board has several more room to put another chip (I2C sensing?) and I would like to move on this direction..! Thank you and have fun!

  Are you sure? yes | no

kodera2t wrote 06/30/2015 at 23:35 point
Thank you for all your precious and useful comments! I will try to make Sduino version 2 soon. I guess the main point will be software not hardware....

  Are you sure? yes | no

Bill Rowe wrote 06/30/2015 at 14:07 point

Googling around I see lots of interest in this.  It has apparently been done with a larger, faster AVR so that's a start:

http://www.thinkmind.org/download.php?articleid=icds_2011_4_30_10048

They use the standard MMC interface and try to limit the transfer speed with some success but also with varying results.  MMC is a single SPI bit stream which is good and the card is supposed to be allowed to set the maximum speed but apparently this is sometimes ignored by the host.  The highest speed they figured they could hadle with a 66mhz avr was 1Mhz which seems low.

Good discussion of the approach and issues though.  I wonder if they'd share the code.

  Are you sure? yes | no

K.C. Lee wrote 06/30/2015 at 14:24 point

The paper said the following, and in the conclusion it mentioned that FPGA/CPLD.

>Although  the  SD  card  (or  MMC  card)  can  return  its maximum  allowed  clock  rate  to  the  SD  card  reader  to prevent the reader to read out data too fast, some SD card readers ignore that property and start off with a frequency far too high for the µC to cope with. Other card readers just reset and search for another card.

That's much to be expected as the public spec says:  

>TRAN_SPEED
>Note that for current SD Memory Cards, this field shall be always 0_0110_010b (032h) which is equal to 25 MHz - the mandatory maximum operating frequency of SD Memory Card. 

>In  High-Speed  mode,  this  field  shall  be  always  0_1011_010b  (05Ah)  which  is  equal  to  50  MHz,  and when the timing mode returns to the default by CMD6 or CMD0 command, its value will be 032h.

"Shall be" means "has to be implemented as such" in the context of a requirement specs.

  Are you sure? yes | no

Bill Rowe wrote 06/30/2015 at 15:31 point

Yeah: The hope would be that an old, mmc-only card would work at say 4Mhz which an AVR might be able to keep up with. 

 Looking at the SDIO spec I note that:"This specification defines two types of SDIO cards. The Full-Speed card<snip>A second version of the SDIO card is the Low-Speed SDIO card. This card requires only the SPI and 1-bit SD transfer modes. 4-bit support is optional. In addition, Low-Speed SDIO cards shall support a full clock range of 0-400 KHz.

So that might be applicable

  Are you sure? yes | no

K.C. Lee wrote 06/30/2015 at 16:03 point

The problem isn't so much as the AVR reading the MMC as the AVR is SPI master and it can talk as slowly as it wants.  You only need to find one that work and problem solved.

When a host talk to the AVR as if it *were* a SD card i.e. SPI slave, the AVR has better be able to keep up at 25MHz and use 4-bit transfer mode as everyone else in the industry.

There's a reason why I suggested the man in the middle approach as the MicroSD card is fully compatible with the hosts and you can power cycle and switch it back to SPI mode.

  Are you sure? yes | no

bobricius wrote 06/30/2015 at 10:39 point

This is like my idea, but I want use ino board as standard mass storage= no os driver required. Firmware as bin file on card + extra files as configuration, I have for this purpose designed sniffer https://www.tindie.com/products/bobricius/micro-sd-card-sniffer-adapter-extension/

I want use microsd format, but I have not skill to make this mass storage bootloader.

I think that newest atsamd mcu are ideal for this.

  Are you sure? yes | no

K.C. Lee wrote 06/30/2015 at 13:01 point

SD card are accessed in 4-bit mode when it is hooked up to real products and at 25MHz/50MHz or higher.  SPI mode is optional and is only for backward compatible reasons.  As a media, you don't have much say on the access method.  So unlikely this can be used without specialize OS drivers and hardware.

More interesting concept is a man in the middle approach as you would want some storage, not having to worry about talking to the host, handling small block sizes and implementing a wear levelling algorithm.   i.e. Use muxes to multiplex a Micro SD between the host and your MCU.  Also need to have program control of the power cycling as the SD vs SPI access mode is locked until power cycled.

Only simplified version of the specs are available to the public, but there are some additional info if you google hard enough.  https://www.sdcard.org/downloads/pls/simplified_specs/

  Are you sure? yes | no

Bill Rowe wrote 06/30/2015 at 14:41 point

That's excellent.  Have you done any traces?  It would be interesting to try this with an older SD/MMC card like 512K or so and see if it can stay in MMC mode.  

  Are you sure? yes | no

Bill Rowe wrote 06/29/2015 at 15:02 point

As Jacob says above,  you maybe don't need a special driver on the host.  The SDuino just need to act like an SD card and allow a small file to be written.  I have written code to access small memory cards in MMC mode and the hardest part of that was navigating the FAT file system.  It would be interesting to hook up a logic analyzer to a small SD card and see what the PC access looks like.

  Are you sure? yes | no

dilo wrote 06/29/2015 at 14:17 point

Very good idea. that can open to eventual innovation.

Can you share you schematics. I know it  not a big deal but just to make sure.

Thank you.

  Are you sure? yes | no

all objects wrote 06/29/2015 at 06:39 point

@Bill Rowe, punching into the same hole with this addtion: The SD card has a lock switch, which could be used to distinguish between both program and runtime mode. Unlocked SDUino works like / emilates a SD card and writing a file (named sketch...) to the card is like uploading a sketch. Locked would be runtime and the connections behave as already achieved.

Nevertheless, a very cool thing! 

  Are you sure? yes | no

Bill Rowe wrote 06/28/2015 at 21:14 point

Could you have designed it so it would go into an SD card slot on a PC for programming?

  Are you sure? yes | no

kodera2t wrote 06/28/2015 at 22:42 point
Hello Bill, yes it will be ultra nice if this card could be programmed through SD card interface. Indeed SD card interface has a definition of "iSDIO" which is different from general storage access, and I imagine and guess if appropriate driver is developed, direct programming (without USB-TTL) will be implemented. But this implementation is completely out of my capability. I would try "call for driver developer" in lackaday.io. Thank you for your interest!

  Are you sure? yes | no

Jacob Christ wrote 06/29/2015 at 12:31 point

This is actually quite easy to do.  The PC will take care of all the hard work, all the device has to do is look like a raw piece of memory to the PC (then get out of the way).  The PC can create the file system and write data anywhere.  Then when not connected to the PC the device just needs to be able to read FAT or whatever desired file system was installed.

  Are you sure? yes | no

Bill Rowe wrote 06/29/2015 at 15:01 point

Jacob: interesting point.  I had imagined acting like a pre-formatted card. There might be a problem with letting windows format it because any standard file system would have more than 32K of overhead which would fill your flash.  

  Are you sure? yes | no

bobricius wrote 06/30/2015 at 10:33 point

with atsamd21 used in arduino zero you can have 256kb flash, it can be enough

  Are you sure? yes | no

Jacob Christ wrote 07/04/2015 at 17:15 point

You don't have to let the OS format it, it just can.  If the card is preformatted the OS will read the FAT info.

  Are you sure? yes | no

Similar Projects

Does this project spark your interest?

Become a member to follow this project and never miss any updates